How to find and use the accessibility features in Microsoft Windows 10
Accessibility Settings
Finding the Ease of Access menu
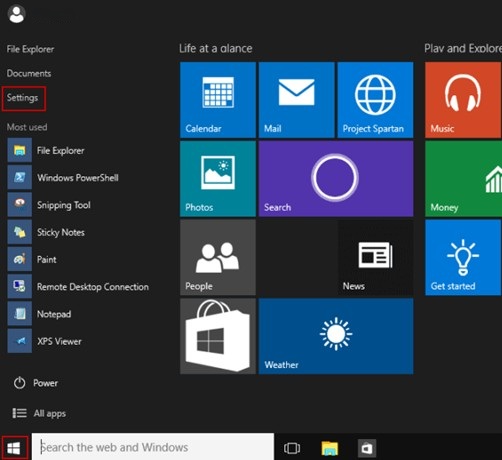
To activate and deactivate most accessibility features, the very best place to start is the Settings menu. To access the settings menu:
- Using your mouse, click the Start Menu icon at the bottom left corner of your screen. It features the Windows logo.
- Click on the Settings icon.
- The Settings Application will open.
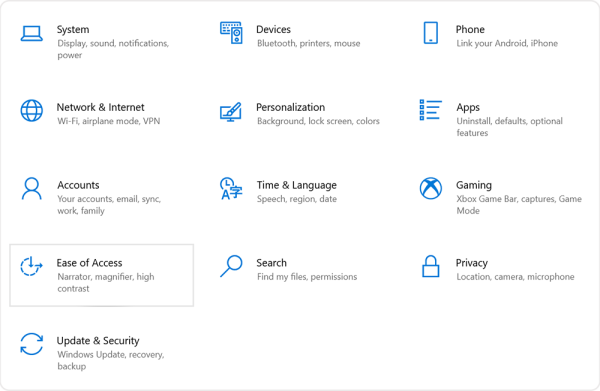
The Ease of Access setting is where you will find most assistive technology features on your Windows device. You will see it as an option among the other settings.
Vision-Related
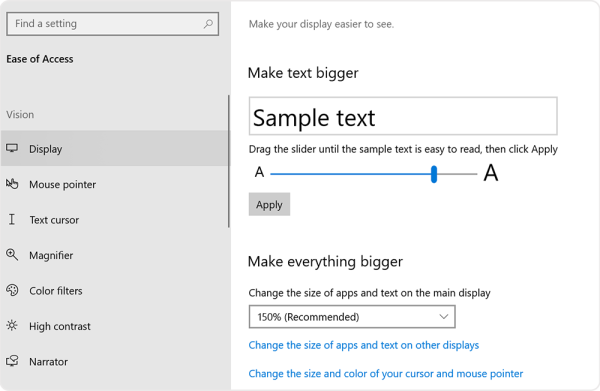
1. Text, Size, Colours, Contrast and Brightness
1.1. Enlarge Text
- Open Ease of Access setting.
- Search for the ‘Display’ section, under the ‘Vision’ category, on the left-hand side of the screen.
- Use the slider to enlarge the text.
- Alternatively, you can use the tab button on your keyboard to find the slider and use the left and right arrow keys to enlarge the text.
- Click ‘Apply’.
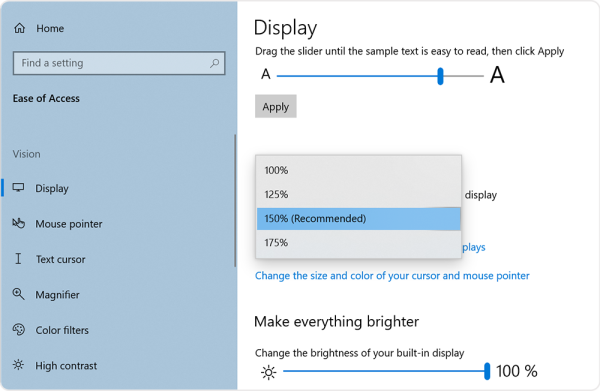
1.2. Enlarge the Size of Apps and Text on the Display
- Open Ease of Access setting.
- Search for the ‘Display’ setting, under the ‘Vision’ category, on the left-hand side of the screen.
- Open the drop-down menu.
- Alternatively, you can use the tab button on your keyboard to find the drop-down menu, press enter, and use the up and down arrow keys.
- Select the preferred option.
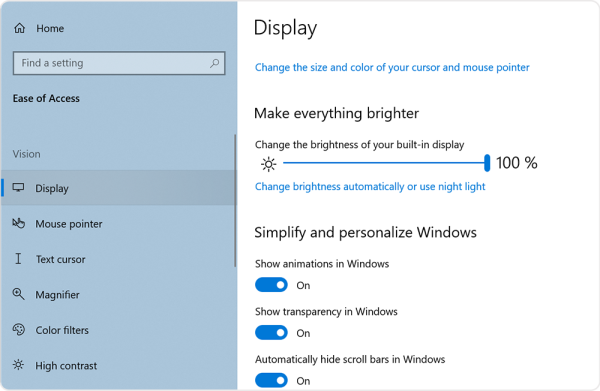
1.3. Change Brightness
- Open Ease of Access setting.
- Search for the ‘Display’ setting, under the ‘Vision’ category, on the left-hand side of the screen.
- Use the slider to increase or decrease brightness.
- Alternatively, you can use the tab button on your keyboard to find the slider and use the left and right arrow keys to change the screen brightness.
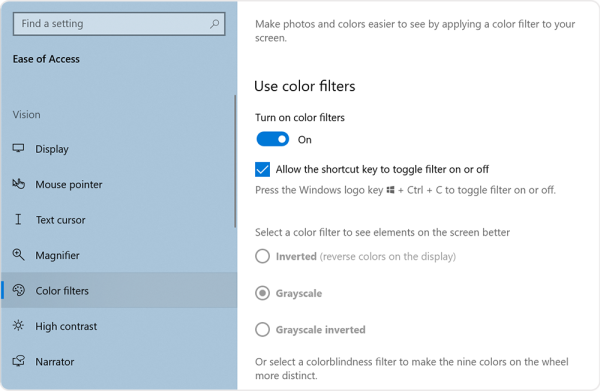
1.4. Change Colour Filters
- Open Ease of Access setting.
- Search for the ‘Colour Filters’ setting, under the ‘Vision’ category, on the left-hand side of the screen.
- Toggle the switch to on.
- For convenience, check the box beneath the switch to allow the shortcut key to toggle the filter on or off.
- Select preferred colour filters, such as greyscale, inverted or colour-blindness filter.
- To switch off, toggle switch back to off.
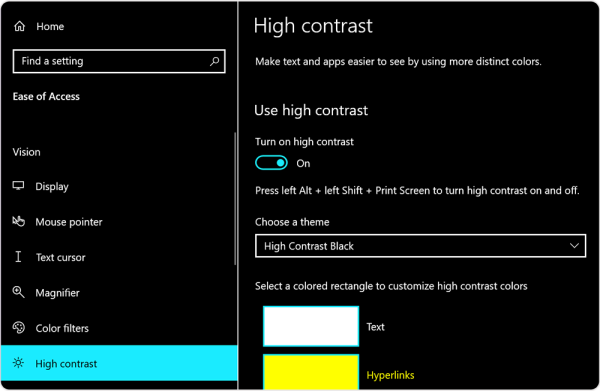
1.5. Increase Colour Contrast
- Open Ease of Access setting.
- Search for the ‘High Contrast’ setting, under the ‘Vision’ category, on the left-hand side of the screen.
- Toggle the off button to on.
- Alternatively, press: left Alt, left shift then print screen.
- Choose a preferred theme and/or customise the current theme.
- Press Apply.
- To switch off, toggle switch back to off.
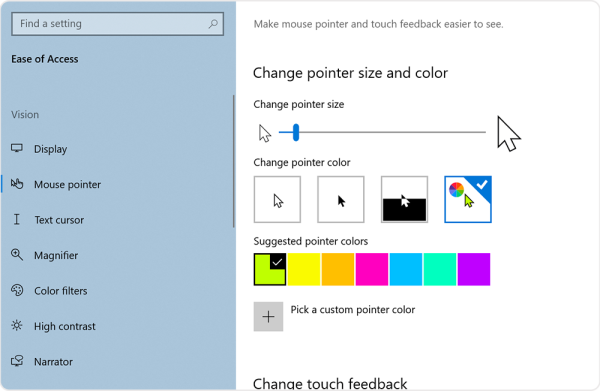
2. Mouse Visibility Options
Make your mouse pointer and touch feedback easier to see.
2.1. Change Mouse Pointer Size
- Open Ease of Access setting.
- Search for the ‘Mouse Pointer’ setting, under the ‘Vision’ category, on the left-hand side of the screen.
- Use the slider to enlarge the mouse pointer.
- Alternatively, you can use the tab button on your keyboard to find the slider and use the left and right arrow keys to enlarge the pointer.
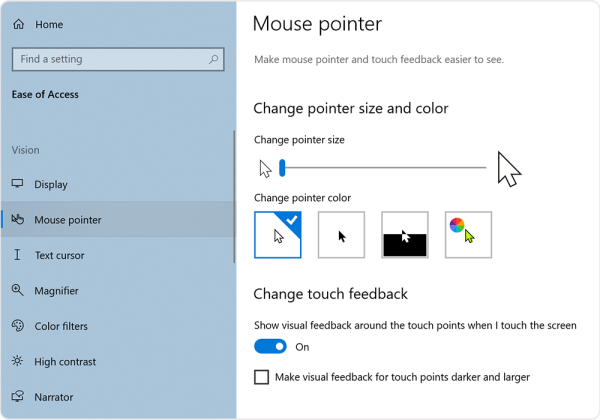
2.2. Change Mouse Pointer Colour
- Open Ease of Access setting.
- Search for the ‘Mouse Pointer’ setting, under the ‘Vision’ category, on the left-hand side of the screen.
- Select the preferred colour from the options, under ‘Change pointer colour’.
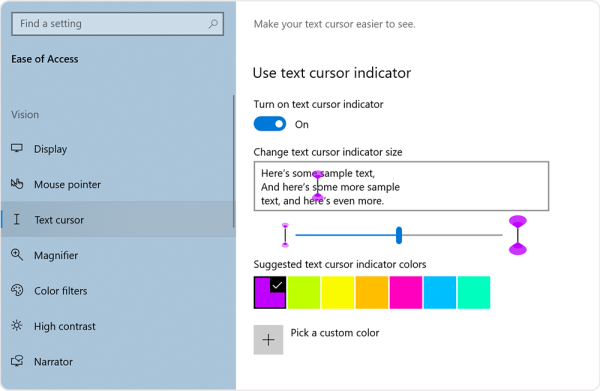
3. Enable/Disable Text Cursor
Make your text cursor easier to see.
- Open Ease of Access setting.
- Search for the ‘Text Cursor’ setting, under the ‘Vision’ category, on the left-hand side of the screen.
- Toggle the switch to on.
- Select preferred cursor indicator size, colour and thickness.
- To switch off the text cursor indicator, toggle it back to off.
4. Narrator
Narrator is a screen-reading application that describes what is on your screen, allowing you greater control as you navigate your device. It can be controlled by mouse, keyboard, and touch.
4.1. Enable/Disable Narrator
- Press the Windows key–Ctrl-Enter.
Alternatively, you can enable the feature through the system’s settings:
- Open Ease of Access setting.
- Search for the ‘Narrator’ setting on the left navigation panel, under the ‘Vision’ category.
- Toggle off switch to on. Alternatively, you can use your Tab key to select the button and press Enter on your keyboard.
- To disable, toggle switch back to off.
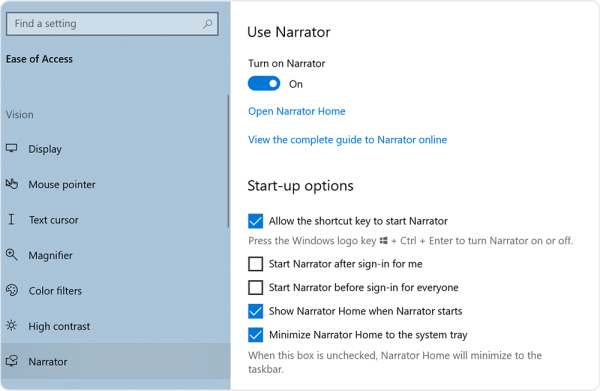
Note: Allowing the shortcut key to start Narrator is a setting that can be automatically set when you initially begin using your device. If it is not set, then you will have to manually set it by selecting the first box under Start-up Options titled ‘Allow the shortcut key to start Narrator’.
You can personalise how you would prefer the Narrator to function in the Narrator settings. For example, you can choose when you would like Narrator to start. If you’d like it to start after you sign into your computer, select the second box beneath Start-up Options titled ‘Start Narrator before sign-in for me’.
4.2. Narrator touch gestures
To explore and hear items on a screen, drag one finger around the screen. When you hear an item that you want to use, double-tap the screen with one finger to activate it. To move through items on the screen, flick left and right with one finger.
You can find more shortcuts that can help you use Narrator under the guide’s Keyboard Shortcut Reference List.
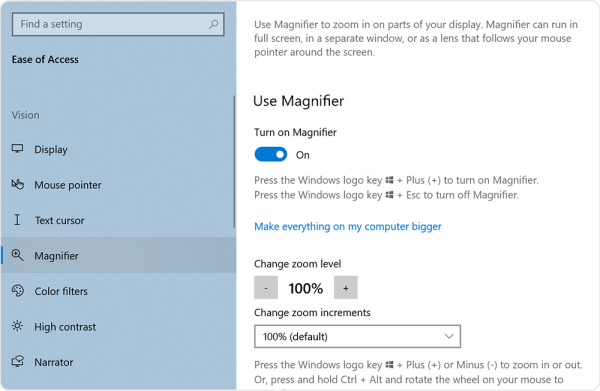
5. Magnifier
Magnifier is a feature that zooms in on parts of your computer display. Magnifier can be viewed in full screen, in a separate window or as a lens that follows your mouse pointer around your screen.
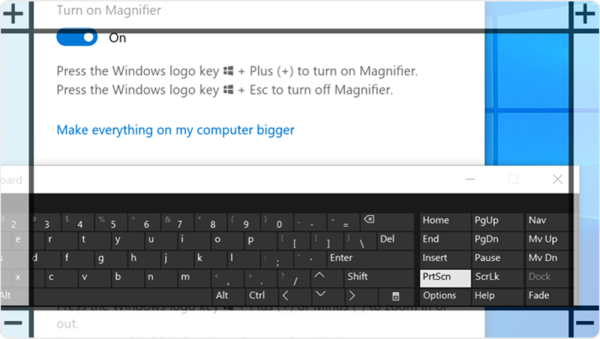
5.1. Enable/Disable Magnifier
You can enable and disable the Magnifier using the keyboard:
- Press the Windows logo key + Plus Sign key (+) to turn it on.
- Press the Windows logo key + Esc key to turn it off.
Alternatively, you can enable the feature through the system’s settings:
- Open Ease of Access setting.
- Search for the Magnifier setting on the left navigation panel, under the ‘Vision’ category.
- Toggle off switch to on. Alternatively, you can use your Tab key to select the button and press Enter on your keyboard.
- To disable the feature, toggle the switch back to off.
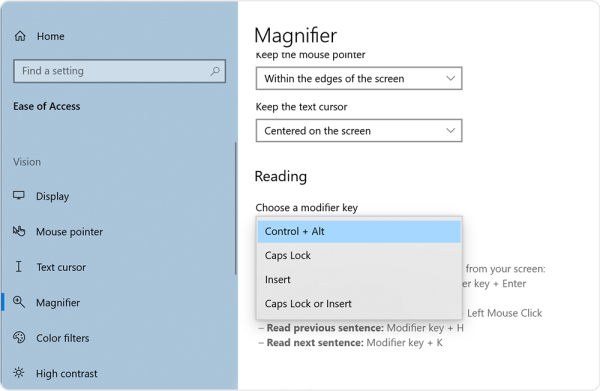
5.2. Activate Reading
Reading enables Magnifier to read from your screen.
- Activate reading by pressing a Modifier key and Enter. The default modifier key is Ctrl and Alt. However, the key can be changed to the Caps Lock and/or Insert key in the Magnifier settings.
Once a modifier key has been chosen, you can use the following commands to have Magnifier read from your screen:- Start, pause and resume reading: Modifier Key + Enter
- Stop reading: Any key
- Reading from mouse pointer: Modifier key + Left Mouse Click
- Read previous sentence: Modifier key + H
- Read Next Sentence: Modifier key + K
- To deactivate Reading, press any key.
You can personalise Magnifier to suit your needs in the Magnifier settings. Shortcuts can be found in the Keyboard Shortcuts Reference Sheet.
When starting Magnifier, it is also important to decide when you would like Magnifier to start. For example, you can choose the option to have Magnifier automatically start after the user signs into their device.
You can personalise how you would prefer the Magnifier to function in the Magnifier settings.
5.3. Magnifier touch gestures
Use the following gestures to work with Magnifier on a Windows touchscreen device:
- Zoom in: Press the Plus (+) button on either the top left or top right of the screen
- Zoom out: If already zoomed in, press the Minus (-) button on either the bottom left or the bottom right of the screen
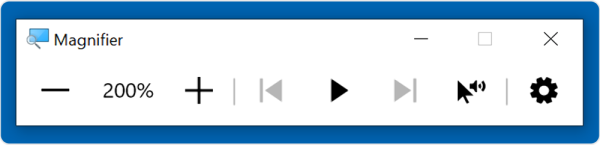
You can also use the floating bar to control the magnifier:
- Minus: Zooms out
- Plus: Zooms in
- Back: Reads previous sentence
- Play/Pause: Reads out text
- Forward: Reads the next sentence
- Pointer: Reads from where the mouse pointer is clicked
- Settings: Change the speed of the narrator and voice
Hearing-Related
1. Mono and Stereo Options
1.1. Increase, Decrease and Mute Device Volume: Three Methods
First Method
Search for the increase, decrease and mute volume buttons on the keyboard, which are generally located on the top row of the keyboard. The button features a little speaker.

Second Method
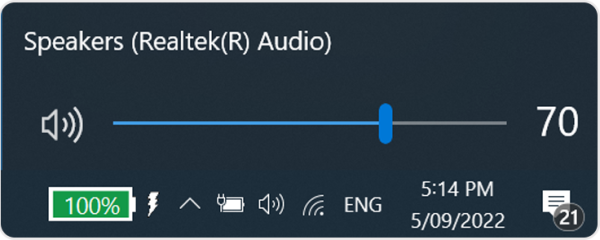
Go to the System Tray of the computer’s taskbar at the bottom right corner of the computer screen, which contains the clock, battery life, Wi-Fi connection and volume. Click the speaker icon and adjust the volume.
Third Method
Open Ease of Access, then search for the ‘Audio’ settings on the left navigation panel, under the ‘Hearing’ category. Adjust the volume with the slider.
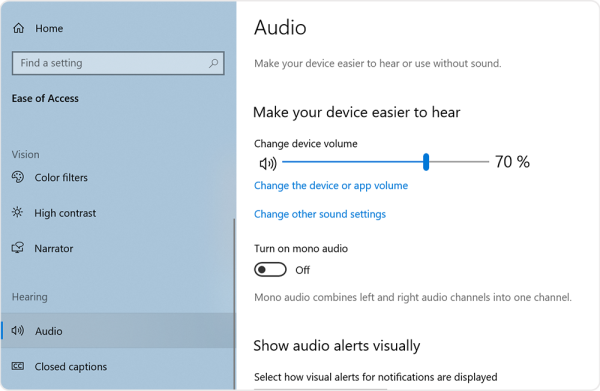
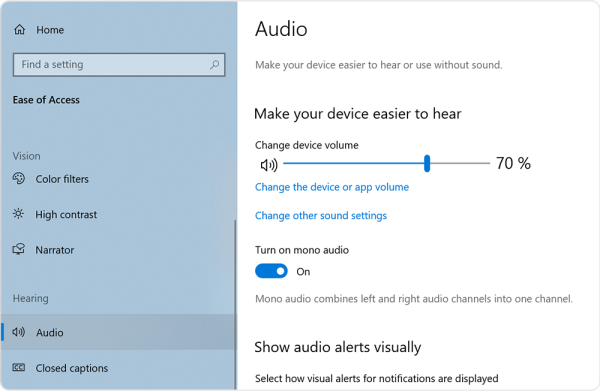
1.2. Turn on Mono Audio
Mono Audio combines the left and right audio channels into one channel.
- Open Ease of Access setting.
- Search for the ‘Audio’ settings on the left navigation panel, under the ‘Hearing’ category.
- Toggle the switch to on.
- To switch off mono audio, toggle back to off.
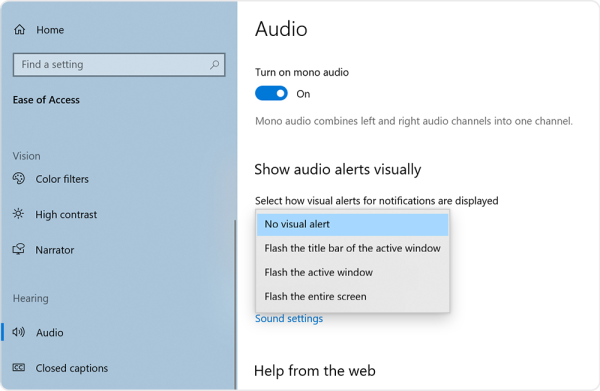
2. Enabled Visual Notifications
Select how visual alerts for notifications are displayed.
- Open Ease of Access setting.
- Search for the ‘Audio’ settings on the left navigation panel, under the ‘Hearing’ category.
- Under the header ‘Show audio alerts visually’, open the dropbox menu.
- Select the preferred option.
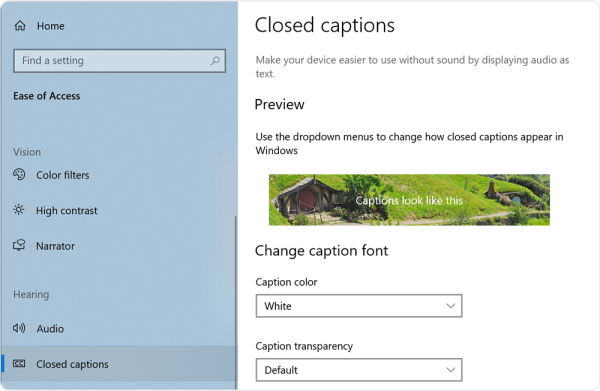
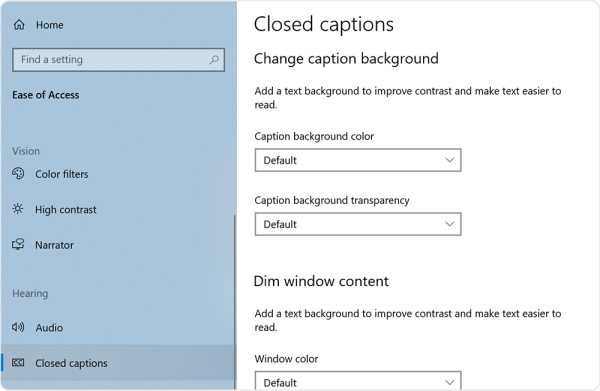
3. Closed Captions
Make your device easier to use without sound by displaying audio as text.
3.1. Personalise Closed Captions Settings
- Open Ease of Access setting.
- Search for the ‘Closed Captions’ setting on the left navigation panel, under the ‘Hearing’ category, on the left-hand side of the screen.
- Use the drop-down menu to change how closed captions appear in Windows.
- Add a text background to improve contrast and make the text easier to read.
General and Mobility-Related
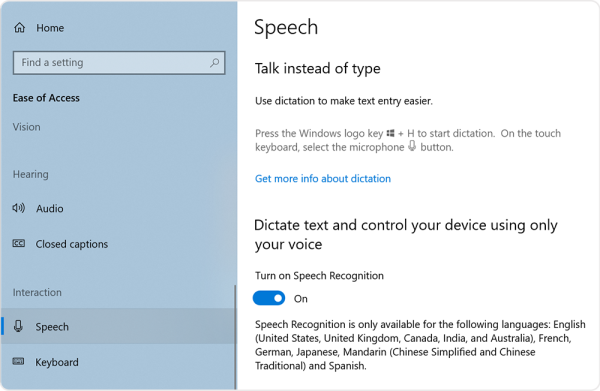
1. Speech
Convert spoken words into text on your device.
1.1 Enable/Disable Dictation
- Press the Windows logo key and H
(On touch keyboards, press the microphone button).
1.2 Enable/Disable Speech Recognition
Dictate text and control your device with only your voice.
- Press the Windows logo key-Ctrl-S
Alternatively, you can enable the feature through the system’s settings:
- Open Ease of Access setting.
- Search for the ‘Speech’ setting on the left navigation panel, under the ‘Interaction’ category.
- Under ‘Turn on Speech Recognition’, toggle switch from off to on.
- To disable, toggle switch back to off.
2. Keyboard
Make it easier to type and use keyboard shortcuts.
2.1. Enable/Disable On-Screen Keyboard
Display a virtual keyboard on the screen to enter input without using a physical keyboard.
- Press the Windows logo key-Ctrl-O
Alternatively, you can enable the feature through the system’s settings:
- Open Ease of Access setting.
- Search for the ‘Keyboard’ setting on the left navigation panel, under the ‘Interaction’ category.
- Under ‘Use the On-Screen Keyboard’, toggle the switch from off to on.
- To disable, toggle switch back to off.
2.2. Enable/Disable Sticky Keys
Sticky Keys allow modifier keys (like Ctrl and Shift) to remain active even after when you are no longer pressing them. This helps users who have trouble pressing two keys at the same time.
- Press the Shift key five times.
Alternatively, you can enable the feature through the system’s settings:
- Open Ease of Access setting.
- Search for the ‘Keyboard’ setting on the left navigation panel, under the ‘Interaction’ category.
- Under ‘Use Sticky Keys’, toggle the switch from off to on.
- To disable, toggle switch back to off.
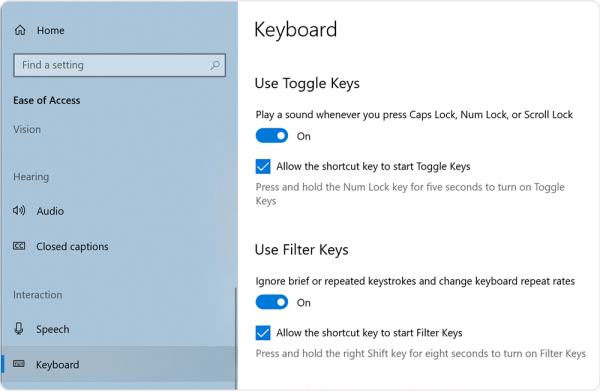
2.3. Enable/Disable Toggle Keys
Toggle Keys provide sound cues when the locking keys, such as Caps Lock, Num Lock or Scroll Lock, are pressed.
- Press and hold the Num Lock key for five seconds.
Alternatively, you can enable the feature through the system’s settings:
- Open Ease of Access setting.
- Search for the ‘Keyboard’ setting on the left navigation panel, under the ‘Interaction’ category.
- Under ‘Use Toggle Keys’, toggle switch from off to on.
- To disable, toggle switch back to off.
2.4. Enable/Disable Filter Keys
Filter Keys inform the device to ignore brief or repeated keypresses and allow the user to set the time a key is pressed before it repeats.
- Press and hold the right Shift key for eight seconds.
Alternatively, you can enable the feature through the system’s settings:
- Open Ease of Access setting.
- Search for the ‘Keyboard’ setting on the left navigation panel, under the ‘Interaction’ category.
- Under ‘Use Filter Keys’, toggle the switch from off to on.
- To disable, toggle switch back to off.
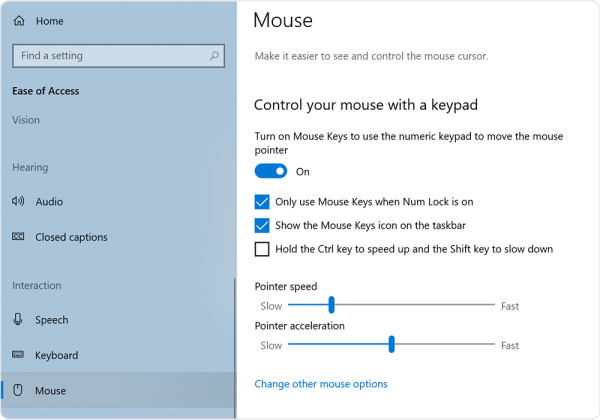
3. Mouse
Make it easier to see and control the mouse cursor.
3.1. Enable/Disable Mouse Keys
Control the mouse pointer using the numeric keypad.
- Press the Left Alt–Left Shift–Enter.
Alternatively, you can enable the feature through the system settings:
- Open Ease of Access setting.
- Search for the ‘Mouse’ setting on the left navigation panel, under the ‘Interaction’ category.
- Toggle switch from off to on.
- To disable, toggle switch back to off.
Keyboard Shortcuts
1. Visual-Related Keyboard Shortcuts
Toggle colour filter on or off: Windows logo key–Ctrl–C
Narrator
Note: The default Narrator key is the Caps Lock key. This can be changed in the Narrator settings, under ‘Select Narrator key’.
- Enable/Disable Narrator: Windows key–Ctrl–Enter
- Activate scan mode: Caps lock–spacebar (press up and down arrows to read page)
- Increase voice speed: Narrator–Plus sign (+)
- Slow voice speed: Narrator–Minus Sign (-)
- Increase voice volume: Narrator–Ctrl–Plus Sign (+)
- Decrease voice volume: Narrator–Ctrl–Minus Sign (-)
- Change how Capitalised text is read: Narrator–4
- Change how much detail Narrator provides about text and controls: Narrator–V
- Get the webpage source of a link: Narrator–Ctrl–D
- Get a webpage summary: Narrator–S
- Get the webpage summary and popular links dialog box: Narrator–S twice quickly
- Turn on or off Outlook column header reading: Narrator–H
- Give feedback on Narrator: Narrator–Alt–F
Narrator touch screen gestures
- Read what’s under your finger: Touch or drag a single finger
- Activate primary action: Double-tap or hold with one finger and then tap anywhere on the screen with a second finger
- Activate secondary action: Triple-tap or hold with one finger and then double-tap anywhere on the screen with a second finger
- Start dragging or extra key options: Hold one finger and tap once with a second and third finger
- Move to next or previous item: Flick left or right with one finger
- Change view: Flick up or down with one finger
- Stop narrator from reading: Tap once with two fingers
- Change verbosity mode: Tap once with three fingers
- Show narrator commands for the current item: Tap once with four fingers
- Show context menu: Double-tap with two fingers
- Read text attributes: Double-tap with three fingers
- Open search mode: Double-tap with four fingers
- Show all narrator commands: Tap three times with four fingers
- Scroll: Swipe in any direction with two fingers
- Tab forward or backwards: Swipe left or right with three fingers
- Read current window: Swipe up with three fingers
- Start reading on explorable text: Swipe down with three fingers
- Turn semantic zoom on or off where supported: Swipe up or down with four fingers
- Move narrator cursor to beginning or end of unit: Swipe left or right with four fingers
Magnifier
- Enable/Disable Magnifier: Windows logo key and Plus sign (+)
- Turn off Magnifier: Windows logo key and Esc
- Zoom In: Windows key and Plus Sign (+)
- Zoom Out: Windows key and Minus Sign (-)
- Zoom In and Out: Press and hold Ctrl and Alt then roll the wheel on your mouse.
- Invert Colours: Ctrl–Alt–I
Change Magnifier View
- Lens: Ctrl–Alt–L
- Full Screen: Ctrl–Alt–F
- Docked: Ctrl–Alt–D
- Cycle through the views: Ctrl–Alt–M
Reading
Note: The default Modifier key is Ctrl and Alt. This can be changed in the Magnifier settings, under ‘Choose a Modifier key’.
- Start, pause, and resume reading: Modifier key and Enter
- Stop Reading: Any Key
- Read from Mouse Pointer: Modifier key and Left Mouse Click
- Read previous sentence: Modifier key and H
- Read next sentence: Modifier key and K
2. Mobility-Related Shortcuts
- Enable Dictation: Windows logo key and H
- Enable/Disable Speech Recognition: Windows logo key–Ctrl–S
- Enable/Disable On-Screen Keyboard: Windows logo key–Ctrl–O
- Enable/Disable Sticky Keys: Press Shift key five times.
- Enable/Disable Toggle Keys: Press Num Lock key for five seconds.
- Enable/Disable Filter Keys: Press and hold the right Shift key for eight seconds.
Additional Resources
Additional information on the assistive technology products and services Microsoft offers on Windows 10 be found in the following link: