How to find and use the accessibility features in Microsoft Windows 11
Accessibility Settings
Getting to the Settings Menu
To activate and deactivate most accessibility features, the very best place to start is the Settings menu. There are two ways to access the Settings menu:
The first way is through the start menu.

- Using your mouse, click the Start Menu icon in your taskbar. It features the Windows logo.
- Click on the Settings icon.
- The Settings Application will open.
- The second way to open the settings menu is through the run dialog box. This involves mostly using your keyboard.
- Press the Windows button and the R key. The Windows key is typically at the bottom left corner of your keyboard. It features the Windows logo.
- Type in the command: ms-settings:
Note: Please remember the colon at the end!
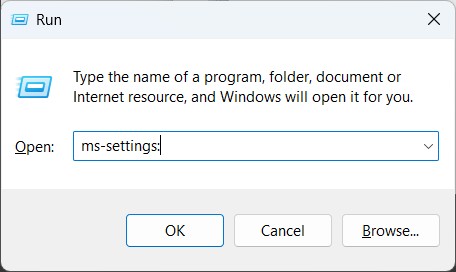
- Press Enter key on your keyboard.
- The Settings application will open.
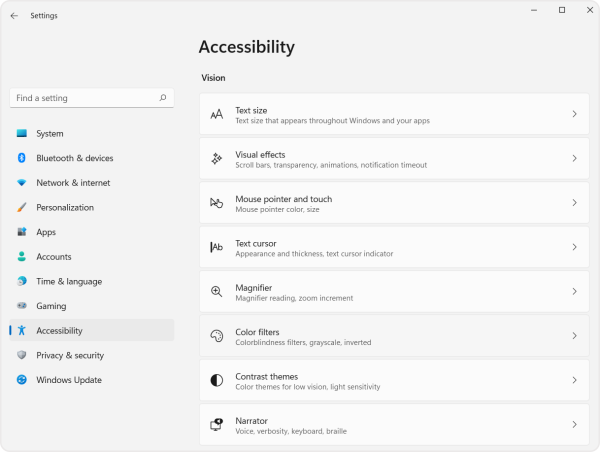
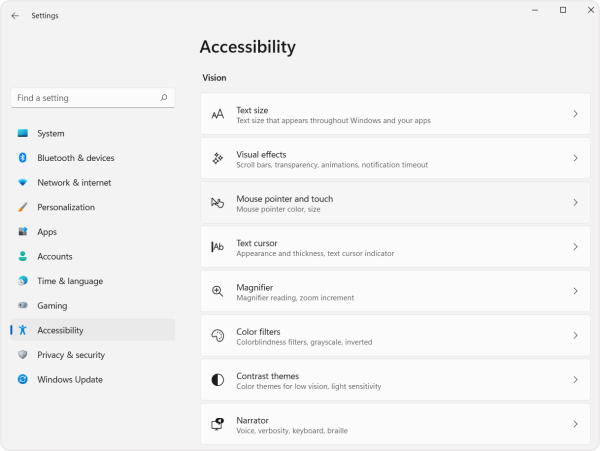
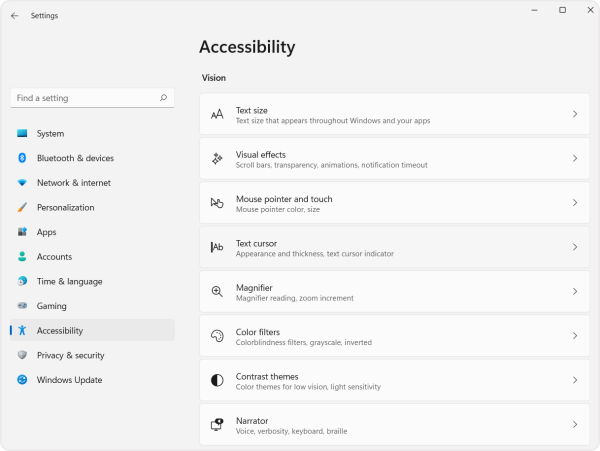
Finding Accessibility Settings
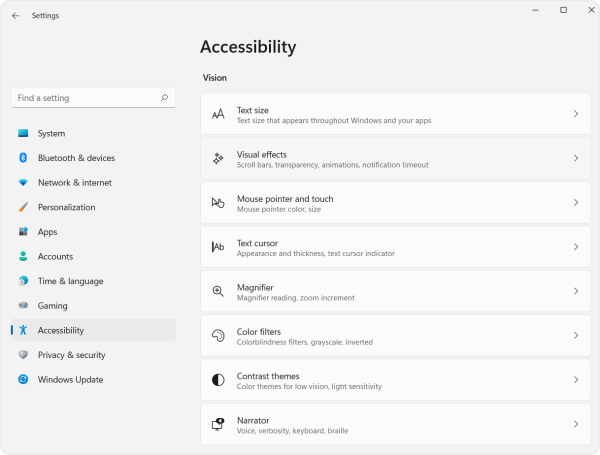
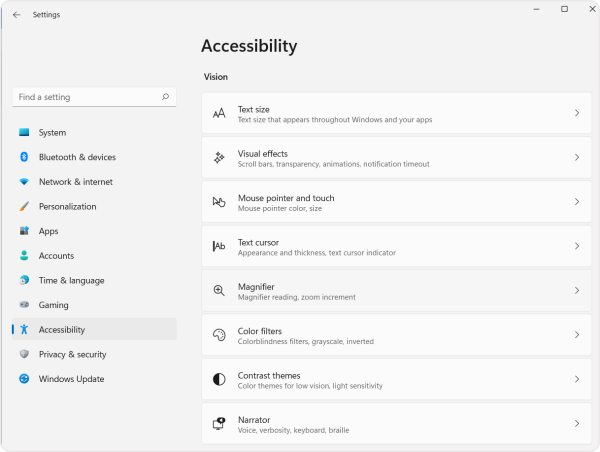
The accessibility menu is where you will find most assistive technology features on your Windows device. 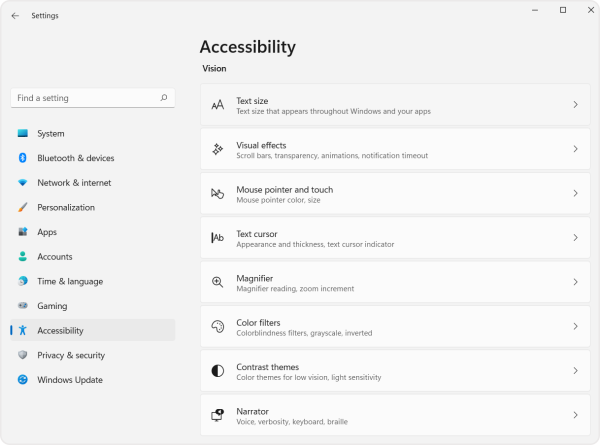
Vision-Related
1. Text, Size, Colours, Contrast and Brightness
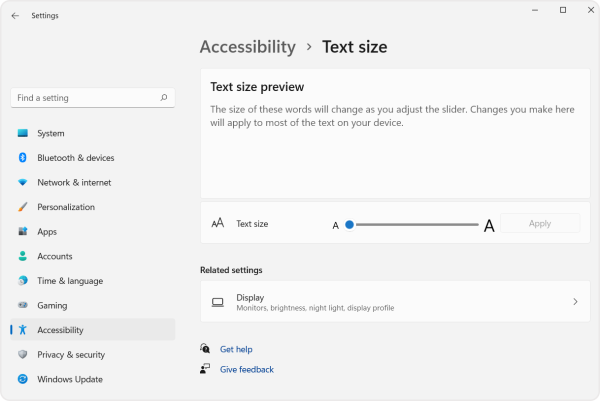
1.1.Enlarge Text
- Open the accessibility menu.
- Select ‘Text size’ under the ‘Vision’ category, on the right-hand side of the window.
- Use the slider to enlarge the text.
- Alternatively, you can use the tab button on your keyboard to find the slider and use the left and right arrow keys to enlarge the text.
- Click ‘Apply’.
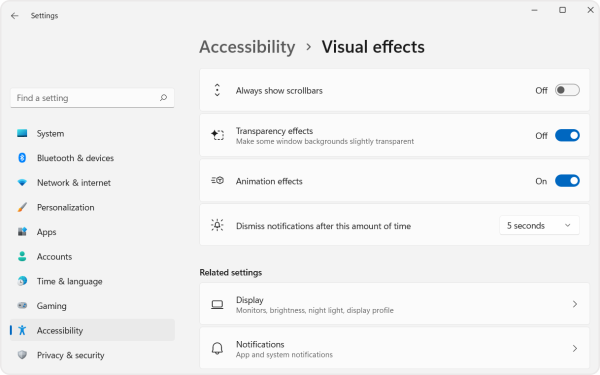
1.2. Configure Visual Effects
- Open the accessibility menu.
- Find the ‘Visual effects’ menu, under the ‘Vision’ category, on the right-hand side of the window.
- Transparency and animation may be disabled on this page. Scrollbars may also be set to always visible and the notification dismissal time may be changed.
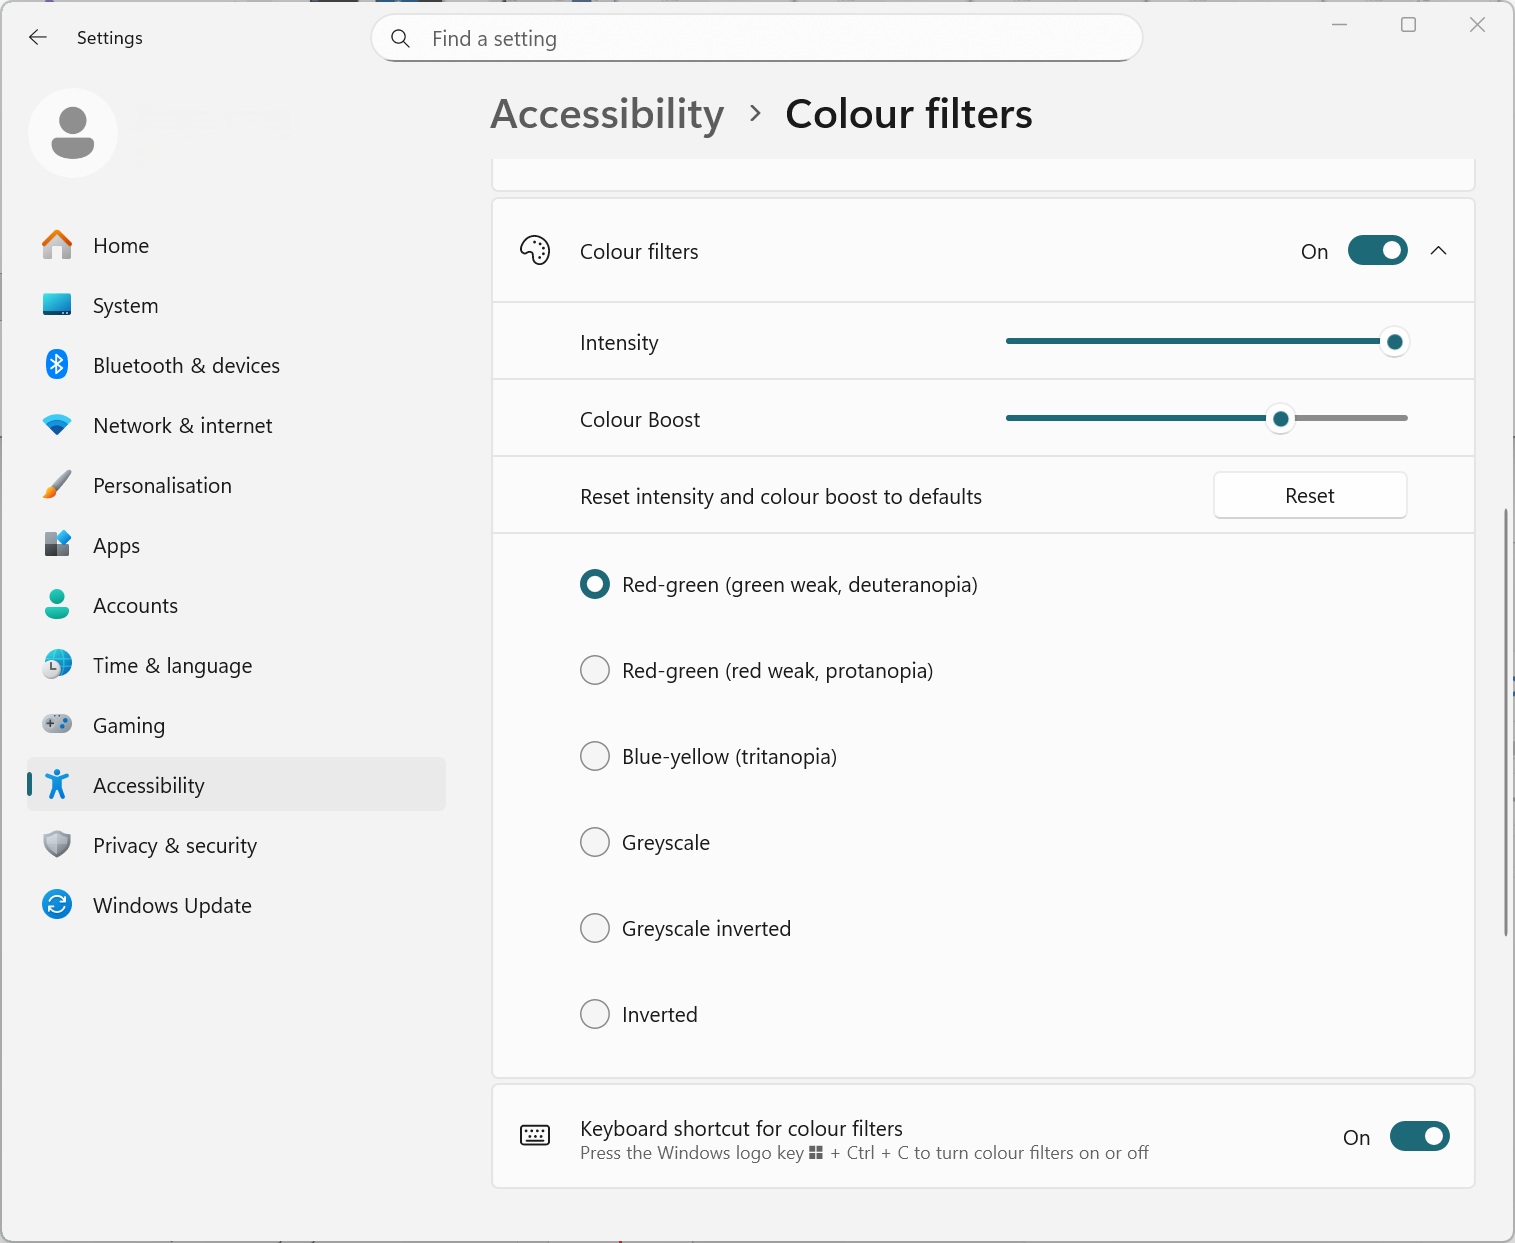
1.3. Change Colour Filters
- Open the accessibility menu.
- Find the ‘Colour filters’ menu, under the ‘Vision’ category, on the right-hand side of the window.
- Toggle the ‘Colour filters’ switch to on.
- Select the drop-down menu next to the toggle to select a filter
- For convenience, toggle the ‘Keyboard shortcut for colour filters’ switch to on to allow the shortcut key to turn the filter on or off.
- To disable the feature, toggle the ‘Colour filters’ switch back to off.
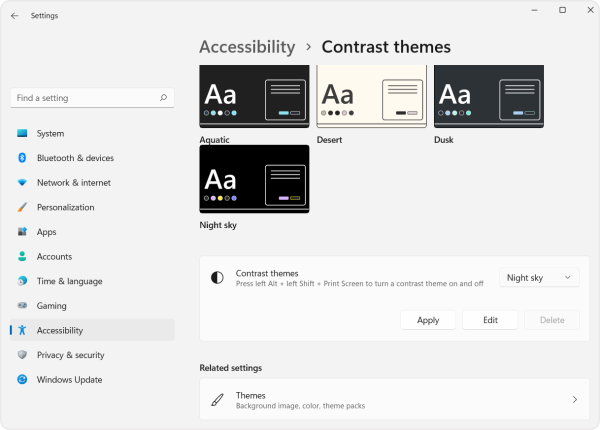
1.4. Increase Colour Contrast
- Open the accessibility menu.
- Find the ‘Contrast themes’ menu on the right-hand side of the window.
- Select a contrast theme from the drop-down menu and select apply.
- The theme may be edited by selecting the ‘Edit’ button.
- To switch off, select ‘None’ from the contrast themes drop-down menu.
2. Mouse Visibility Options
Make your mouse pointer and touch feedback easier to see.
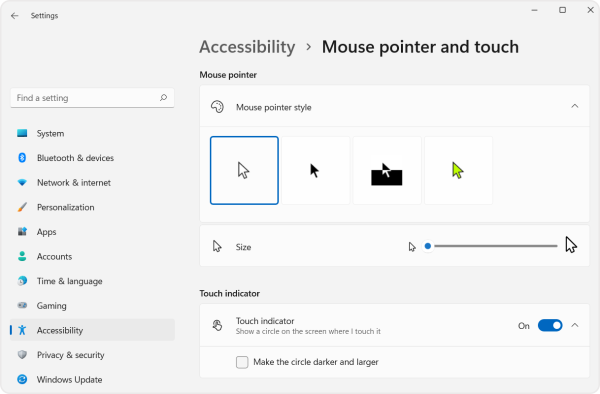
2.1. Change Mouse Pointer Size
- Open the accessibility menu.
- Find the ‘Mouse pointer and touch’ menu, under the ‘Vision’ category, on the right-hand side of the window.
- Use the slider to enlarge the mouse pointer.
- Alternatively, you can use the tab button on your keyboard to find the slider and use the left and right arrow keys to enlarge the pointer.
2.2. Change Mouse Pointer Colour
- Open the accessibility menu.
- Find the ‘Mouse pointer and touch’ menu on the right-hand side of the window.
- Select the preferred colour from the options, under ‘Mouse pointer style’.
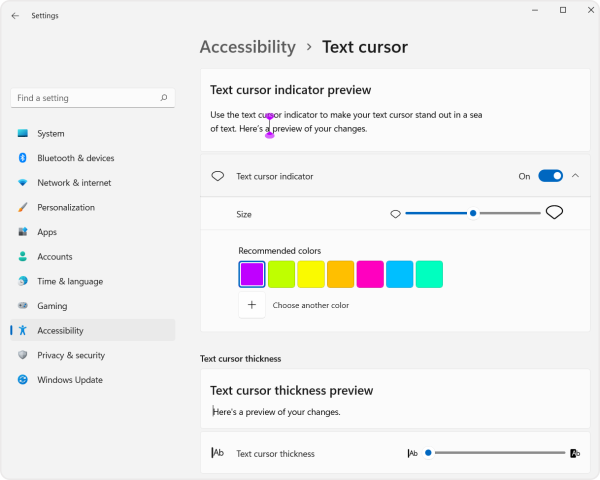
3. Enable/Disable Text Cursor
Make your text cursor easier to see.
- Open the accessibility menu.
- Find the ‘Text cursor’ menu, under the ‘Vision’ category, on the right-hand side of the window.
- Toggle switch to on.
- To switch off the text cursor indicator, toggle back to off.
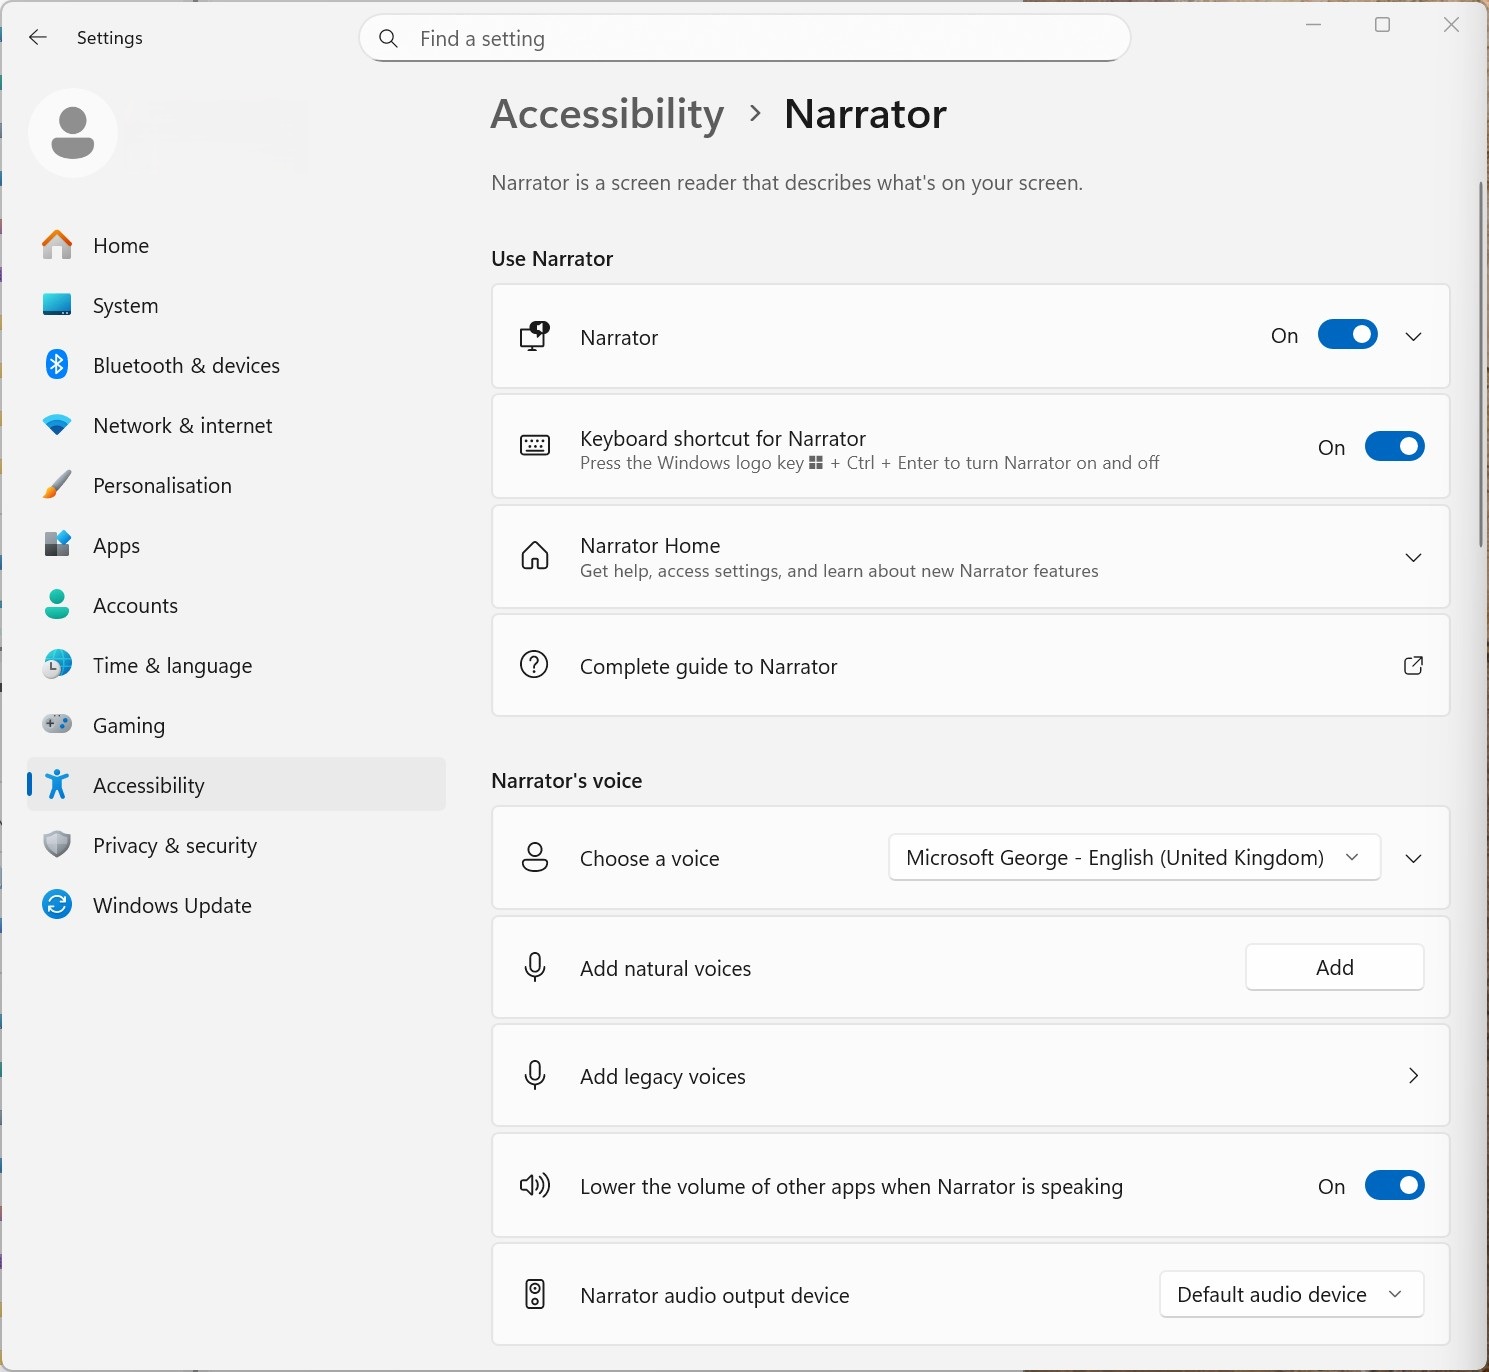
4. Narrator
Narrator is a screen reading application that describes what is on your screen, allowing you greater control as you navigate your device. It can be controlled by mouse, keyboard, and touch.
4.1. Enable/Disable Narrator
- Press the Windows key–Ctrl–Enter.
Alternatively, you can enable the feature though the system’s settings:
- Open the accessibility menu.
- Find the ‘Narrator’ menu on the right-hand navigation panel, under the ‘Vision’ category.
- Toggle off switch to on. Alternatively, you can use your Tab key to select the button and press Enter on your keyboard.
To disable, toggle switch back to off.
Note: Allowing the shortcut key to start Narrator is a setting that can be automatically set when you initially begin using your device. If it is not set, then you will have to manually set it by selecting the first box under Start-up Options titled ‘Keyboard shortcut for Narrator’.
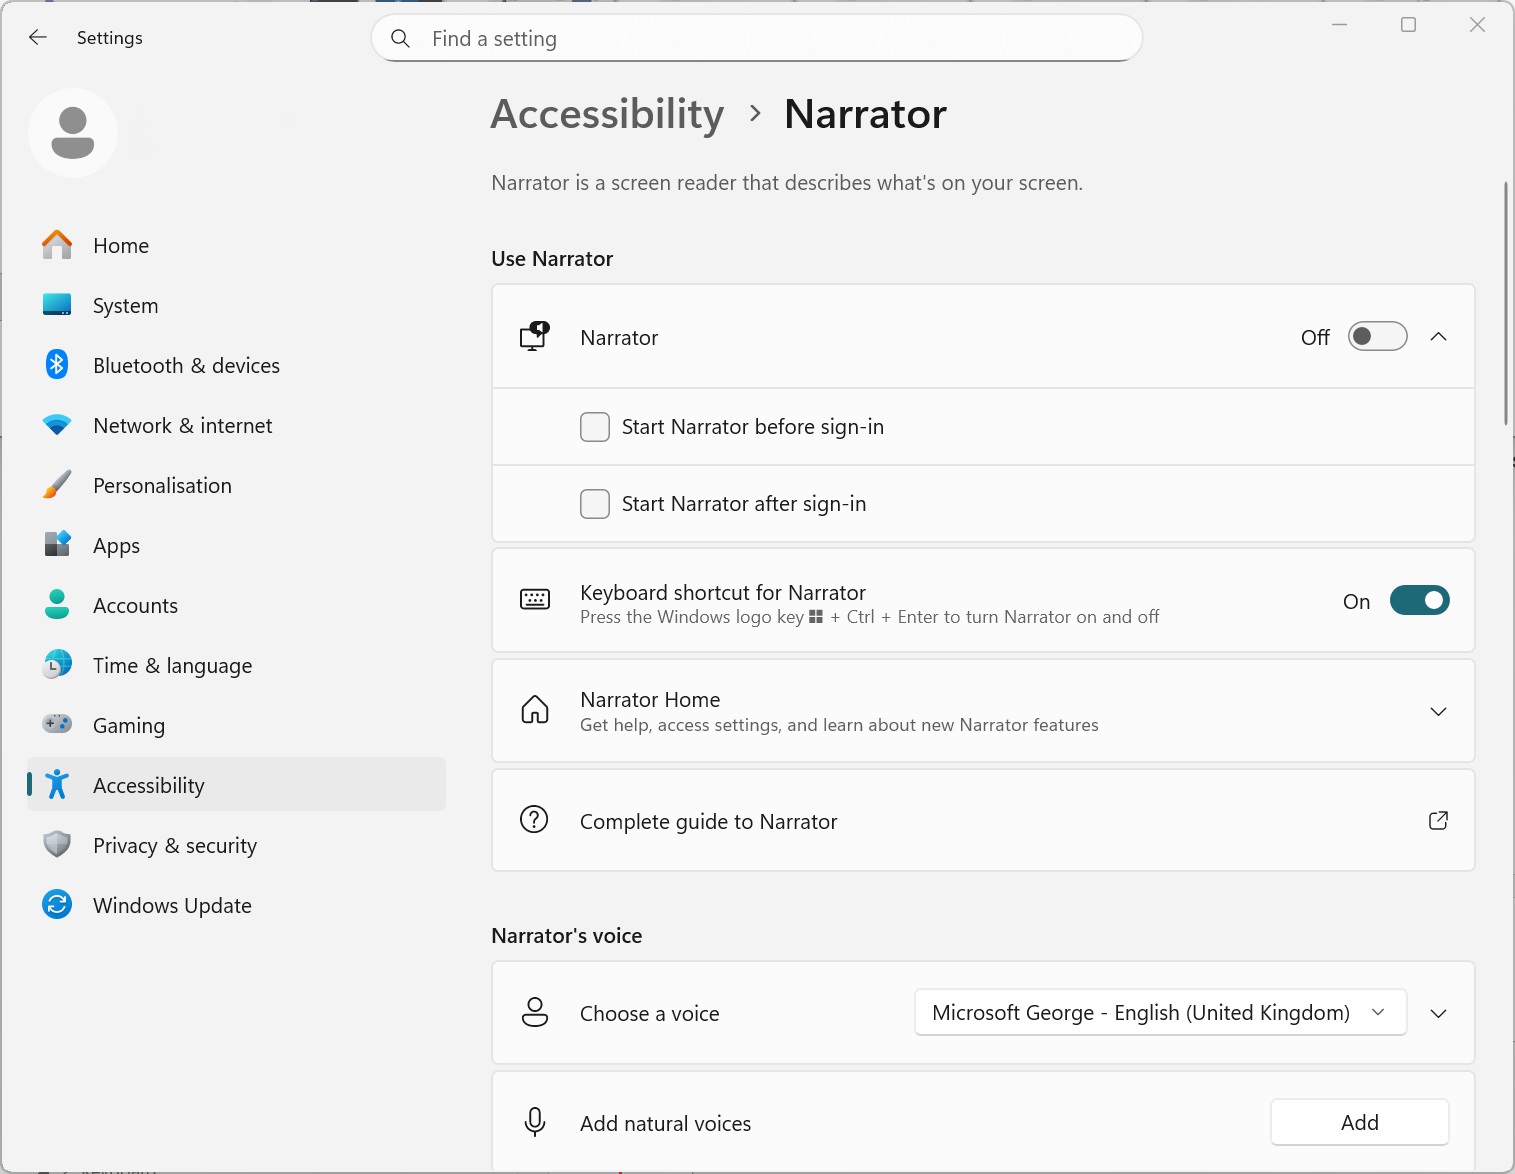
User can personalise how you would prefer Narrator to function in the Narrator settings. For example, you can choose when you would like Narrator to start. If you’d like it to start before you sign into your computer, open the narrator drop-down menu and select the second box titled ‘Start Narrator before sign-in’.
4.2. Using Narrator with braille
Narrator works with braille displays that use a USB or serial port. To use your braille display with Narrator, download and install braille:
- Press the Windows logo key + Ctrl + N to open Narrator settings.
- Under Use braille, select Download and install braille. (This will take some time. Windows will also ask if you’re sure that you want to allow Windows to make changes to your PC.)
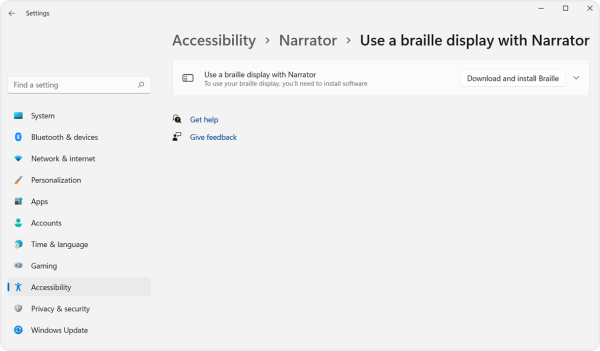
- When download and installation is complete, select Turn on braille.
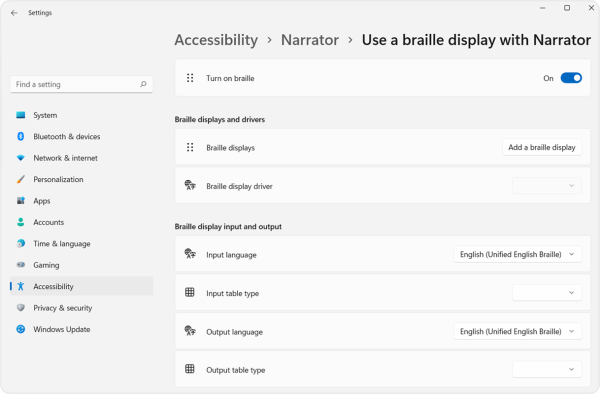
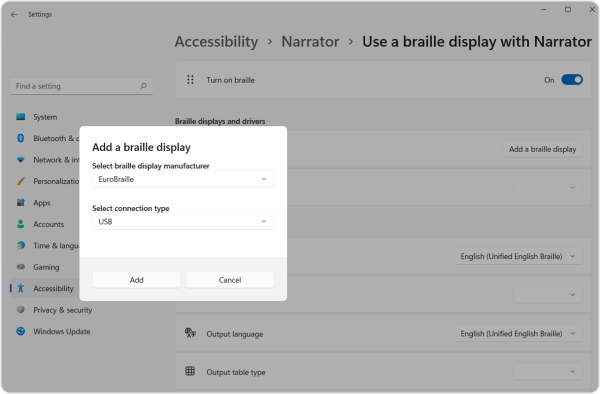
- Next, add your braille display. Select Add a braille display and then choose your braille display manufacturer and connection type (USB or serial port).
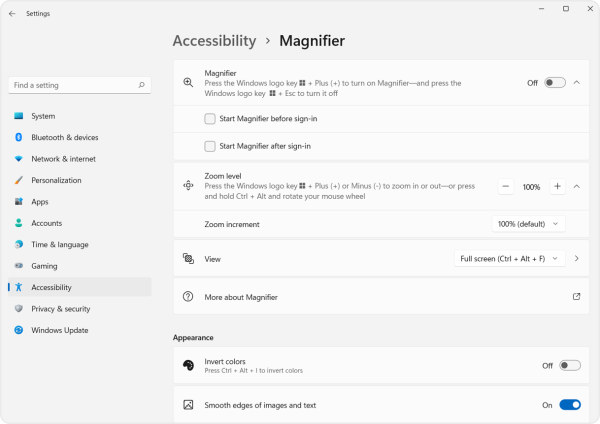
5. Magnifier
Magnifier is a feature that zooms in on parts of your computer display. Magnifier can be viewed in full screen, in a separate window or as a lens that follows your mouse pointer around your screen.
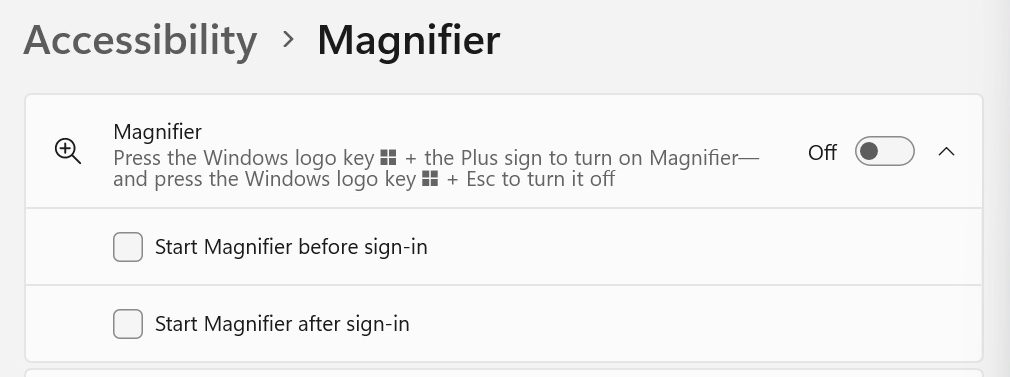
5.1. Enable/Disable Magnifier
- Press the Windows logo key + plus sign key.
- To disable Magnifier, press the Windows logo key + Esc key
Alternatively, you can enable the feature though the system’s settings:
- Open the accessibility menu.
- Find the Magnifier menu on the right-hand navigation panel, under the ‘Vision’ category.
- Toggle switch to on.
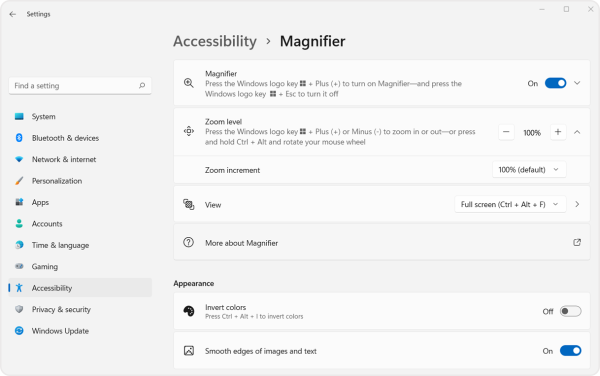
- To disable the feature, toggle switch back to off.
- Admin can also click the checkbox next to Start Magnifier after sign-in to have the Magnifier launch automatically when start Windows, or the checkbox for Start Magnifier before sign-in to have it launch when Windows first shows the sign-in screen.
- Use the plus and minus keys for Zoom level to zoom in and out or use the Zoom increment drop-down menu underneath to change the increments used here and in the Magnifier toolbar.
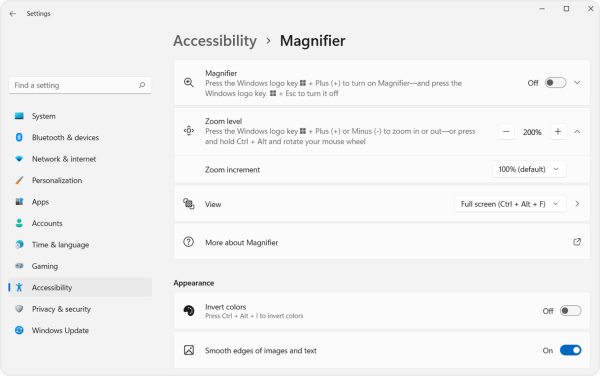
- Admin can also enable or switch off the Invert colors option if you find inverting the colors makes text easier or harder to read.
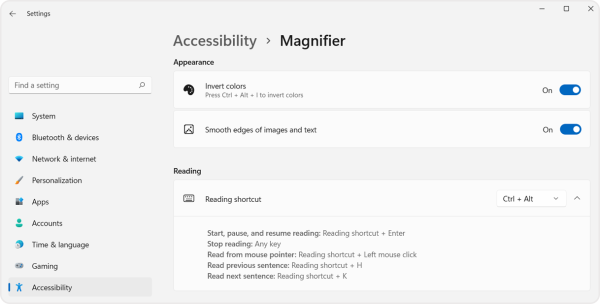
5.2. Activate Reading
Reading enables Magnifier to read from your screen.
- Find the Reading shortcut function on the right-hand magnifier panel, under the ‘Reading’ category.
Note: This function only works when the magnifier is enabled.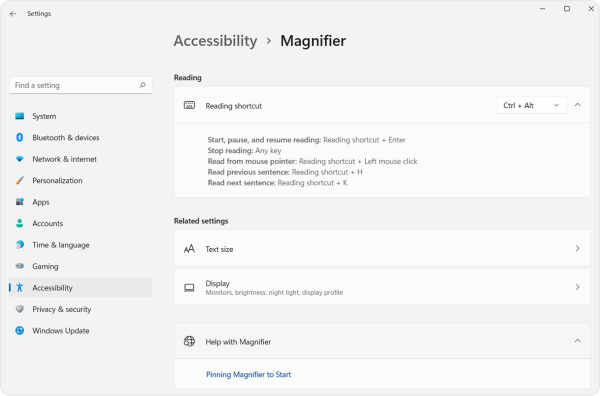
- Activate reading by pressing a Modifier key and Enter. The default modifier key is Ctrl and Alt; however the key can be changed to the Caps Lock and/or Insert key in the Magnifier settings.
Once a modifier key has been chosen, you can use the following commands to have Magnifier read from your screen:
- Start, pause, and resume reading: Modifier Key + Enter
- Stop reading: Any key
- Reading from mouse pointer: Modifier key + Left Mouse Click
- Read previous sentence: Modifier key + H
- Read Next Sentence: Modifier key + K
You can personalise Magnifier to suit your needs in the Magnifier settings. Shortcuts can be found in the guide’s reference sheet.
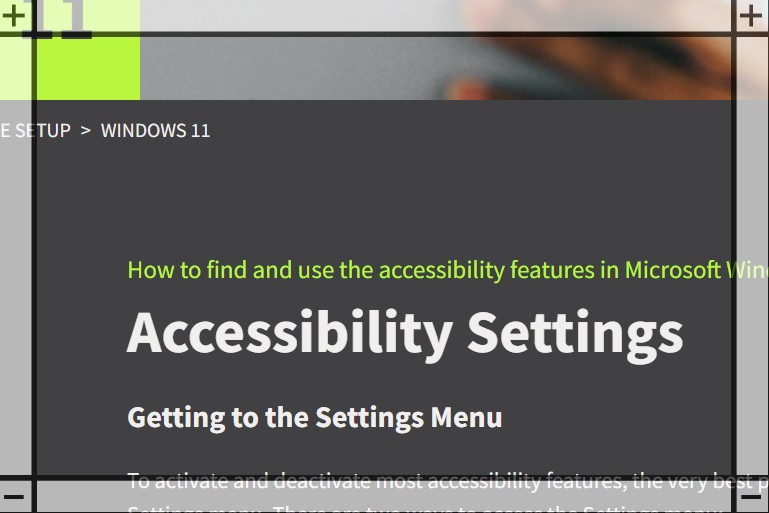
5.3. Magnifier touch gestures
- Use the following gestures to work with Magnifier on a Windows touchscreen device:
- Zoom in: Press the Plus (+) button on either the top left or top right of the screen
- Zoom out: If already zoomed in, press the Minus (-) button on either the bottom left or the bottom right of the screen

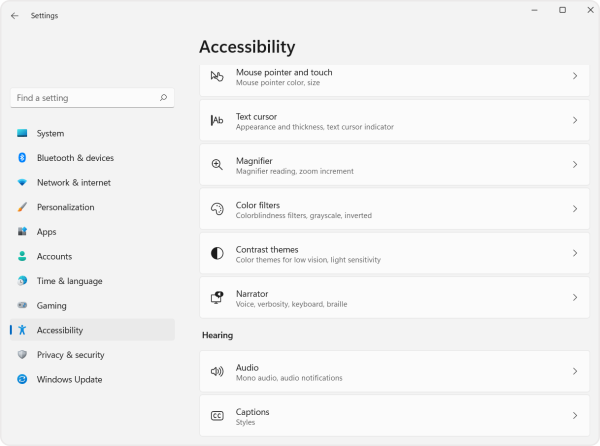
Hearing Related
1. Mono and Stereo Options
1.1. Increase, Decrease and Mute Device Volume: Three Methods
First Method
Find the increase, decrease and mute volume buttons on the keyboard, which are generally situated on the top row of the keyboard. The button features little speakers.

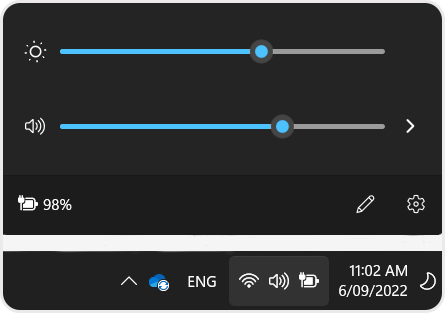
Second Method
Go to the System Tray of the computer’s taskbar at the bottom right corner of the computer screen, which contains the battery, network connection and volume. Click the speaker icon and adjust volume.
1.2. Turn on Mono Audio
Mono Audio combines the left and right audio channels into one channel.
- Open the accessibility menu.
- Find the ‘Audio’ menu on the right-hand navigation panel, under the ‘Hearing’ category.

- Toggle off button to on.
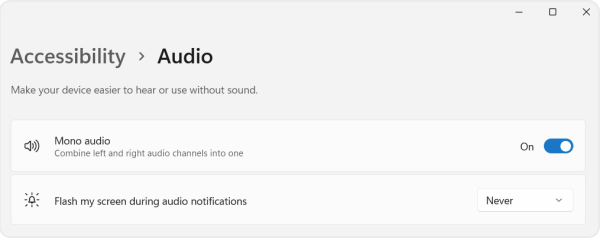
- To switch off mono audio, toggle back to off.
2. Enabled Visual Notifications
Select how visual alerts for notifications are displayed.
- Open the accessibility menu.
- Find the ‘Audio’ menu on the right-hand navigation panel, under the ‘Hearing’ category.
- Under the header ‘Flash my screen during audio notifications’, open the drop box menu.
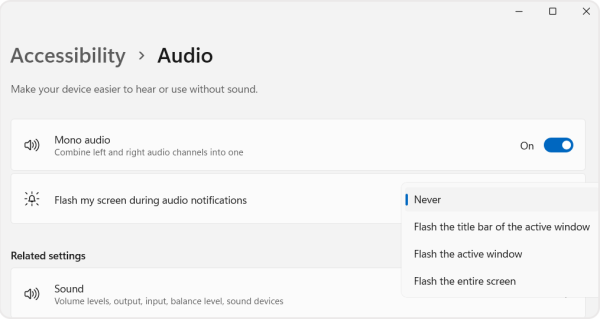
- Select preferred option.
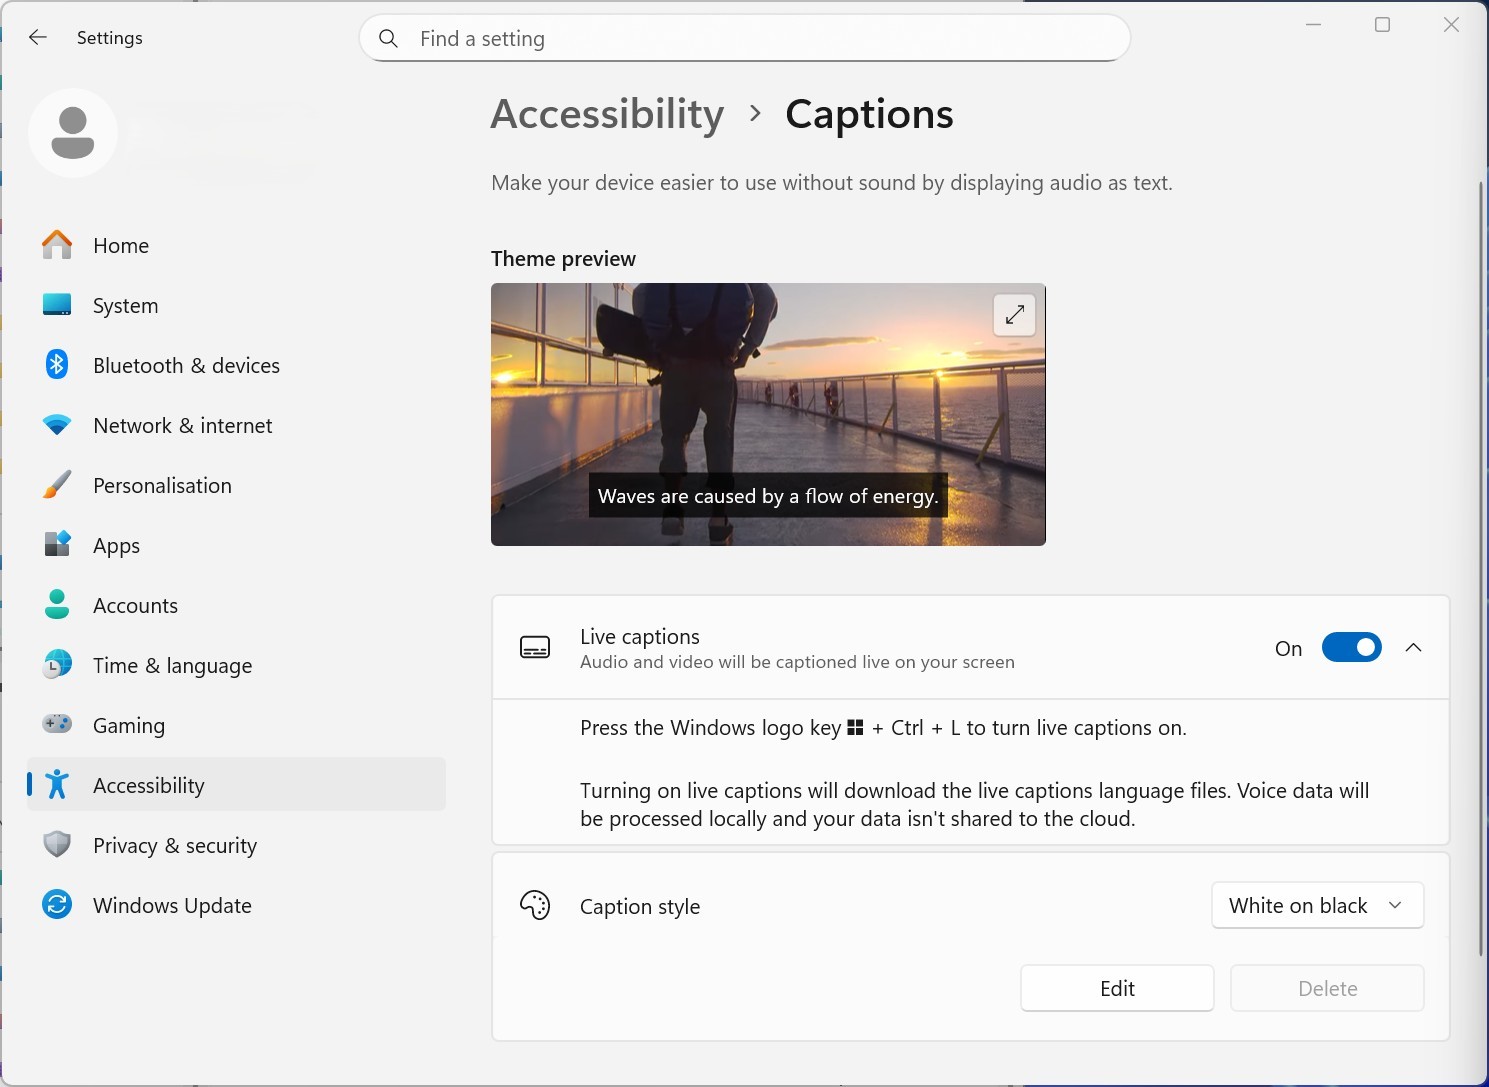
3. Captions
Make your device easier to use without sound by displaying audio as text.
3.1. Personalise Close Captions Settings
- Open the accessibility menu.
- Find the ‘Captions’ menu on the right-hand navigation panel, under the ‘Hearing’ category.
- Select a present style from the drop-down menu or click the edit button to define a custom style.
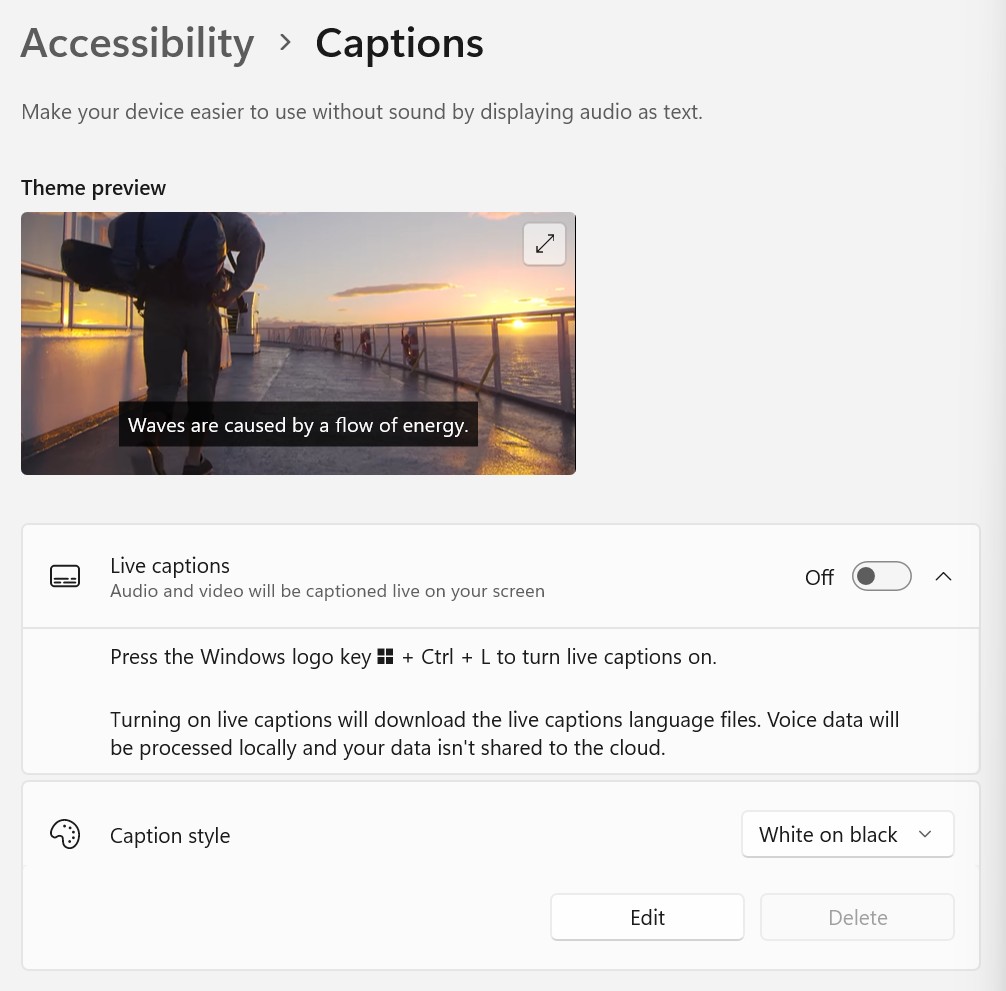
3.2. Enable/Disable Live captions
There are a few ways to turn on live captions:
The first way is through the System Tray on the taskbar.
- Go to the System Tray of the computer’s taskbar at the bottom right corner of the computer screen, and select the battery, network connection or volume icon.
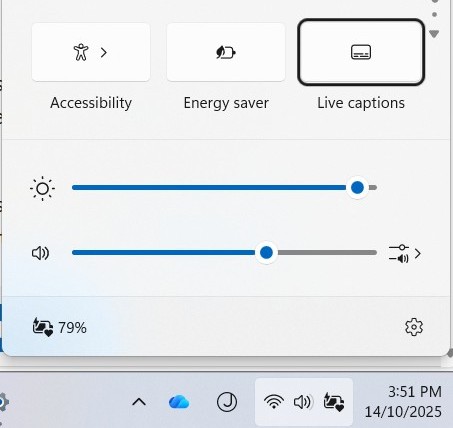
- Select the Live captions button.
The second way is with the keyboard shortcut.
- Press Windows key–Ctrl–L
The third way is through the Start menu.
- Press Windows key to open the Start menu.

- Select ‘All’.
- Select ‘Accessibility’ and expand the dropdown menu.
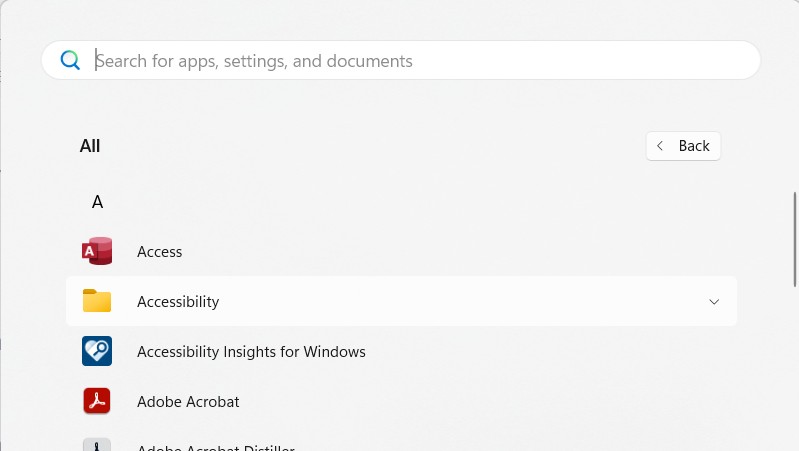
- Select ‘Live captions’

Alternatively, you can enable the feature through the system’s settings:
- Open the accessibility menu.
- Find the ‘Captions’ menu on the right-hand navigation panel, under the ‘Hearing’ category.
- Toggle the Live captions switch to on.
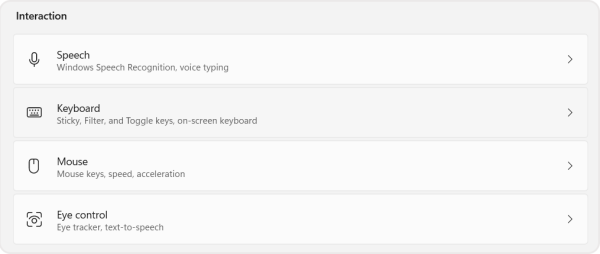
General and Mobility-Related
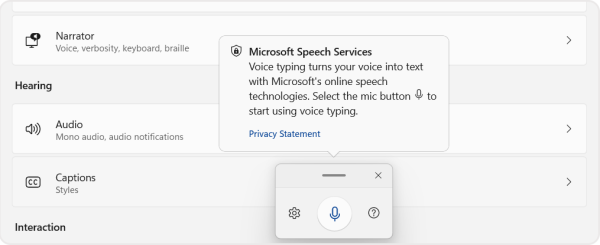
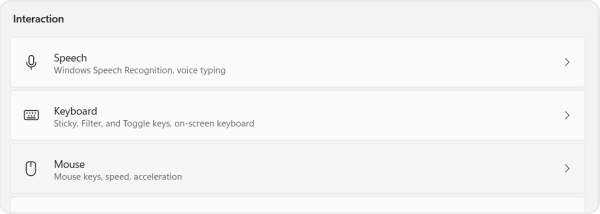
1. Speech
Convert spoken words into text on your personal device.
1.1.Enable/Disable Voice typing
Press Windows key–H
(On touch keyboards, press the microphone button).
1.2. Enable/Disable Voice access
Dictate text and control your personal device with only your voice.
- Press Windows key–Ctrl–S
Alternatively, you can enable the feature though the system’s settings:
- Open the accessibility menu.
- Find the ‘Speech’ menu on the right-hand navigation panel, under the ‘Interaction’ category.

- Under ‘Voice access’, toggle switch to on.

- To disable, toggle switch back to off.
Note: The name of the feature changed from “Windows Speech Recognition” to “Voice access.”
User can personalise how you would prefer Voice access to function in the Speech settings. For example, you can choose when you would like Voice access to start. If you’d like it to start before you sign into your computer, open the Voice access drop-down menu and select the first box titled ‘Start voice access before you sign-in to your PC’.
2. Keyboard
Make it easier to type and use keyboard shortcuts.
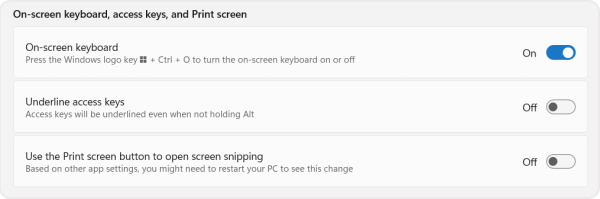
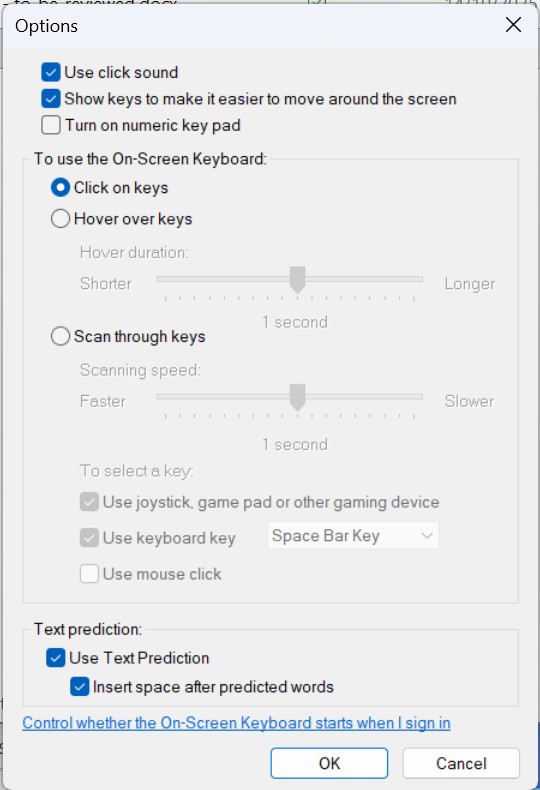
2.1. Enable/Disable On-Screen Keyboard
Display a virtual keyboard on screen to enter input without using a physical keyboard.
- Press the Windows key–Ctrl–O
Alternatively, you can enable the feature though the system’s settings:
- Open the accessibility menu.
- Find the ‘Keyboard’ menu on the right-hand navigation panel, under the ‘Interaction’ category.
- Under ‘On-Screen Keyboard’, toggle switch from off to on.
- With the OSK open, select the Options key to change how info is entered into the On-Screen Keyboard

- To disable, toggle switch back to off.
2.2. Enable/Disable Sticky Keys
Sticky Keys allows modifier keys (like Ctrl and Shift) to remain active even when you are no longer pressing them. This helps users who have trouble pressing two keys at the same time.
You can enable the feature though the system’s settings:
- Open the accessibility menu.
- Find the ‘Keyboard’ menu on the right-hand navigation panel, under the ‘Interaction’ category.
- Under ‘Sticky Keys’, toggle switch to on.

- To disable, toggle switch back to off.
2.3. Enable/Disable Toggle Keys
Toggle Keys provides sound cues when the locking keys, such as Caps Lock, Num Lock or Scroll Lock, are pressed.
- Press and hold the Num Lock key for five seconds.
Alternatively, you can enable the feature though the system’s settings:
- Open the accessibility menu.
- Find the ‘Keyboard’ menu on the right-hand navigation panel, under the ‘Interaction’ category.
- Under ‘Toggle keys’, toggle switch from off to on.

- To disable, toggle switch back to off.
2.4. Enable/Disable Filter Keys
Filter Keys informs the device to ignore brief or repeated key presses and allows the user to set the time a key is pressed before it repeats.
- Press and hold the right Shift key for eight seconds.
Alternatively, you can enable the feature though the system’s settings:
- Open the accessibility menu.
- Find the ‘Keyboard’ menu on the right-hand navigation panel, under the ‘Interaction’ category.
- Under ‘Use Filter Keys’, toggle switch from off to on.

- To disable, toggle switch back to off.
3. Mouse
Make it easier to see and control the mouse cursor.
3.1. Enable/Disable Mouse Keys
Control the mouse pointer using the numeric keypad.
- Open the accessibility menu.
- Search for the ‘Mouse’ menu on the right-hand navigation panel, under the ‘Interaction’ category.
- Toggle ‘Mouse keys’ switch to on.
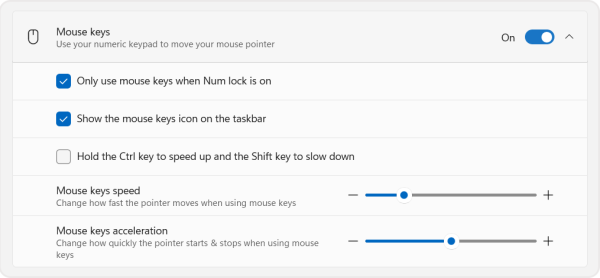
- To disable, toggle switch back to off.
Keyboard Shortcuts
1. Visual-Related Keyboard Shortcuts
Toggle colour filter on or off: Windows key–Ctrl–C
Narrator
Note: The default Narrator key is the Caps Lock key. This can be changed in the Narrator settings, under ‘Select Narrator key’.
- Enable/Disable Narrator: Windows key–Ctrl–Enter
- Activate scan mode: Caps lock–spacebar (press up and down arrows to read page)
- Navigate to next list item: I
- Navigate to previous list item: Shift–I
- Increase voice speed: Narrator–Plus sign key (+)
- Slow voice speed: Narrator–Minus Sign (-)
- Increase voice volume: Narrator–Ctrl–Plus sign key (+)
- Decrease voice volume: Narrator–Ctrl–Minus Sign (-)
- Change how Capitalised text is read: Narrator–4
- Change how much detail Narrator provides about text and controls: Narrator–V
- Get image descriptions: Narrator–Ctrl–D
- Focus on images or graph elements: G or Shift–G
- Get a webpage summary: Narrator–S
- Get the webpage summary and popular links dialog box: Narrator–S twice quickly
- Turn on or off Outlook column header reading: Narrator–H
- Re-hear what Narrator said last: Narrator–X
- Copy the last phrase Narrator said to clipboard: Narrator–Ctrl–X
- Open Speech recap and view the last 500 spoken strings: Narrator–Alt–X
- Give feedback on Narrator: Narrator–Alt–F
Magnifier
- Enable/Disable Magnifier: Windows key-Plus sign key (+)
- Turn off Magnifier: Windows key-Esc
- Zoom In: Windows key-Plus sign key (+)
- Zoom Out: Windows key-Minus key (-)
- Zoom In and Out: Press and hold Ctrl and Alt then roll the wheel on your mouse.
- Invert Colours: Ctrl–Alt–I
Change Magnifier View
- Lens: Ctrl–Alt–L
- Full Screen: Ctrl–Alt–F
- Docked: Ctrl–Alt–D
- Cycle through the views: Ctrl–Alt–M
Reading
Note: The default Modifier key is Ctrl and Alt. This can be changed in the Magnifier settings, under ‘Choose a Modifier key’.
- Start, pause, and resume reading: Modifier key–Enter
- Stop Reading: Any Key
- Read from Mouse Pointer: Modifier key–Left Mouse Click
- Read previous sentence: Modifier key–H
- Read next sentence: Modifier key–K
2. Mobility-Related Shortcuts
- Enable Dictation (Voice typing): Windows key–H
- Enable/Disable Voice access: Windows key–Ctrl–S
- Enable/Disable On-Screen Keyboard: Windows key–Ctrl–O
- Enable/Disable Sticky Keys: Press Shift key five times.
- Enable/Disable Toggle Keys: Press and hold the Num Lock key for five seconds.
- Enable/Disable Filter Keys: Press and hold the right Shift key for eight seconds.
3. Additional accessibility keyboard shortcuts
- Turn Filter Keys on and off: Right Shift for eight seconds
- Turn High Contrast on or off: Left Alt + left Shift + Print screen
- Turn Mouse Keys on or off: Left Alt + left Shift + Num lock
- Turn Sticky Keys on or off: Shift five times
- Open Search: Ctrl + E
- Turn Toggle Keys on or off: Num lock for five seconds
- Opens Quick Settings: Windows key + A
- Turn color filters on or off: Windows key + Ctrl + C
- Opens voice typing: Windows key + H
- Open Narrator settings: Windows key + Ctrl + N
- Turn on Voice access: Windows key + Ctrl + S
- Turn on the On-Screen Keyboard: Windows key + Ctrl + O
- Opens Accessibility Settings: Windows key + U
- Opens Widgets: Windows key + W
Windows Hello
Windows Hello is a more personal, more secure way to get instant access to Windows 11 devices using a PIN, facial recognition, or fingerprint. Admin will need to set up a PIN as part of setting up fingerprint or facial recognition sign-in, but admin can also sign in with PIN.
These options help make it easier and safer to sign into PC because PIN is only associated with one device and it’s backed up for recovery with Microsoft account.
- Select Start > Settings > Accounts > Sign-in options .
- Click on the sign-in option admin wants to use, then click on set up and follow the prompts on your screen.
- Select Facial recognition to set up facial recognition sign-in with your PC’s infrared camera or an external infrared camera.
- Select Fingerprint recognition to set up sign-in with a fingerprint reader.
- Select PIN to set up sign-in with a PIN.
Additional Resources
Additional information on the assistive technology products and services Microsoft offers on Windows 11 may be found at the following link:
https://www.microsoft.com/en-au/accessibility/windows