How to find and use the accessibility features on Samsung Smartphone
Accessibility Settings
Finding the Accessibility Menu
- Open the Settings application on your device.
- Select Accessibility (you may have to scroll to the bottom of the settings menu to find this option).
Vision-Related
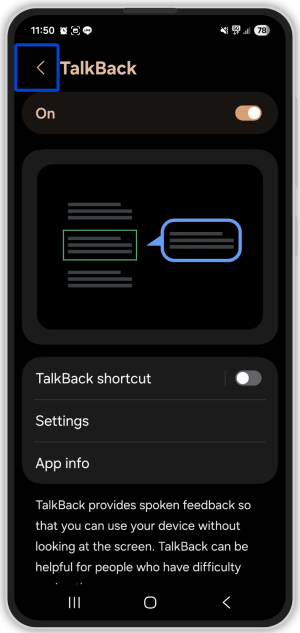
1. TalkBack
TalkBack provides spoken feedback to help low-vision users navigate their device.
You can choose to enable the TalkBack shortcut and select which actions you can use to start using TalkBack directly. There are three shortcut options to choose from:
- Tap Accessibility button
- Press Side and Volume up buttons
- Press and hold Volume up and down buttons for 3 seconds
1.1. Enabling TalkBack
- Tap on the Settings application.
- Select the Accessibility menu.
- From the Accessibility menu, select Talkback.
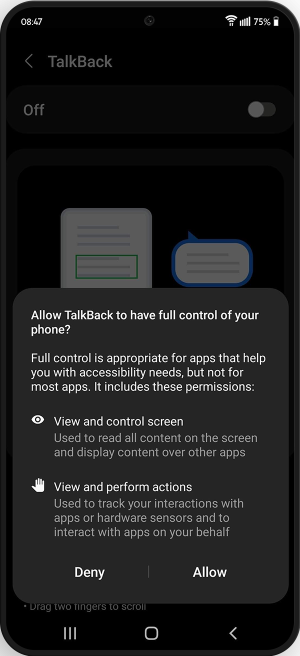
- Tap on the toggle Use TalkBack.
Note: A prompt may appear asking to allow TalkBack to have full control of the phone. - Feel free to explore more advanced audio and control settings by selecting Settings from the TalkBack menu.
1.2. Navigating TalkBack
Note: When TalkBack is enabled, actions that are normally used with one finger such as scrolling are now used with two fingers.
- Place a finger on the screen.
- Slowly drag the finger across the screen. As the finger moves, the TalkBack screen reader will announce icons, buttons, text, and other items it encounters.
- Pause for a few seconds and TalkBack will suggest actions that may be applicable such as replying to a message, opening a link in a new browser and more.
- To engage with something on the screen, double-tap anywhere on the screen to select it.
1.3. Finger Gestures
Finger gestures allow users to navigate their mobile devices using TalkBack. For the most part, these gestures are largely customisable, and they can be customised to suit personal preferences by:
- Opening Accessibility settings.
- Finding TalkBack then selecting Settings.
- Select Customise gestures.
There may be some gestures that are not customisable, and there may be other gestures that are not assigned to any particular action.
Some versions may have an option to Practice gestures. Select this option in the Customise gestures menu to practise using user-created customisations.
To reset customisations back to the factory defaults, select Reset gesture settings and click Reset or Confirm.
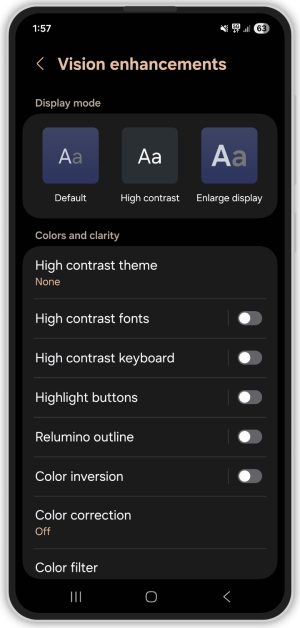
2. High Contrast Theme
Use themes that feature light colours on dark backgrounds which are easier on the eyes.
- Tap on the Settings application.
- Select the Accessibility menu.
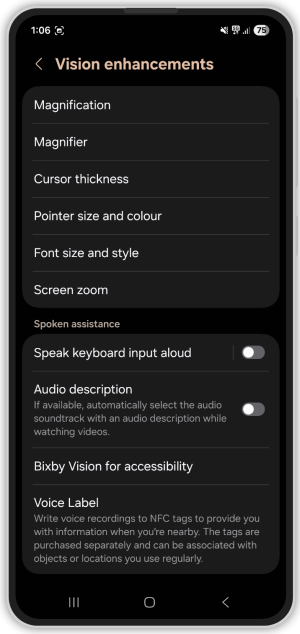
- Select the Vision enhancements menu.
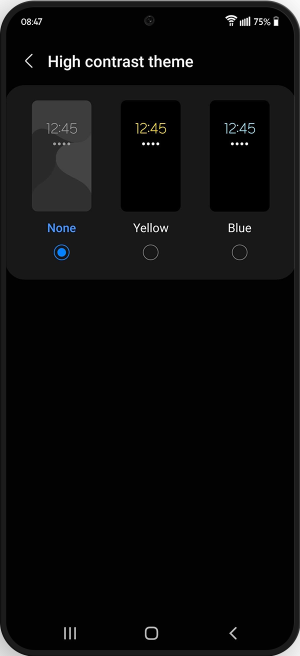
- From the Vision enhancements menu, select High contrast theme.
- Try out the different contrast themes and select the theme that is most suitable.
- From the Vision enhancements menu, you can also enable or disable toggles for the following settings:
- High contrast fonts: Enables high contrast on text.
- High contrast keyboard: Enables high contrast for the keyboard.
- Highlight buttons: Enables high contrast for buttons.
- Colour inversion: Inverts the colours of the screen.
3. Colour correction
Colour correction may assist in making you see colours easier.
- Tap on the Settings application.
- Select the Accessibility menu.
- Select the Vision enhancements menu.
- From the Vision enhancements menu, select Colour correction.
- Select the toggle to turn on colour adjustment.
- Select between the given colour schemes:
- Deutan (green-red)
- Protan (red-green)
- Tritan (blue-yellow)
- Greyscale
- Customise the intensity by sliding the cursor along the Intensity slider bar.

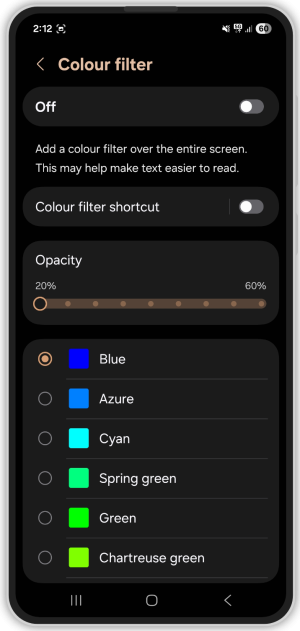
4. Colour Filter
Add a colour filter over the entire screen. This may help make text easier to read.
- Tap on the Settings application.
- Select the Accessibility menu.
- Select the Vision enhancements menu.
- From the Vision enhancements menu, select Colour filter.
- Select the toggle to turn on colour filter.
- Once enabled, you will now be able to choose what colour filter you would like applied to your phone.
- Customise the opacity by sliding the cursor along the Opacity slider bar.
5. Magnifier
Magnify your surroundings using the camera.
5.1. Enabling Magnifier
- Tap on the Settings application.
- Select the Accessibility menu.
- Select the Vision enhancements menu.
- From the Vision enhancements menu, select Magnifier.
- Select Magnifier shortcut to select actions you can use to start using Magnifier.
- Read the pop-up message instructions if they appear, and tap Got it.
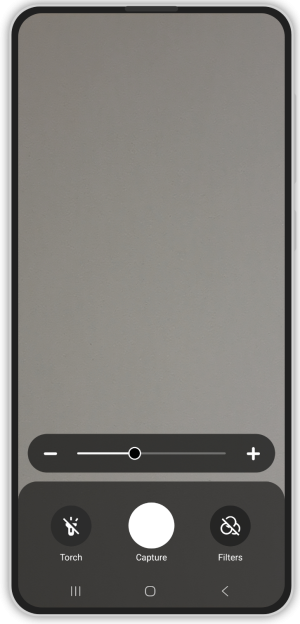
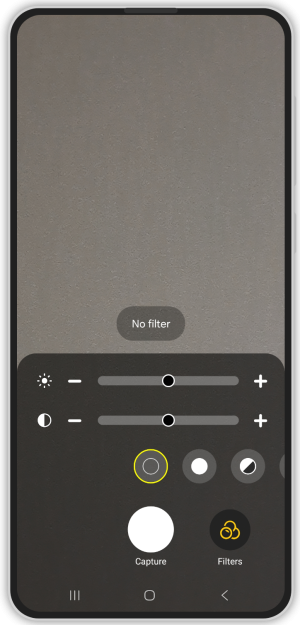
5.2. Using Magnifier
After starting the Magnifier app, a camera-like interface will appear.
To adjust the image:
- Adjust the zoom level: Drag the zoom slider left or right, tap the slider buttons, or spread two fingers apart to zoom in and bring them closer together to zoom out.
- Adjust the brightness: Tap the Filters button, then use the slider with a sun-shaped icon on its left.
- Adjust the contrast: Tap the Filters button, then use the slider with a two-tone circle icon on its left.
- Apply colour filters: Tap the Venn Filters button and select from the colour filter options.
- Turn on the phone flashlight: Tap the flashlight-shaped button.
- Save a magnified object as an image: Tap the Capture (large circular) button in the bottom centre of the screen. You can then save this via the save icon at the bottom right of your screen.
- Share a magnified object as an image: Tap the Capture button in the bottom centre of the screen. You can then share this via the share icon at the bottom left of your screen.

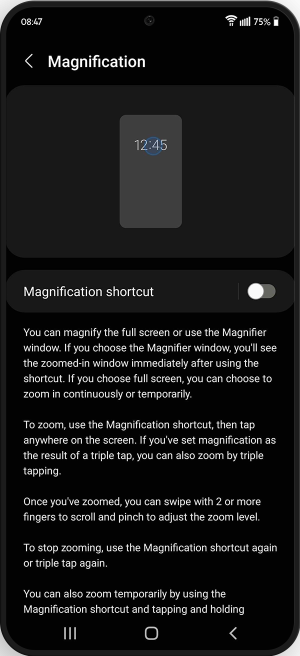
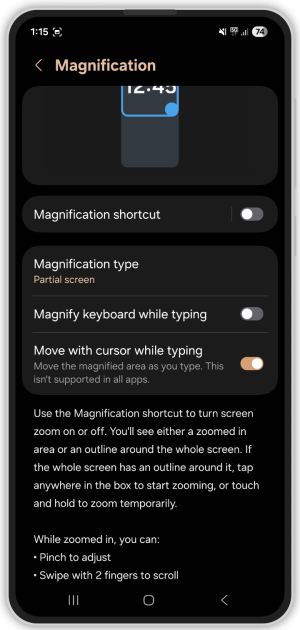
6. Magnification
Helps users with low or limited vision to have a better view of the screen.
You can choose to magnify either a partial area of the screen or the entire screen.
6.1. Enabling Magnification
- Tap on the Settings application.
- Select the Accessibility menu.
- Select the Vision enhancements menu.
- From the Vision enhancements menu, select Magnification.
- By selecting Magnification shortcut, you can select actions to be used to start using Magnification.
- Read the pop-up message instructions, if they appear, and tap Got it.
- Once magnification has been activated from the shortcut, the magnification window will appear on the screen.
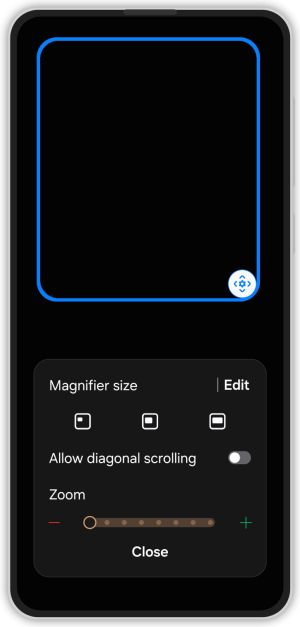
6.2. Navigating Magnification
When Partial screen is enabled, a settings button appears in the bottom-right corner of the magnification window. From the settings menu that opens when you press this button, you can adjust the following options:
- Magnifier size: Select the size of the magnification window between small, medium, large, and full screen. The options may differ depending on the Magnification type you use.
- Allow diagonal scrolling (partial screen magnification only): Change whether diagonal scrolling is on or off. To easily move around and locate the magnified section on the screen, turn off Allow diagonal scrolling.
- Zoom: Use the slider to adjust the zoom level.
You can also use the following ways to navigate Magnification:
- Use two fingers to move the magnification window around the screen.
- Press and drag the setting button in the bottom-right corner of the magnification window to move the window around the screen.
- Spread two fingers apart to zoom in or bring the two fingers closer together to zoom out.
- To stop zooming, use the same shortcut you used to turn on Magnification.
- If you use Triple-tap screen as the shortcut for Magnification, you can also zoom temporarily by triple tapping and holding the screen. Lift your finger to zoom out again.
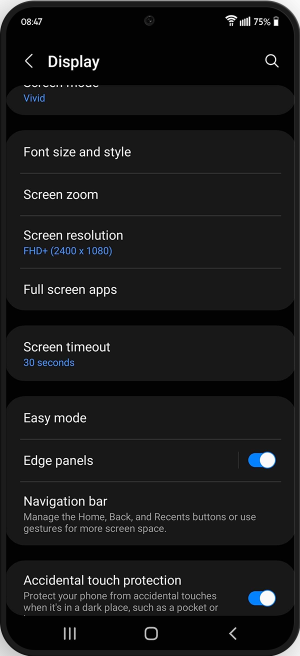
7. Display Settings
Samsung devices have a range of display settings that make it easier to view items on your device and reduce fatigue and strain on the eyes.
7.1. Accessing Display Settings
From the Settings menu, select Display.
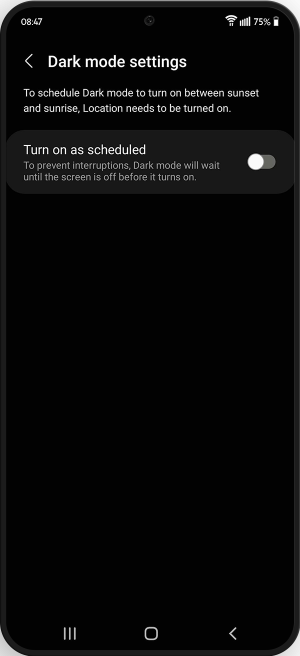
7.2. Dark Mode
Dark mode is a feature that limits the light emitted by phones. In addition to reducing battery usage, it also helps with readability by applying a dark background to all apps and screens. This feature may be of assistance especially for the visually impaired.
- Tap on the Settings application.
- Select the Display menu.
- From the Display menu, choose between light mode or dark mode.
To set up a schedule to automatically enable and disable dark mode:
- Select Dark mode settings.
- Turn on the “Turn on as scheduled” switch, then choose either Sunset to sunrise or set a custom schedule.
7.3. Brightness
Samsung devices can detect the levels of brightness in your surroundings and automatically configure the screen’s brightness to suit your environment.
- Tap on the Settings application.
- Select the Display menu.
- From the Display menu, turn on the Adaptive brightness switch.
- Alternatively, use the brightness slider to adjust brightness settings.
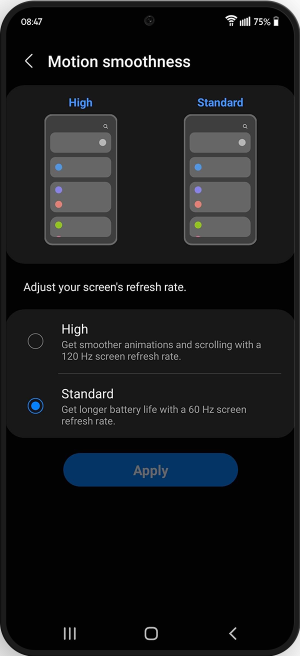
7.4. Motion Smoothness
Adjust your screen’s refresh rate.
- Tap on the Settings application.
- Select the Display menu.
- From the Display menu, select Motion smoothness.
- Choose between Standard or High refresh rate.
- Select Apply to confirm change.
7.5. Eye Comfort Shield
Keeps your eyes comfortable by limiting blue light and using warmer colours. Using at night can make it easier to fall asleep.
- Tap on the Settings application.
- Select the Display menu.
- From the Display menu, Select Eye comfort shield.
- Choose either Adaptive to automatically adjust screen colours or select Custom and use the Colour temperature slider bar to set a comfort level.
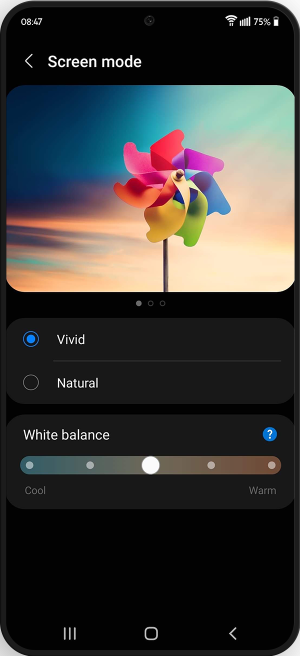
7.6. Screen Mode
Choose your colour preference displayed on the screen and customize it to your liking.
- Tap on the Settings application.
- Select the Display menu.
- From the Display menu, select Screen mode.
- Choose between Vivid or Natural.
- Customise the white balance by sliding the cursor along the White Balance slider bar.
- Tap on Advanced settings for more customisation options.
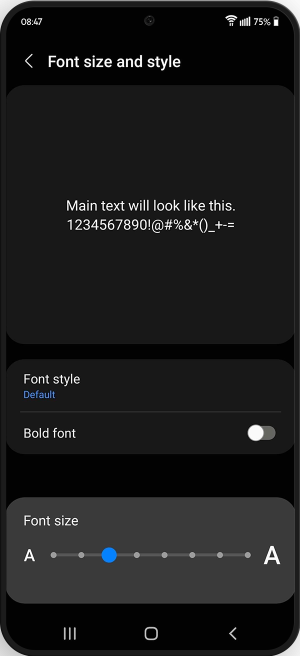
7.7. Font size and style
Customise the font size and style of text on your device.
- Tap on the Settings application.
- Select the Display menu.
- From the Display menu, select Font size and style.
- Select Font style to change the style of the font.
- Tap on the Bold font toggle to thicken the letters of the text.
- Customise the font size by sliding the cursor along the Font size slider bar.
- The preview at the top of the screen shows what the font will look like.
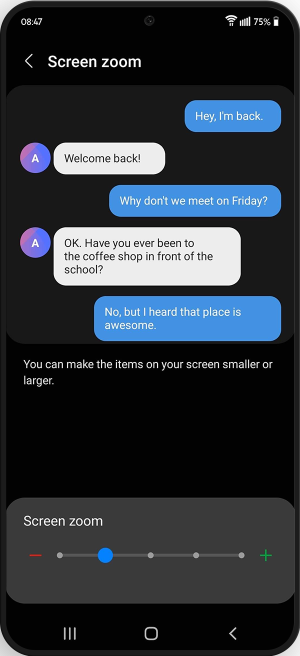
7.8. Screen Zoom
Make items such as applications, messages and buttons on your screen appear smaller or larger.
- Tap on the Settings application.
- Select the Display menu.
- From the Display menu, select Screen zoom.
- Use the slider bar at the bottom to adjust the default zoom setting.
- The preview at the top of the screen shows what the zoom settings will look like.
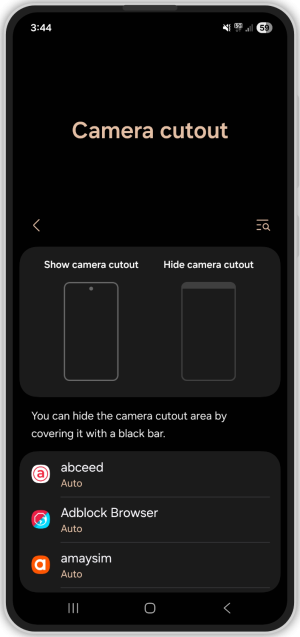
7.9. Camera cutout
You can hide & unhide the camera cutout area by covering it with a black bar.
Note: Available screens and settings may vary by software version and phone model.
- Tap on the Settings application.
- Select the Display menu.
- From the Display menu, select Camera cutout.
- Tap a listed app and select either Show camera cutout, Hide camera cutout, or Auto.
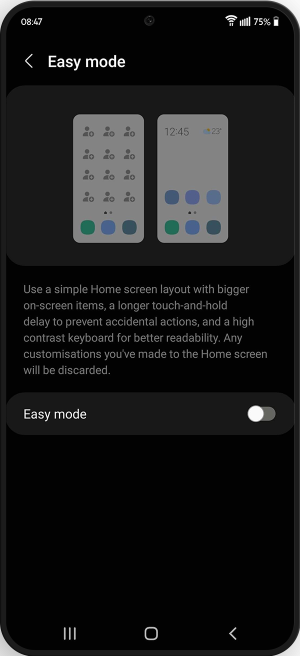
7.10. Easy Mode
Provides a simple home screen layout with bigger on-screen items, a longer touch-and-hold delay and a high contrast keyboard to increase readability (customisations already made to the home screen will be discarded).
- Tap on the Settings application.
- Select the Display menu.
- From the Display menu, select Easy mode.
- Tap on Easy mode toggle to enable the feature.
- Once Easy mode has been enabled, you can change the following settings:
- Touch and hold delay: Set how long it takes for a continuous touch to be recognised as a touch and hold. This doesn’t affect the keyboard
- High contrast keyboard: Choose between different keyboard colour contrasts.
Hearing-Related
1. Hearing Aid Support
Optimize device for use with hearing aids or use Bluetooth to pair with hearing aids.
- Tap on the Settings application.
- Select the Accessibility menu.
- Select the Hearing enhancements menu.
- From the Hearing enhancements menu, select Hearing aid support.
- Tap on the Hearing aid support shortcut toggle.
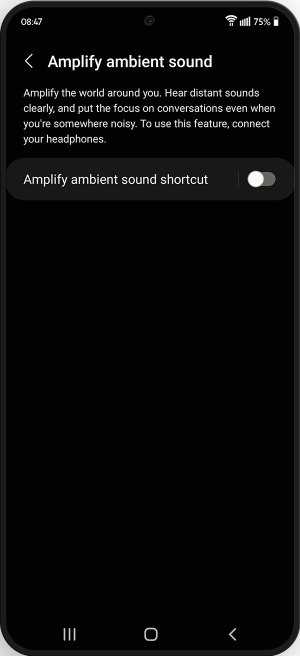
2. Amplify Ambient Sound
This feature amplifies sounds around you to assist with hearing distant sounds.
Note: This feature requires audio devices such as headphones, earphones or hearing aids to work.
- Tap on the Settings application.
- Select the Accessibility menu.
- Select the Hearing enhancements menu.
- From the Hearing enhancements menu, select Amplify ambient sound.
- Turn on the Amplify ambient sound shortcut toggle.
- You can now use the selected shortcut to activate this feature.
3. Adapt Sound
Adjusts the sound frequency to suit the user based on their age and sensitivity to noise frequency.
- Tap on the Settings application.
- Select the Accessibility menu.
- Select the Hearing enhancements menu.
- From the Hearing enhancements menu, select Adapt sound.
- Switch the toggle to on.
- Select age and frequency preference from the options below.
- The Adapt Sound for option allow you to choose what type of sounds to adapt for. Choose between Media and calls, Only Media or Only calls.
- You can also test your hearing with the ‘Add personalised sound profile’ button at the bottom of the screen.

4. Left/Right Sound Balance
Adjust the balance of noise output through headphones based on your hearing. For example, if the user’s left ear can hear more than the right, this feature allows the user to shift the balance of the audio so the right ear can receive more decibels than the left.
- Tap on the Settings application.
- Select the Accessibility menu.
- Select the Hearing enhancements menu.
- From the Hearing enhancements menu, adjust the sound balance by sliding the cursor along the Left/right sound balance slider bar.
- From the menu above, you can also enable or disable toggles for the following settings:
- Mono Audio: Play the same sound out of both speakers.
- Mute all sounds: Turn off all sounds on your phone including calls, alerts and media.
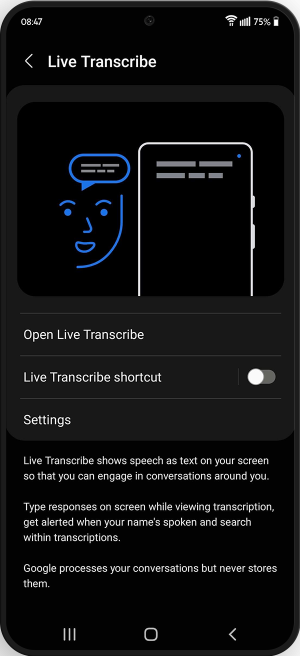
5. Live Transcribe
Live Transcribe shows speech as text on your screen so that you can engage in conversation around you.
- Tap on the Settings application.
- Select the Accessibility menu.
- Select the Hearing enhancements menu.
- From the Hearing enhancements menu, select Live Transcribe.
- Tap Open Live Transcribe.
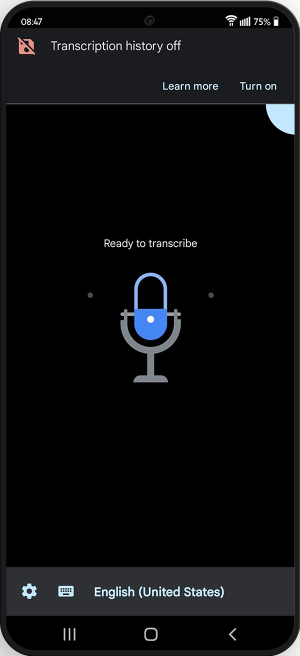
Note: If Live Transcribe is not already installed on your device, your device may prompt you to download it from the Google Play Store. - Once the app is opened, speech around you will now be converted into text on the screen.
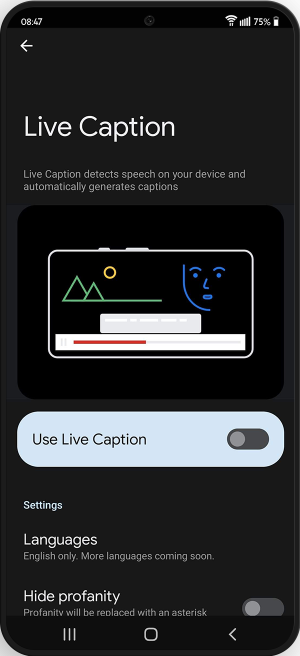
6. Live caption
Live Caption detects speech on your device and automatically generates captions.
- Tap on the Settings application.
- Select the Accessibility menu.
- Select the Hearing enhancements menu.
- From the Hearing enhancements menu, select Live caption.
- Tap on Use Live Caption toggle to use this feature.
- From the menu above, you can also change the following settings:
- Caption preferences: Set caption size and style.
- Expressive captions: Adds styles to captions to better convey tone and labels non-speech
- Add styles to captions: Uses text formatting to better convey tone, like capital letters for shouting.
- Show sound labels:Include sounds like laughter, applause and music.
- Show speech emotion: Captures and tags the emotional tone of speech, like joy or sadness, in captions.
- Lengthen words: Lengthen words when a speaker emphasises them. For example, “Amazing!” becomes “Amaazing!”
- Hide profanity:Replaces profanity with an asterisk symbol.
- Live Caption in volume control:Adjust live caption volume using the volume keys.
7. Caption preference
A feature that allows Subtitles to appear on your screen when playing videos with embedded subtitles.
- Tap on the Settings application.
- Select the Accessibility menu.
- Select the Hearing enhancements menu.
- From the Hearing enhancements menu, select Caption preference.
- Tap on Show captions to enable this feature.
- From the menu above, you can also change the following settings:
- Caption size and style: Change text size and caption style of subtitles.
- More options: Change the language of the subtitles.
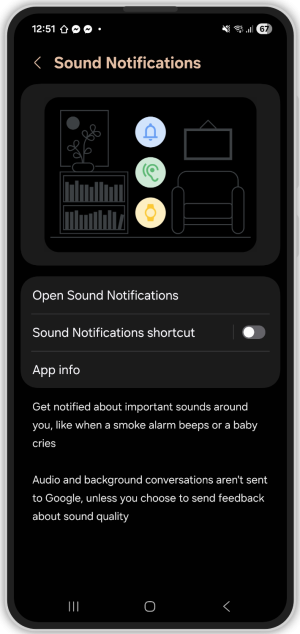
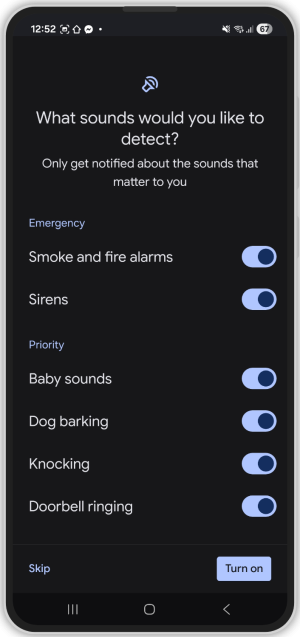
8. Sound Notifications
A feature that allows you to receive alerts when a baby is crying or when a doorbell rings.
- Tap on the Settings application.
- Select the Accessibility menu.
- Select the Hearing enhancements menu.
- From the Hearing enhancements menu, select Sound Notifications.
- From the menu, select Open Sound Notifications.
- You can choose to be notified of important sounds around you, like when a smoke alarm beeps or a baby cries.
General and Mobility-Related
1. Universal Switch
For people who have difficulty touching the screen, the Universal switch feature lets you select items and take actions with switches instead of touches.
- Tap on the Settings application.
- Select the Accessibility menu.
- Select the Interaction and Dexterity menu.
- From the Interaction and Dexterity menu, select Universal switch.
- Tap on the On/Off toggle to enable Universal switch.
Note: If you are currently using a lock screen pattern type that is not compatible with Universal switch, a message will pop up asking you to change to a different lock type first.
Note: If it is your first time opening Universal switch, the Universal switch help will appear to take you through the tutorial. - Read the pop-up message instructions and tap Add switch.
- Choose between either adding an accessory or using the camera to control your phone.
- From the Universal switch menu, you can also change the following settings:
- Tutorial: Allows you to view the tutorial again.
- Quick setup and presets: Decide whether switches will be used for just one action each, or whether switches can function differently depending on whether you press or press and hold.
- Universal switch shortcut: Allows you to select actions to be used to start using the universal switch.
- Settings: Change various settings related to the universal switch.
- Add switch: Either connect an accessory to use as a switch or use the front camera to detect movements.
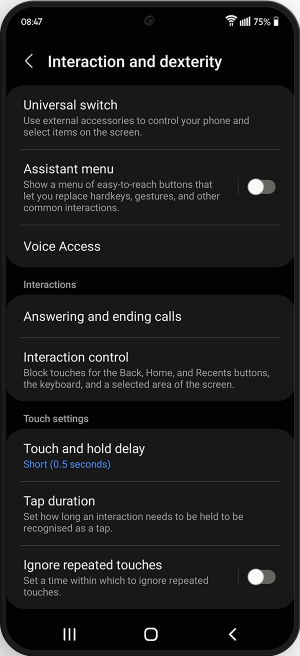
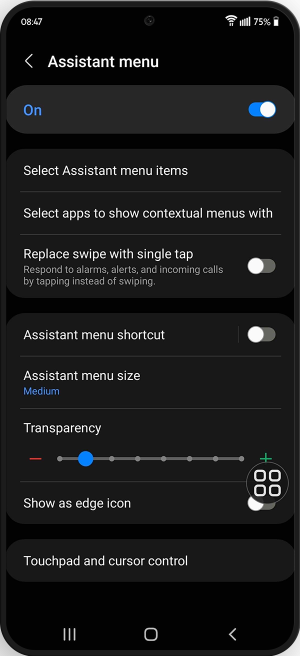
2. Assistant Menu
The assistant menu is a feature that shows a menu of easy-to-reach buttons that let you replace hard keys, gestures, and other common interactions.
- Tap on the Settings application.
- Select the Accessibility menu.
- Select the Interaction and Dexterity menu.
- From the Interaction and dexterity menu, select Assistant menu.
- Once this feature is enabled, a circle menu with 4 squares will appear. The menu can be moved anywhere around the screen by dragging with one finger.
- Tap on the Assistant menu to expand the menu and view shortcuts.
- From the Assistant menu settings page, you can also change the following settings:
- Select Assistant menu items: Choose which items to hide or show.
- Select apps to show contextual menus with: When you use a selected app, the Assistant menu will show contextual options specific to that app.
- Replace swipe with single tap: Respond to alarms, alerts, and incoming calls by tapping instead of swiping.
- Transparency: Sets the transparency of the Assistant menu.
- Show as edge icon: Moves the Assistant menu to the edge of the phone.
- Assistant menu size: Choose between small, medium and large.
3. Interactions
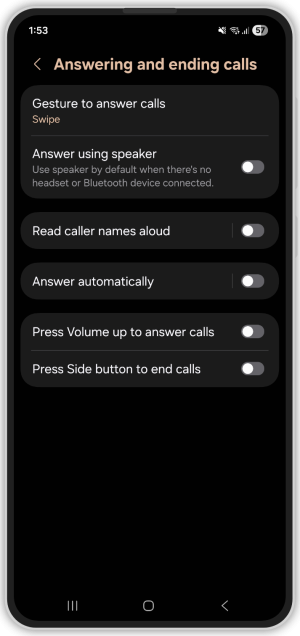
3.1. Answering and ending calls
- Tap on the Settings application.
- Select the Accessibility menu.
- Select the Interaction and Dexterity menu.
- From the Interaction and dexterity menu, select Answering and ending calls.
- From the Answering and ending calls menu, you can also change the following settings:
- Gesture to answer calls: Choose between Swipe and Tap.
- Answer using speaker: Use speaker by default when there’s no headset or Bluetooth device connected.
- Read caller name aloud: Choose between having the caller name read aloud with Bluetooth or headset only or to always have caller name read aloud.
- Answer Automatically: Answer incoming calls automatically after a headset or Bluetooth device is connected. You can change the time it takes to automatically answer calls to either 2 seconds, 5 seconds, 10 seconds or set a custom time.
- Press Volume up to answer: Allows you to have the Volume up button set to answer an incoming call.
- Press Side key to end calls: Allows you to have the Side key set to end a call.
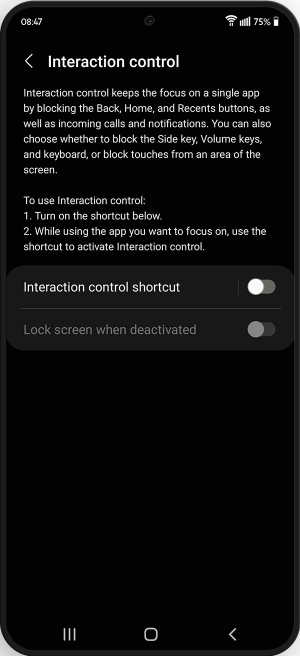
3.2. Interaction Control
Interaction control keeps the focus on a single app by blocking the Back, Home, and Recents buttons as well as incoming calls and notifications.
- Tap on the Settings application.
- Select the Accessibility menu.
- Select the Interaction and Dexterity menu.
- From the Interaction and dexterity menu, select Interaction control.
- Tap on the toggle Interaction control shortcut.
Note: When you enable this feature, you’ll be prompted to turn off other gesture-based features (such as Mute with gestures, Palm swipe to capture, and Alert when phone picked up) because they can interfere with Interaction control. - Tap Turn off on the pop-up message.
- Tap on Interaction control shortcut to choose between Press Side and Volume up keys or Press and hold Volume up and down keys for 3 seconds.
- Use the shortcut key selected when using an app to block interaction for either specific areas of the screen or block the whole screen.
- Select Options on the top right-hand side of the screen for more settings.
3.3. Touch Settings
- Touch and hold delay: Sets how long it takes for a continuous touch to be recognised as a touch and hold. This doesn’t affect keyboard.
- Tap duration: Sets how long an interaction needs to be held to be recognised as a tap.
- Ignore repeated touches: Set a time within which to ignore repeated touches.
3.4. Mouse and Physical Keyboard
- Auto action after pointer stops: Use Auto click to have a click happen automatically, and use Corner actions to assign actions to the corners of your screen. Auto click and Corner actions will happen after your pointer stops moving for a set amount of time.
- Sticky keys: When you press a modifier key like Shift, Ctrl, or Alt, it will stay pressed so you can enter keyboard shortcuts one key at a time.
- Slow keys: Type by touching and holding for a set time to avoid accidental key presses.
- Bounce keys: Prevent accidental key presses by setting a delay before a second tap on the same key is accepted.
Shortcuts
The following finger gestures can be used when TalkBack is enabled on your Samsung device. Note that the gestures below are the default settings, but you can change the gestures and their associated actions to suit your preferences.
One Finger Gestures
- Swipe Up: Move reading control down or backwards.
- Swipe Down: Move reading control up or forwards.
- Swipe Left: Previous Item
- Swipe Right: Next Item
One Finger Back and Forth
- Swipe Up then down: Previous reading control
- Swipe down then up: Next reading control
- Swipe left then right: Scroll back
- Swipe right then left: Scroll forwards
One Finger Angled Gestures
- Swipe up then left: Return to the home screen
- Swipe up then right: Open TalkBack menu
- Swipe down then left: Back
- Swipe down then right: Open TalkBack menu
- Swipe left then up: Screen overview, this shows all the different apps you have open
- Swipe left then down: Search in the current screen
- Swipe right then up: Start a voice command
- Swipe right then down: Display/Read device notifications
Two Fingers
- Tap with 2 fingers: Pause or resume speech
- Double tap with 2 fingers: Play/Pause media (videos, music, etc.)
- Double tap and hold with 2 fingers: Start or End a selection mode
- Triple tap and hold with 2 fingers: Turn speech on or off
- Triple tap with 2 fingers: Read from focused item
- Swipe Up/Down/Left/Right with 2 fingers: Scroll Up/Down/Left/Right
Three Fingers
- Single Tap: Opens the TalkBack menu
- Touch and hold: Open the search screen
- Double tap: Copy images or text to the clipboard
- Double tap and hold: Cut
- Triple tap: Paste
- Triple tap and hold: Select all
- Swipe Up or Swipe Left: Previous reading control
- Swipe Down or Swipe Right: Next reading control
Four Fingers
- Single Tap: Practise gestures
- Double Tap: Open TalkBack tutorial
Additional Resources
For additional information on the accessibility features offered by Android, visit their website using the following link: https://www.android.com/intl/en_au/accessibility/
The Samsung mobile accessibility website may be found here: https://www.samsung.com/au/accessibility/mobile/