How to find and use the accessibility features on iOS iPad
Vision-Related
1. VoiceOver
VoiceOver is a gesture-based screen reader that provides audible descriptions of what is on the screen. This includes text, battery level, who is calling and which app a user is hovering over with their finger.
Note: VoiceOver changes the way your iPad operates once enabled. When it is on, use the VoiceOver gestures to operate it.
- Go to Settings.
- Select Accessibility.
- Select VoiceOver.
- Tap the toggle once to enable VoiceOver.
- When you disable VoiceOver, tap the toggle once to select it, then double-tap to toggle it off.

1.1 Practice VoiceOver gestures
Users can practice VoiceOver gestures in a trial environment without affecting their iPad settings. When practising a motion, VoiceOver describes the gesture and the resulting action.
Users can try different techniques to discover which works best. If a gesture doesn’t work, try a quicker movement, especially for a double-tap or swipe gesture. To swipe, users can try brushing the screen quickly with their fingers. For best results using multi-finger gestures, touch the screen with some space between your fingers.
- Go to Settings.
- Select Accessibility.
- Select VoiceOver.
- Turn on VoiceOver, tap VoiceOver Practice, then double-tap to start.
- Practice the following gestures with one, two, three, and four fingers:
- Tap
- Double-tap
- Triple-tap
- Swipe left, right up or down
- When you finish practising, tap Done, then double-tap to exit.
- To disable voice over, double-tap the toggle.
2. Zoom
Zoom accessibility allows users to enlarge aspects of specific items. For example, you can use zoom to look closer at images and picture details.
2.1. Enabling Zoom
- Go to Settings
- Select Accessibility.
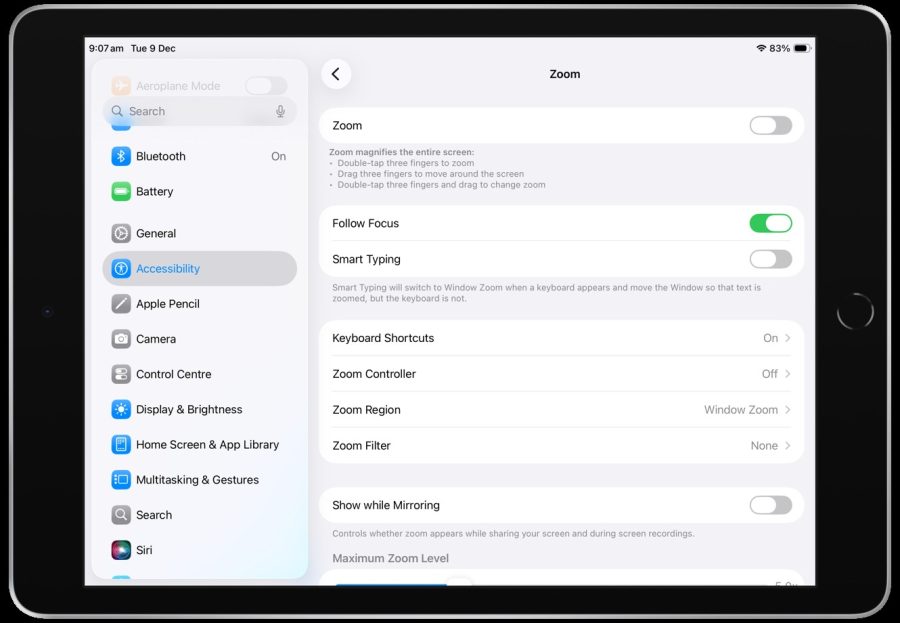
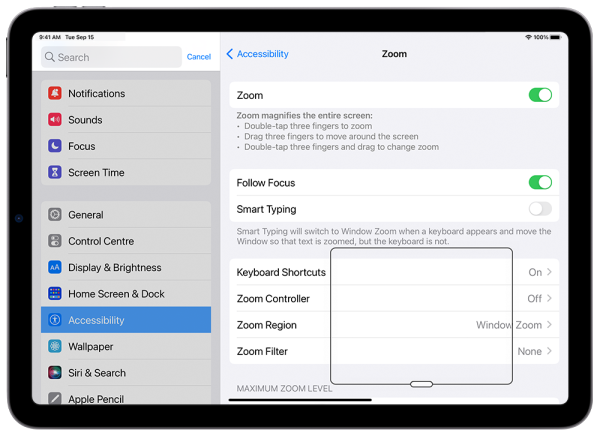
- Select Zoom.
- Toggle the Zoom switch from off to on.
2.2. Using Zoom
Once Zoom has been enabled, it will magnify the entire screen:
- Double-tap three fingers to zoom
- Drag three fingers to move around the screen
- Double-tap three fingers and drag to change zoom.
- Drag the handle at the bottom of the Zoom lens to move the Zoom lens.
From the Zoom menu, you can change the following settings:
- Follow Focus: Track your selections, text insertion point, and your typing.
- Smart Typing: Switch to Windows Zoom when a keyboard appears.
- Keyboard Shortcuts: Control Zoom using shortcuts on an external keyboard.
- Zoom Controller: Turn the controller on, set controller actions, and adjust the colour and opacity.
- Zoom Region: Choose Pinned Zoom, Full-Screen Zoom or Window Zoom.
- Zoom filter: Choose None, Inverted, Grayscale, Grayscale Inverted or Low light.
- Maximum Zoom Level: Drag the slider to adjust the level.
3. Magnifier
3.1. Enabling Magnifier
The Magnifier function uses your iPad camera to zoom in on street signs and other small text to make it easier to read. You can also use the Magnifier function to take temporary photos, turn on the flashlight, and adjust the camera’s lighting or brightness.
- Go to Settings.
- Select Accessibility
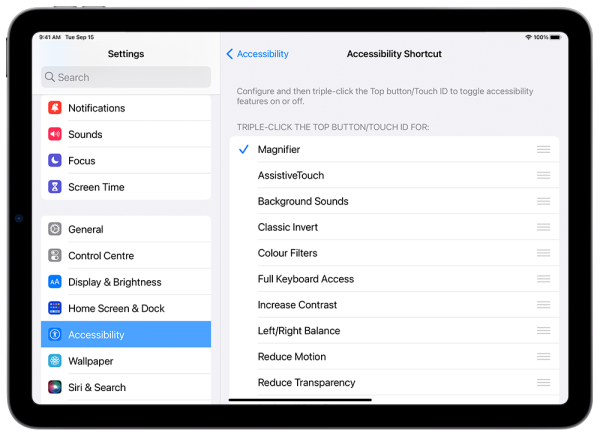
- Select Accessibility Shortcuts.
- Select Magnifier
- To start Magnifier, triple-click the home button to start the magnifier. Or find and select the magnifier icon on your home screen.
- To end Magnifier, swipe up from the bottom of the screen and close the Magnifier app.
3.2. Using Magnifier
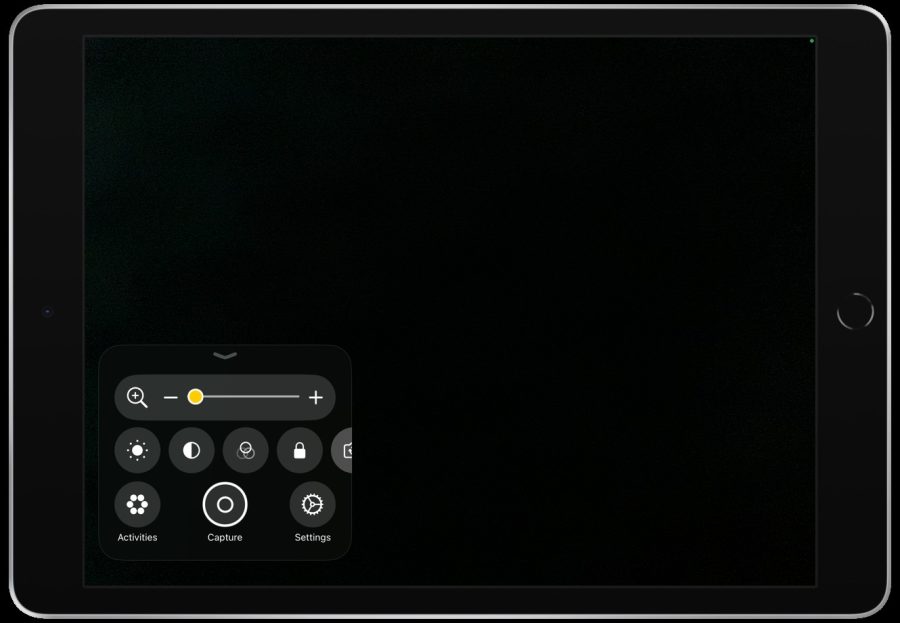
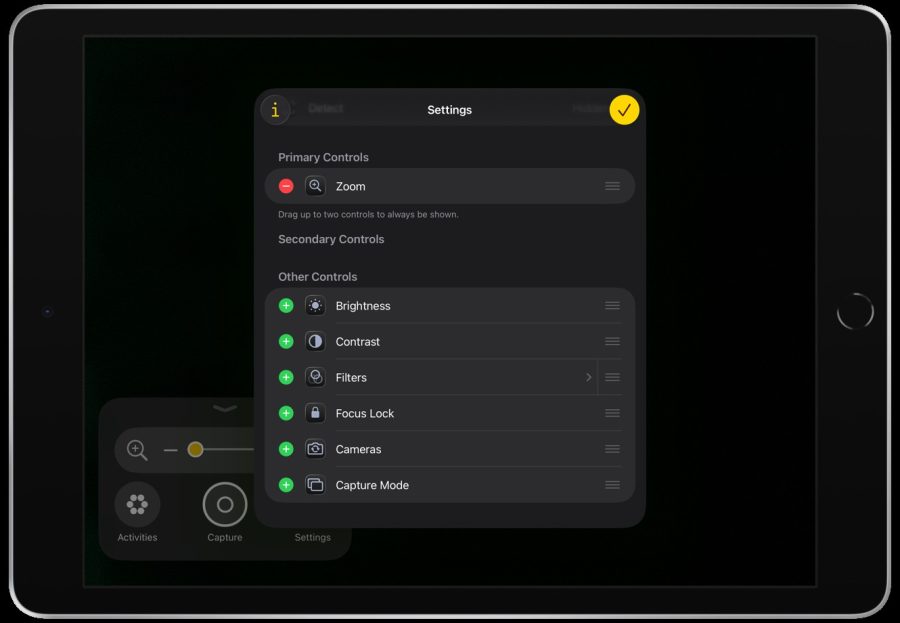
After starting the magnifier app, a camera-like interface will appear, as well as a few small icons at the bottom of the screen.
To adjust the image:
- Adjust the zoom level:Drag the zoom control slider left or right.
- Switch between the front and back camera: Tap the camera switch button (the camera icon with arrows) to switch between the cameras.
- Adjust the brightness:Tap the sun shaped brightness button, then drag the slider.
- Adjust the contrast:Tap the two-tone circle contrast button, then drag the slider.
- Apply colour filters:Tap the Venn diagram filters button.
- Turn on your iPhone’s flashlight:Tap the flashlight-shaped button.
- Save a magnified object as an image:Tap the large circular button in the bottom centre of the screen. You can then share the image via the share icon that appears at the bottom-left of the screen
- Detect people around you:On iPad Pro, you can detect people and help you maintain a physical or social distance from others.
If any of the above features are not displayed, tap the Settings icon and enable them under Secondary Controls.
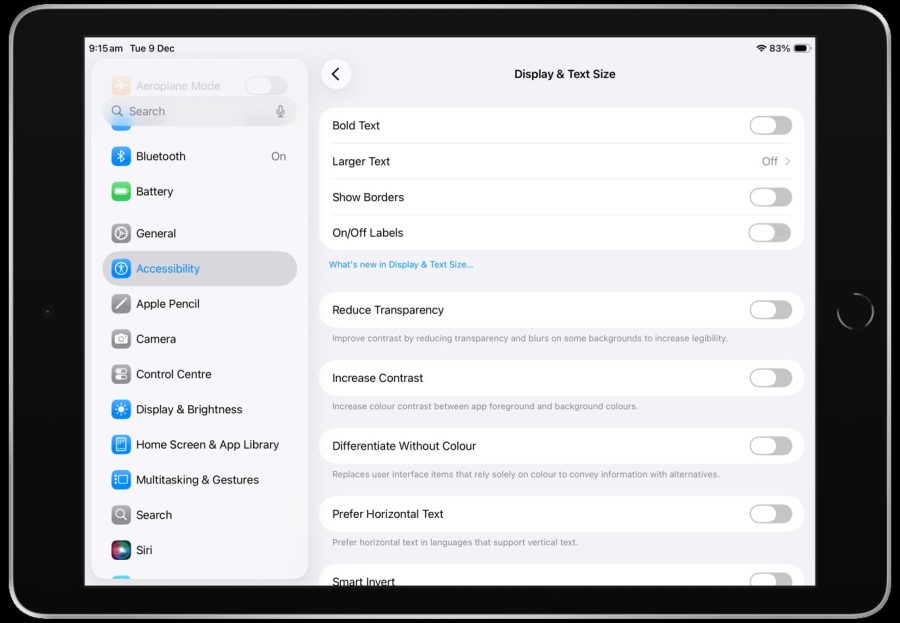
4. Display & Text Size
Display and Text Size allow users to personalise how text appears on their screen.
- Go to Settings.
- Select Accessibility.
- Select Display & Text Size.
- From the Display & Text Size menu, you can change the following settings:
-
- Bold Text: Display text in bold.
- Larger Text: Enable larger text then adjust the size using the slider.
- Show Borders: Makes onscreen elements (such as controls and buttons) easier to see by adding a border around them.
- On/Off Labels: Uses a vertical line to indicate when switches are on and a circle to indicate when they’re off.
- Reduce Transparency: Reduces transparency by blurring some background.
- Increase Contrast: Alters colours and text styling to improve contrast.
- Differentiate Without Colour: Replaces items that rely on colour with alternatives.
- Prefer Horizontal Text: Prefer horizontal text in languages that support vertical text.
- Smart Invert: Reverses the colours of the display except for images, media and some apps that use dark colour styles.
- Classic Invert: Reverses the colour of the display.
- Colour Filters: Colour filters can be used to differentiate colours by users who are colour blind and to aid users who have difficulty reading text on the display.
- Reduce White Point: This setting reduces the intensity of bright colours.
- Auto-Brightness: This setting automatically adjusts the screen brightness for current light conditions using the built-in ambient light sensor.

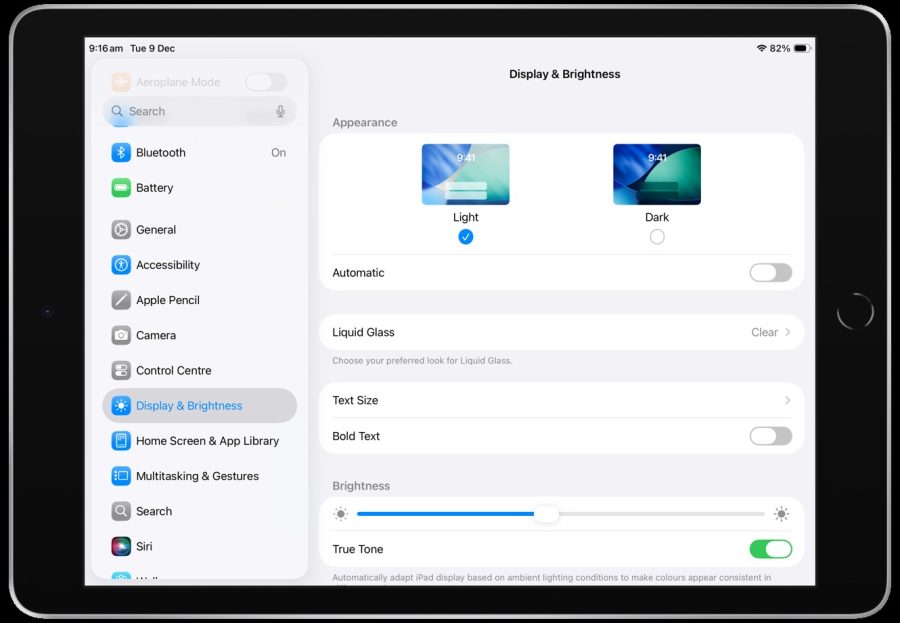
5. Display Settings
Display Settings allows users to personalise the appearance of the device’s system and how text is stylised on their screens.
- Open Settings.
- Select Display & Brightness.
- From the Display & Brightness menu, you can change the following settings:
- Appearance: Change between light and dark theme.
- Liquid Glass: Choose your preferred look for Liquid Glass. Clear is more transparent, revealing the content beneath. Tinted increases opacity and adds more contrast.
- Text Size: Use the slider at the bottom of the screen to adjust the size of the text.
- Bold Text: Embolden the text on your screen.
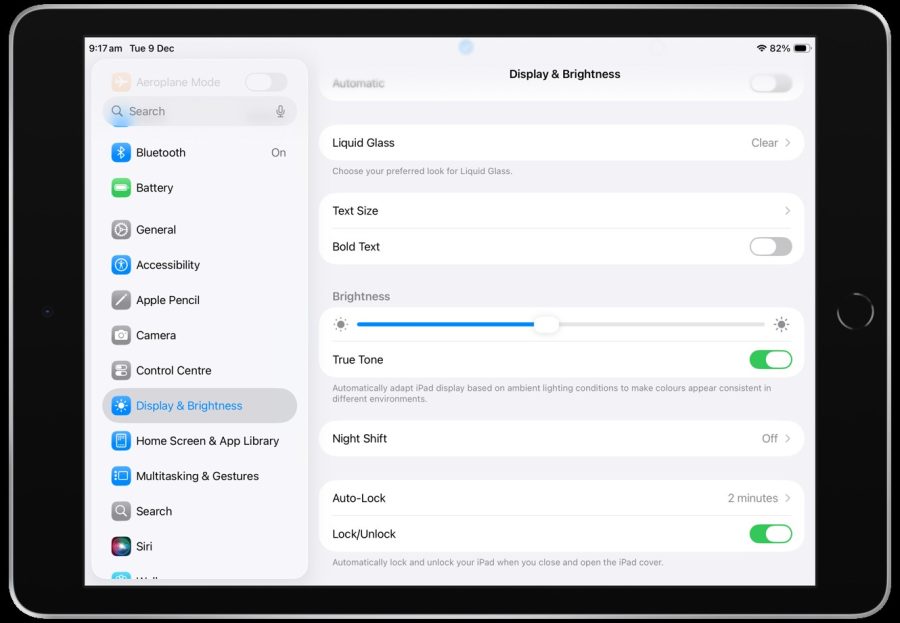
- Brightness: Use the slider to adjust device brightness.
- True Tone: Automatically adjusts display brightness depending on the user’s physical environment
- Night Shift: Automatically shifts the colour of the device’s display screen to the warmer end of the colour spectrum.
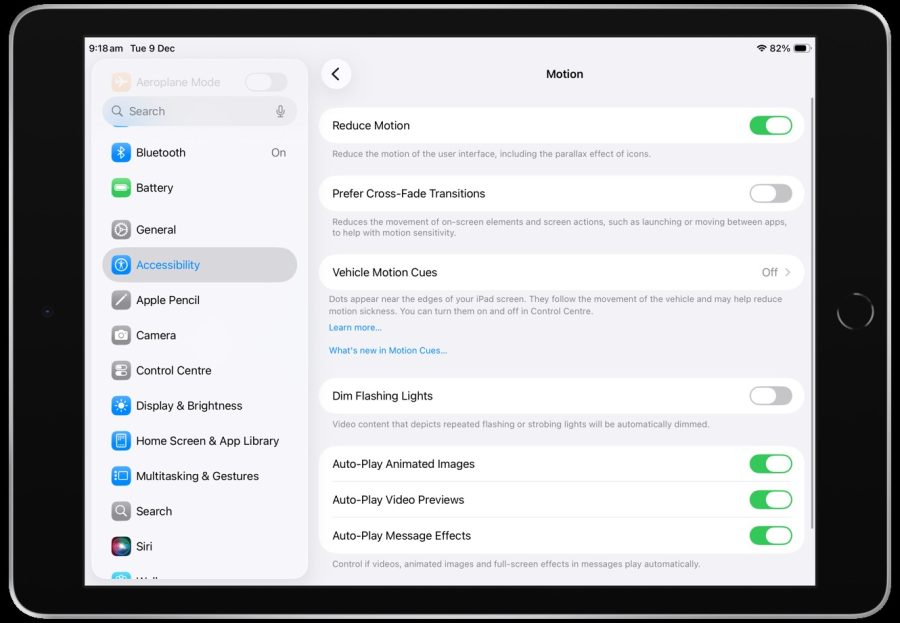
6. Motion
If you are sensitive to motion effects or screen movement on your device, you can use reduce motion to turn off these effects.
- Go to Settings.
- Search for Accessibility.
- Select Motion.
- From the Motion menu, you can change the following settings:
- Reduce Motion: Reduces the motion of the user interface, including the parallax effect of icons
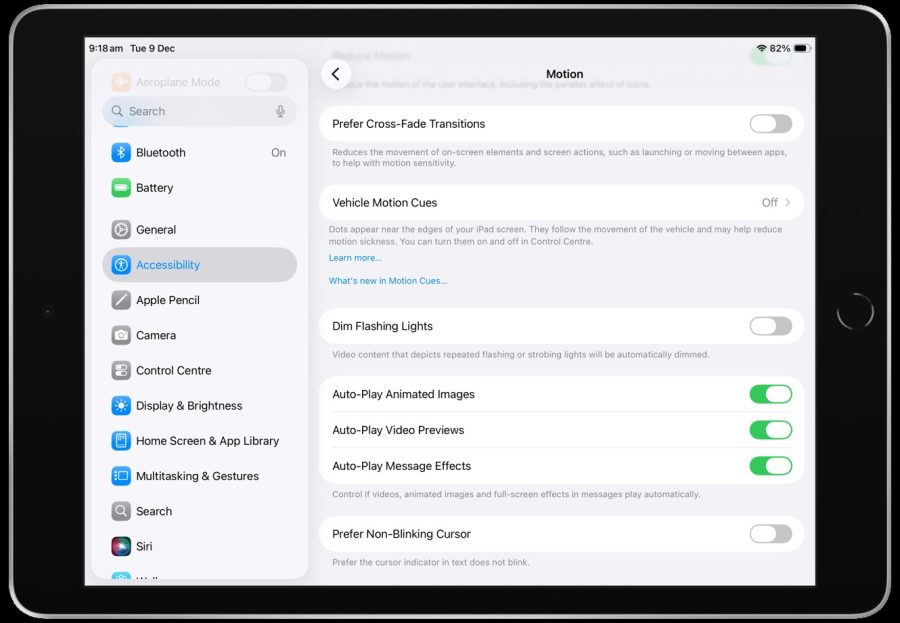
- Prefer Cross-Fade Transitions: Reduces the movement of on-screen elements and screen actions, such as launching or moving between apps, to help with motion sensitivity.
- Vehicle Motion Cues: Dots appear near the edges of your iPad screen. They follow the movement of the vehicle and may help reduce motion sickness.
- Dim Flashing Lights: Video content that depicts repeated flashing or strobing lights will be automatically dimmed.
- Auto-Play Animated Images: Allows apps to automatically play animated images.
- Auto-Play Video Previews: Allows apps such as the App Store to automatically play video previews.
- Auto-Play Message Effects: Allows the Messages app to automatically play full-screen effects. If you turn this setting off, you can still manually play effects by tapping Replay below the message bubble.
- Prefer Non-Blinking Cursor: Prefer the cursor indicator in text does not blink.
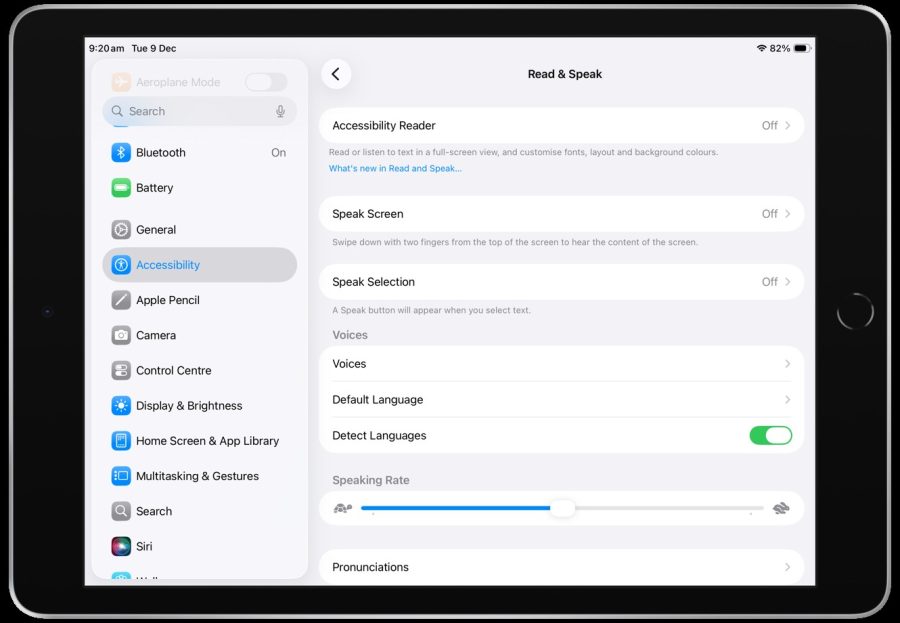
7. Read & Speak
Even if VoiceOver is turned off, you can have iPad read text on the screen out loud. Have iPad read the entire screen or a specific selection. Or hear what you type spoken out loud, character by character or word by word.
- Open Settings.
- Select
- Select Read & Speak.
- From the Spoken Content menu, you can change the following settings:
- Accessibility Reader: Turn on Accessibility Reader to enable the Accessibility Shortcut for this feature. It allows you to listen to text in a full-screen view and customise fonts, layouts, and background colours. You can also turn on Autoplay if you want Accessibility Reader to automatically read the text aloud.
To start using Accessibility Reader, do either of the following:
- Accessibility Reader: Turn on Accessibility Reader to enable the Accessibility Shortcut for this feature. It allows you to listen to text in a full-screen view and customise fonts, layouts, and background colours. You can also turn on Autoplay if you want Accessibility Reader to automatically read the text aloud.
-
-
- Use the Accessibility Shortcut: Open an app, triple-click the home / side button on your iPad, then tap Accessibility Reader.
- Use Control Centre: Open an app, open Control Centre, the tap Accessibility Reader.
-
-
- Speak Screen: To hear the entire screen, swipe down with two fingers from the top of the screen. You can also customise the behaviour of this feature by doing any of the following:
-
-
- Highlighting: Customise the highlight style, colour, and selection for in-app text that is spoken aloud.
- Show Controller: Turn on Show Controller to keep the Speak Screen controls on the screen.
- Controller Actions: Choose what happens when you long press or double-tap the screen. You can also reduce the size of the speech controller when you’re not using it.
-
-
- Speak Selection: Turn on Speak Selection to have iPad speak the text you select. You can customise the highlighting style. To use the feature:
-
-
- Select the text you want spoken, then tap Speak.
-
-
- Show Controller (Available on Speak Screen page): Show the controller for quick access to Speak Screen and Speak on Touch.
- Highlight Content (Available on Speak Screen page or Speak Selection page): iPad can highlight words, sentences, or both as they’re spoken. Users can customise the highlight colour and style.
- Voices: Choose a voice and dialect.
- Default Language: Choose a default language that iPad will speak.
- Detect Languages: Turn on Detect Languages to have iPad automatically detect and speak multiple languages.
- Speaking Rate: Drag the slider to adjust the speaking rate.
- Pronunciations: Users can dictate or spell out how they want certain phrases to be spoken.
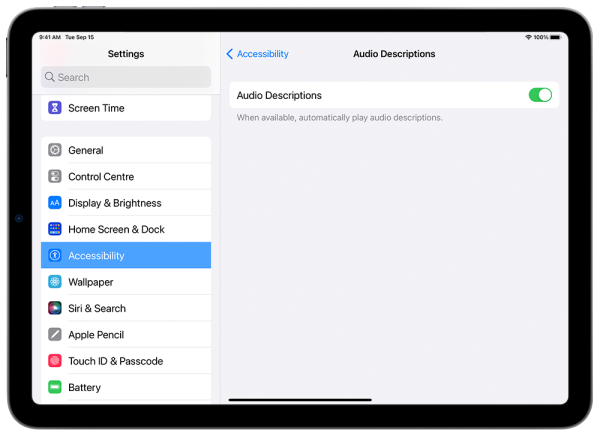
8. Audio Descriptions
If there is video content that includes audio descriptions of scenes, the iPad can play the descriptions. Users can watch movies with detailed audio descriptions on their iPad. Look for the Audio Description icon under the movie title on the Apple TV app or the iTunes Store.
- Go to Settings.
- Select Accessibility.
- Select Audio Descriptions.
- Tap the toggle to enable Audio Descriptions.
Hearing-Related
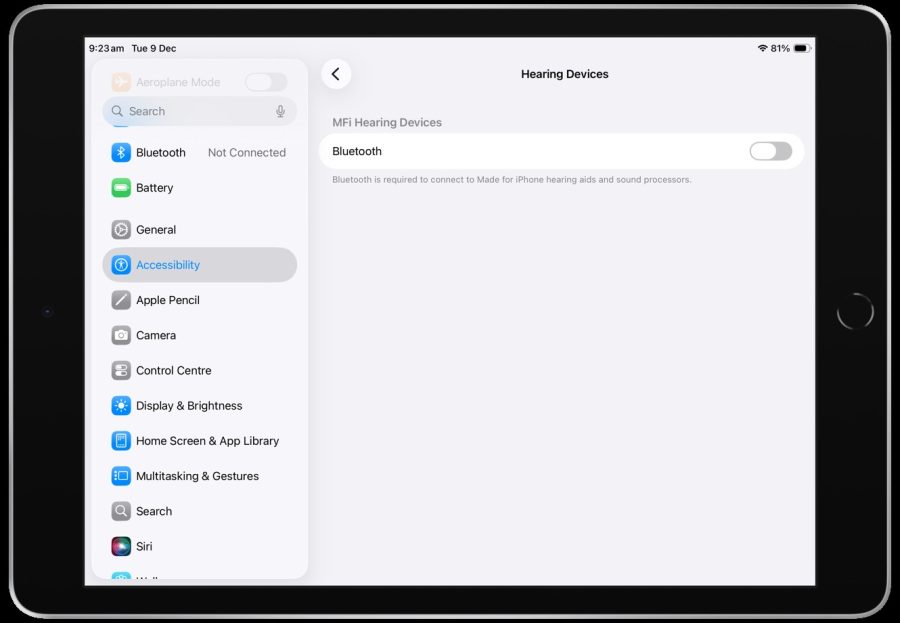
1. Hearing Devices
1.1 Connecting Hearing Devices
- Go to Settings.
- Select Accessibility.
- Select Hearing Devices.
- Tap the Bluetooth toggle on.
Note: If Bluetooth is enabled, your iPad will automatically search for a hearing device. - When the name of the hearing aid appears below MFi Hearing Devices (this can take a short while), select it and respond to the pairing request.
- From the Hearing Devices menu, you can also enable Hearing Aid Compatibility to improve audio quality with some hearing aids.
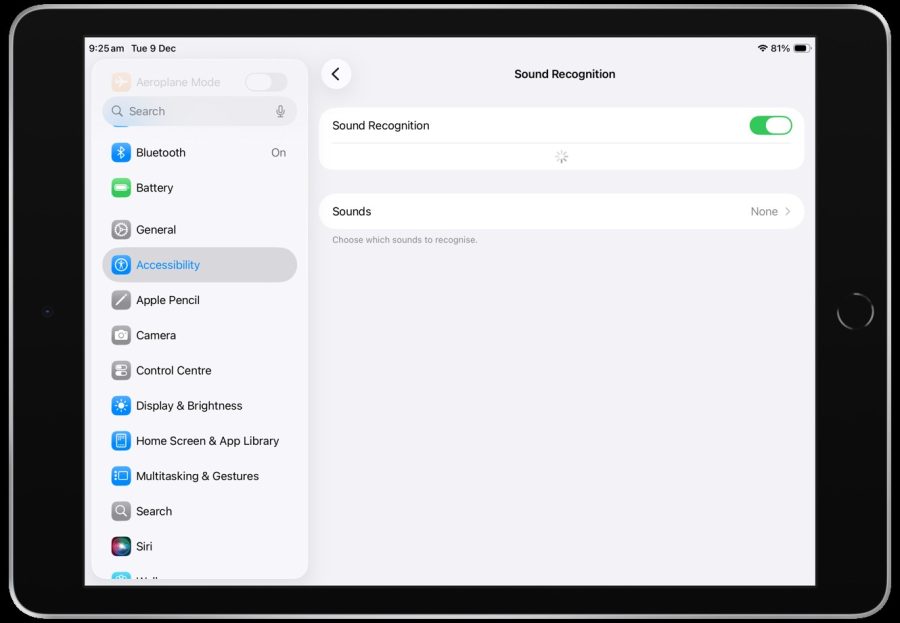
2. Sound Recognition
Sound Recognition listens for certain sounds and uses on-device intelligence to notify users when a specific sound is detected. iPads can continuously listen for certain sounds (for example, a crying baby, doorbell, or siren) and notify users when it recognises these sounds.
Note: Do not rely on your iPad to recognise sounds in circumstances where you may be harmed or injured, in high-risk or emergencies, or for navigation.
- Go to Settings.
- Select Accessibility.
- Select Sound & Name Recognition.
- Select Sound Recognition.
- Turn on Sound Recognition.
- Tap Sounds, then turn on the sounds you want the iPad to recognise.
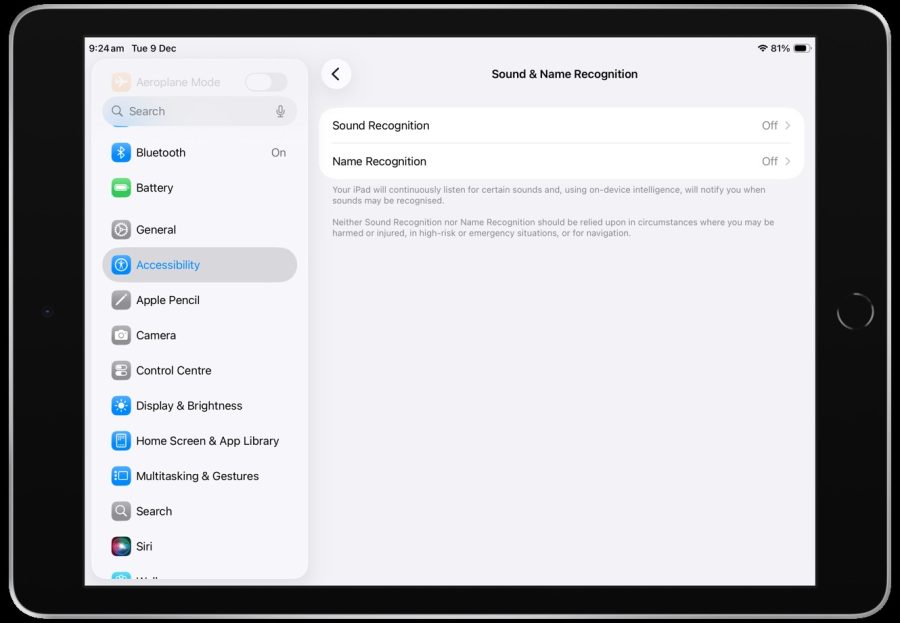
3. Name Recognition
Your iPad can continuously listen for your name and notify you when it recognises it. You can record how you or someone else says your name to help iPad recognise your name.
Note: Name Recognition is available on iPadOS 26 and later. Name Recognition is only available in English. Don’t rely on your iPad to recognise your name in circumstances where you may be harmed or injured or in high-risk or emergency situations.
- Go to Settings.
- Select Accessibility.
- Select Sound & Name Recognition.
- Tap Name Recognition, then tap Set Up Name Recognition.
- Follow the onscreen instructions.
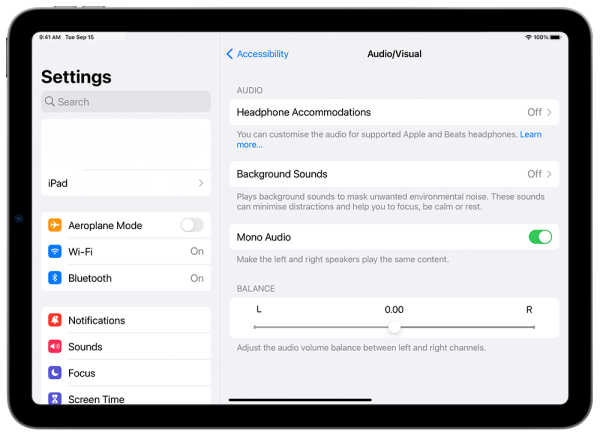
4. Audio & Visual
Adjust audio and visual accessibility settings to suit your hearing needs.
- Go to Settings.
- Select Accessibility.
- Select Audio & Visual.
- From the Audio & Visual menu, you can change the following settings:
- Headphone Accommodations: Customise the audio for supported Apple and Beats headphones.
- Background Sounds: Plays background sounds to mask unwanted environmental noise.
- Live Listen: You can stream sound from the microphone on iPad to your MFi hearing devices or AirPods. This can help you hear better in some situations – for example, when having a conversation in a noisy environment. Position iPad near the sound source, then sounds around you will become louder.
- Mono Audio: Turn on to combine the left and right channels to play the same content.
- Always Show Volume Control: Display volume controls on the lock screen when listening to audio, such as podcasts.
- Add Voice Isolation: Adds Isolate as an additional option to Enhance Dialogue. When used, dialogue is completely isolated for people who need maximum clarity. Other elements of the audio mix will be substantially reduced.
- Balance: Adjust the audio volume balance between left and right channels. Drag the Left-Right Stereo Balance slider.
- Add Audio in Calls: When you allow apps to include audio in video and voice calls, both audio and microphone input will be added to a call. Muting the microphone will silence all audio.
- Call Audio Routing: Call audio routing determines where audio will be heard during a phone call or FaceTime audio.
5. Subtitles & Captioning
When playing video content in a supported app, users can turn on subtitles and closed captions if they are available.
- Go to Settings.
- Select Accessibility.
- Select Subtitles & Captioning.
- From the Subtitles & Captioning menu, you can change the following settings:
- Closed Captions + SDH: When you play video content in a supported app, you can turn on subtitles and closed captions (if available). iPad usually shows standard subtitles and captions, but you can also choose special accessible captions – such as subtitles for the deaf and hard of hearing (SDH) – if available.
- Style: Choose from available built-in caption styles including Transparent Background, Large Text, Classic, and Outline T
- Show Audio Transcriptions: Display audio transcriptions for announcements from HomePod.
- Show when Muted: Automatically turn on subtitles when the volume is muted or turned all the way down.
- Show on Skip Back: Temporarily turn on subtitles when you skip back, up to 30 seconds.
General and Mobility-Related
1. Touch
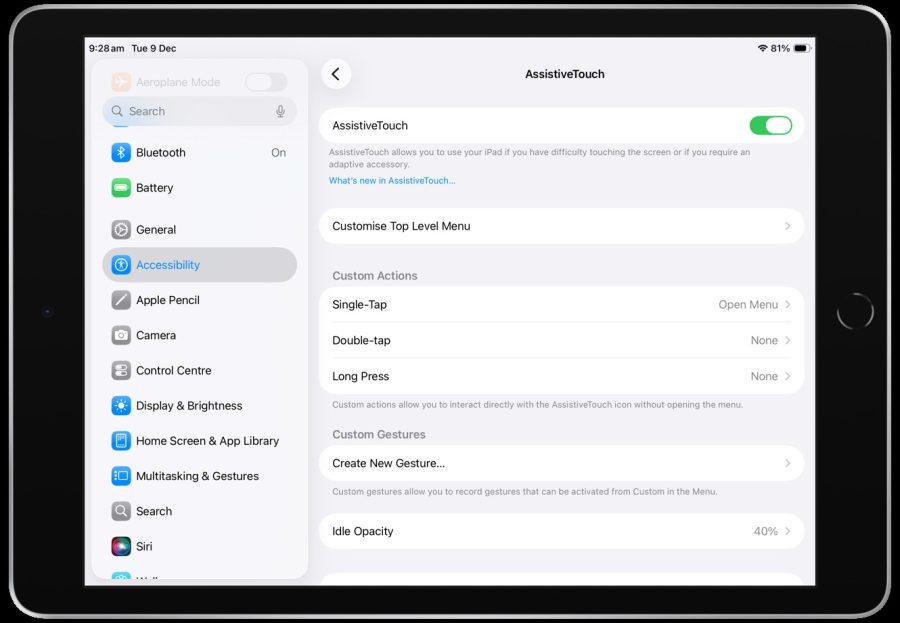
1.1. AssistiveTouch
With AssistiveTouch on iPad, you can adapt the touchscreen to fit your needs. If certain gestures don’t work for you, replace them with a tap or alternative gesture, or use a simple sound. You can also use AssistiveTouch when you need to press iPad buttons. You can use AssistiveTouch without any accessory or with a compatible adaptive accessory (such as a joystic).
- Go to Settings.
- Search for Accessibility.
- Select Touch.
- Tap AssistiveTouch.
- Toggle switch to switch on.
- A circular menu will now appear on the screen. You can move the menu anywhere along the edge of your device.
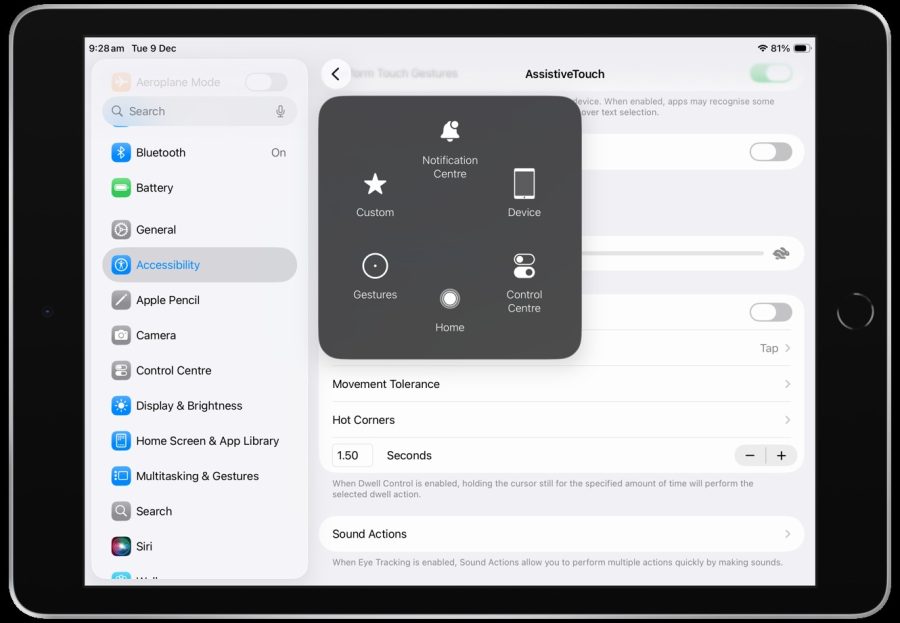
- Tap the button once to open the AssistiveTouch menu.
- From the Assistive Touch Menu, you can perform the following actions and more:
- Go to the Home Screen
- Double-tap
- Perform multifinger gestures
- Perform scroll gestures
- Activate the Accessibility Shortcut
- Lock the screen
- Adjust the volume
- Summon Siri
- Restart the device
- Capture a screenshot
- Simulate shaking the device
- Tap anywhere outside of the AssistiveTouch menu to close it.

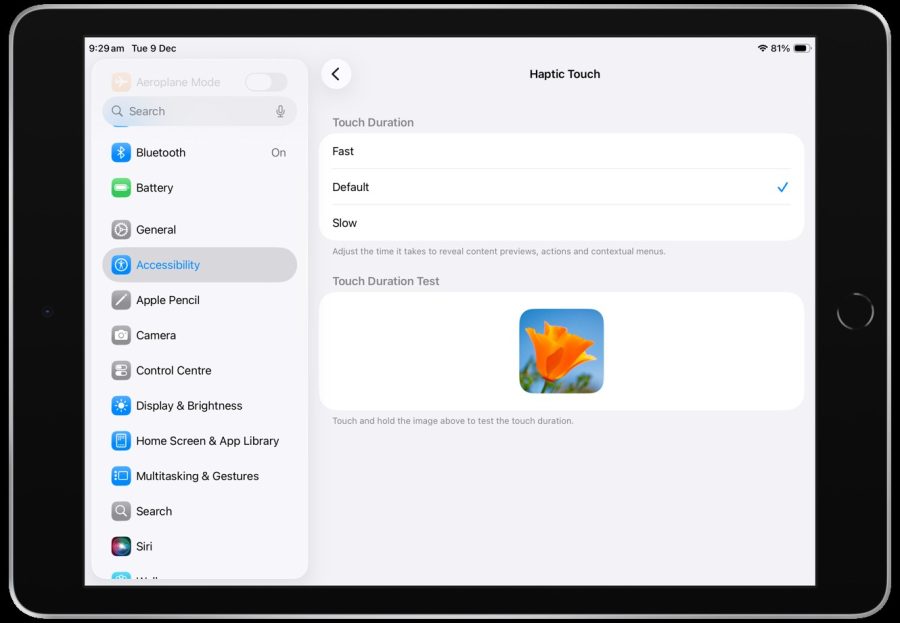
1.2. Haptic Touch
Haptic touch allows users to press on the display using different lengths of time to reveal content previews, actions, and contextual menus.
- Go to Settings.
- Select Accessibility.
- Select Touch.
- Select Haptic Touch.
- From the Haptic Touch menu, you can choose between Fast, Default, or Slow for Touch Duration and perform a Touch Duration Test.
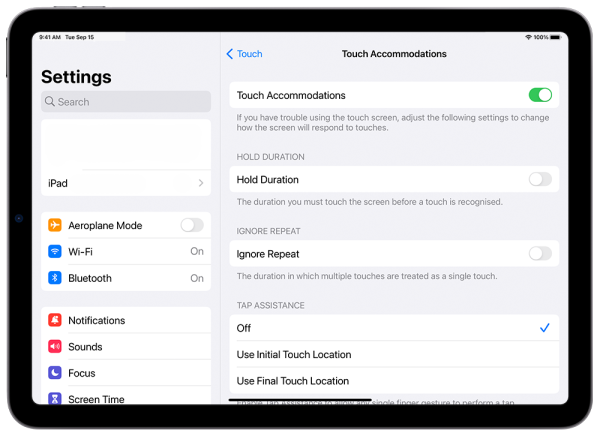
1.3. Touch Accommodations
Adjust how the screen responds to touch with Touch Accommodations. Control how long a screen can be touched before it’s recognised, or whether repeat touches are ignored. This way, a user can touch anywhere on the screen without accidentally performing an action.
- Go to Settings.
- Select Accessibility.
- Select Touch.
- Select Touch Accommodations.
- From the Touch Accommodations menu, you can change the following settings:
- Hold Duration: Determine how long you press the screen before your touch is recognised.
- Ignore repeat: Set a duration during which multiple taps will be recognised as one tap.
- Tap Assistance: Allow any single finger gesture to perform a tap.
1.4. Face ID & Attention
Face ID & Attention is a feature that allows people to change the way the iPad opens. Usually, iPads utilise Face ID to open their phone, however, it requires the full attention of the user, meaning that the user’s eyes have to be focusing on the screen. For those who are unable to do so, Apple has implemented a feature within the accessibility category to turn this off.
- Go to Settings.
- Select Face ID & Passcode.
- From the Face ID & Attention menu, you can change the following settings:
- Require Attention for Face ID: When enabled, your device will require you to look directly at your phone to unlock it.
- Attention Aware Features: iPad will check for attention before dimming the display, expanding a notification when locked or lowering the volume of some alerts.
- Haptic on Successful Authentication: Play a haptic when Face ID successfully unlocks the iPad, authorises Apple Pay or verifies iTunes and Apple Store purchases.
2. Switch Control
Switch Control is an accessibility feature that allows folks with limited mobility to have full use of their device with the help of ability switches and other adaptive devices. Items on the screen are sequentially highlighted and can be activated by tapping, moving your head in front of the selfie camera, or pressing adaptive switches.
- Open Settings
- Select Accessibility.
- Select Switch Control.
- Tap on the Switch Control toggle to enable it.
3. Voice Control
With Voice Control, users can navigate and interact with their device using their voice to tap, swipe, type and more.
Note: When Voice Control is on, you use Voice Control to dictate text; standard iPadOS Dictation isn’t available. If you just want to enter text using Dictation, without controlling your iPad with your voice, see Dictate text. Voice Control isn’t available in all languages. See the iOS and iPadOS Feature Availability website.
- Go to Settings.
- Select Accessibility.
- Select Voice Control.
- Tap on the toggle to Set Up Voice Control.
- A download will begin in the background. When the download is complete, a microphone will appear in the status bar of your device that indicates that Voice Control is listening or not listening.
- To view the full list of commands, select the Commands from the Voice Control menu.
- You can use the interactive Voice Control Tutorial to get familiar with Voice Control and practice essential command.
4. Keyboards & Typing
4.1. Keyboards
If you have difficulties using the touchscreen, you can control your iPad using shortcuts on an external keyboard.
Note: An external keyboard needs to be connected via Bluetooth before it can be used.
- Go to Settings.
- Select Accessibility.
- Select Keyboards.
- Select Full Keyboard Access.
- Tap the toggle to enable Full Keyboard Access.
- You can now use the external keyboard to control your iPad.
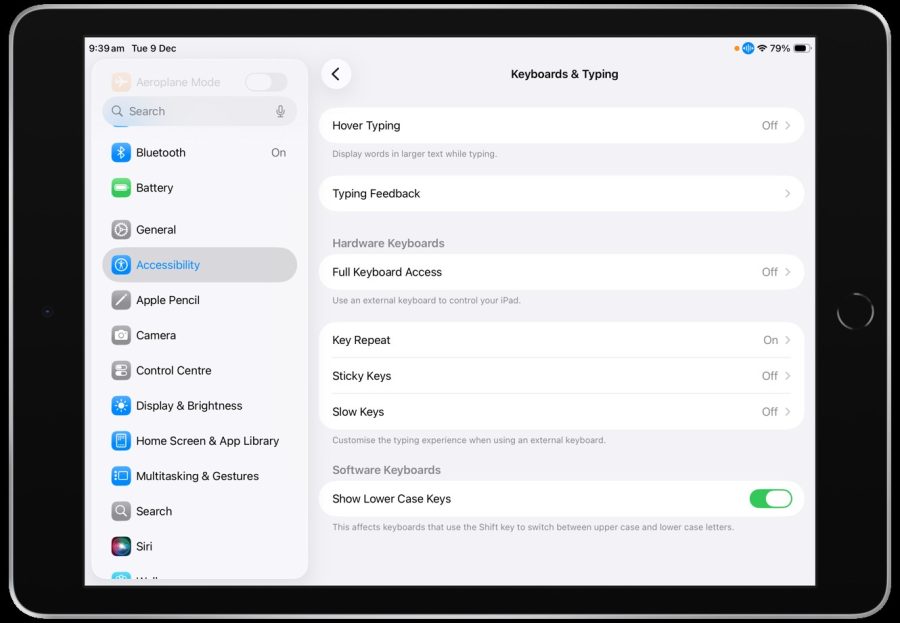

4.2. Typing Feedback
With Typing Feedback, your iOS or iPadOS device can give you feedback as you type as well as speak text corrections and word suggestions.
- Go to Settings.
- Select Accessibility.
- Select Typing Feedback.
- From the Typing Feedback menu, you can change the following settings:
- Character feedback:
- Turn on Characters to have your device speak letters as you type.
- Turn on Character Hints to have your device speak the phonetic name of the letter.
- Speak Words: Have your device speak a word as you type it.
- Speak Auto-text: Have your device speak auto-corrections and auto-capitalisations as they appear.
- Hold to Speak Predictions: You can touch and hold on a word to hear text predictions as you type.
- Character feedback:
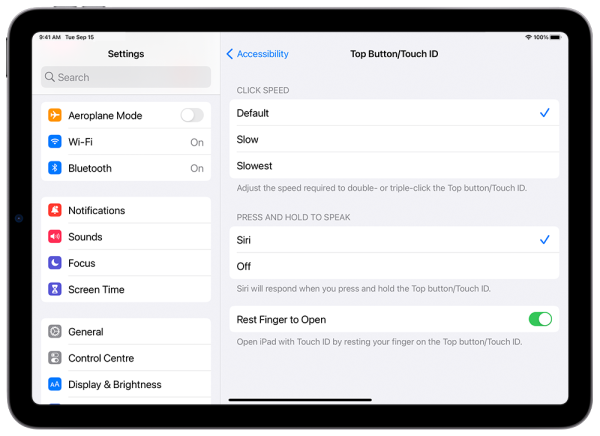
5. Top / Home Button
Apple provides the opportunity for those with limited mobility to use the top button more efficiently by giving users the ability to change the button’s response time.
- Go to Settings
- Select Accessibility.
- Select Top Button.
- From the Top button menu, you can change the following settings:
- Click speed: Adjust the speed required to double or triple-click the side button.
- Press and Hold to Speak: Siri will respond when you press and hold the top button.
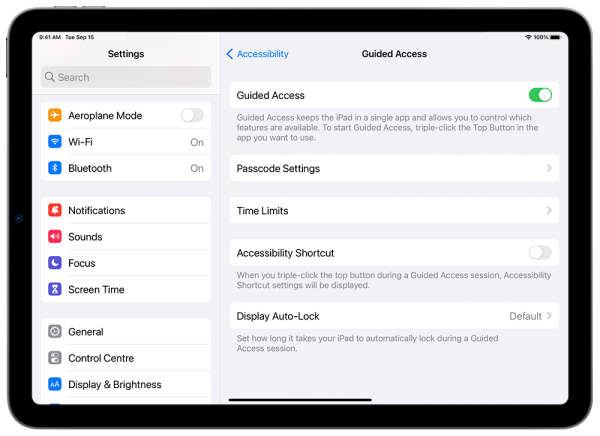
6. Guided Access
Guided Access keeps the iPad in a single app and allows the user to control which features are available during a session.
6.1. Enabling Guided Access
- Go to Settings.
- Select Accessibility.
- Select Guided Access.
- Tap toggle the switch from off to on.
- From the Guided Access menu, you can change the following settings:
- Passcode Settings: Tap Set Guided Access Passcode, then enter a passcode.
- Time Limits: Play a sound or speak the time remaining before a Guided Access session ends.
- Accessibility Shortcut: Turn the shortcut on or off during Guided Access sessions.
- Display Auto-Lock: Set how long it takes the iPad to automatically lock during a Guided Access session.
6.2. Starting Guide Access
- Open the app you want to use.
- Turn on Guided Access using accessibility shortcuts.
- Users can circle any area of the screen they would like to disable. Drag the mask into position or use the handles to adjust its size.
- Tap Options, (or Session Settings on some devices), then turn on or off any of the following:
- Top Button (or Sleep/Wake Button)
- Volume Buttons
- Motion (to prevent the iPad from switching from portrait to landscape or from responding to other motions)
- Keyboards
- Touch
- Time Limit
- Tap Start
6.3. Ending Guided Access Session
Do any of the following:
- On an iPad with a Home Button: Double-click the Home button, then unlock with Touch ID (if enabled). Or triple-click the Home button, then enter the Guided Access passcode.
- On iPad Air (4th generation): Double-click the top button, then unlock with Touch ID (if enabled). Or triple-click the top button, then enter the Guided Access passcode.
- On an iPad with Face ID: Double-click the top button, then unlock with Face ID (if enabled). Or triple-click the top button, then enter the Guided Access passcode.
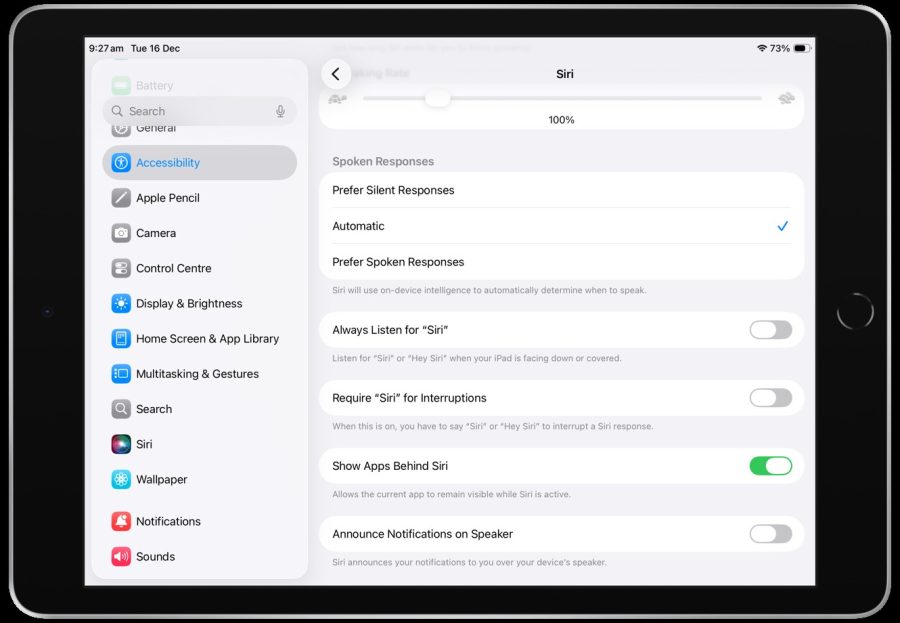
7. Siri
Siri is often the easiest way to start using accessibility features with the iPad. With Siri, users can open apps, turn settings features on or off, or use Siri as a personal assistant.
- Go to Settings.
- Select Accessibility.
- Select Siri.
- From the Siri menu, you can change the following settings:
- Type to Siri:Can choose between enabling type to Siri or listen for voice input when you press and hold the side/home button
- Siri Pause Time: Set how long Siri waits for you to finish speaking. Choose between Default, Longer, and Longest.
- Speaking Rate: Manage Siri’s Speaking Rate by controlling the slider.
- Spoken Responses:Choose between Prefer Silent Responses, Automatic, or Prefer Spoken Resp
- Always Listen for “Siri”:Listen for “Siri” or “Hey Siri” when your iPad is facing down or covered.
- Require “Siri” for Interruptions: When this is on, you have to say “Siri” or “Hey Siri” to interrupt a Siri response.
- Show Apps Behind Siri:Allows the current app to remain visible while Siri is active.
- Announce Notifications on Speaker: Siri announces your notifications to you over your device’s speaker.

8. Accessibility Shortcuts
Add your favourite features to the Accessibility Shortcut, and you will be able to enable and disable them by triple-clicking the top button.
Add Accessibility Shortcut
- Go to Settings.
- Select Accessibility.
- Select Accessibility Shortcut.
- Tap on the accessibility features you want to enable by using the shortcut.
- If one feature is selected, triple-click the top button to enable/disable it.
- If more than one feature is selected, triple-click the top button and then select which feature to enable/disable from the menu.
Keyboard Shortcuts
- Go to the next item: Tab
- Go to the previous item: Shift–Tab
- Activate the selected item: Spacebar
- Go to the Home Screen: Command–H
- Open the App Switcher: Tab–A
- Open Control Centre: Tab–C
- Open Notification Centre: Tab–N
- Show Help: Tab–H
Additional Resources
To learn more about the accessibility features found on iOS, visit the Apple website through the following links:
For iPad specific features, click this link: https://support.apple.com/en-au/guide/ipad/ipad9a2465f9/ipados
For more general information on accessibility, including features found on other Apple devices, click this link: https://www.apple.com/au/accessibility/