How to find and use the accessibility features on Stock Android Smartphone
Accessibility Settings
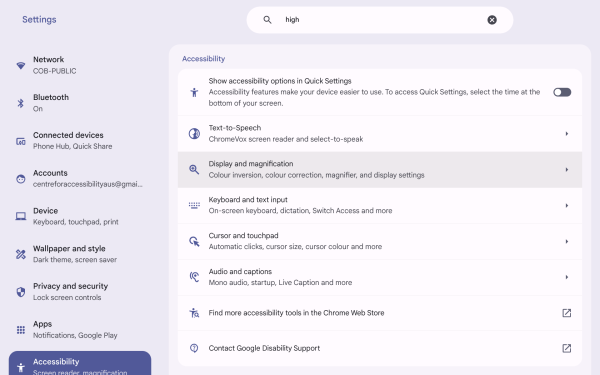
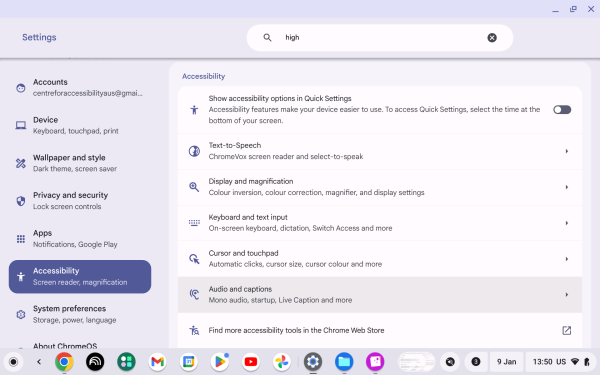
Finding the Accessibility Settings
- Go to the application menu.
- Find and click on Settings.
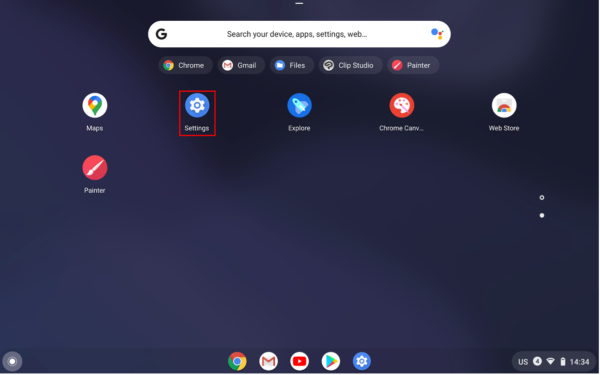
- Click on “Accessibility” at the left menu bar.
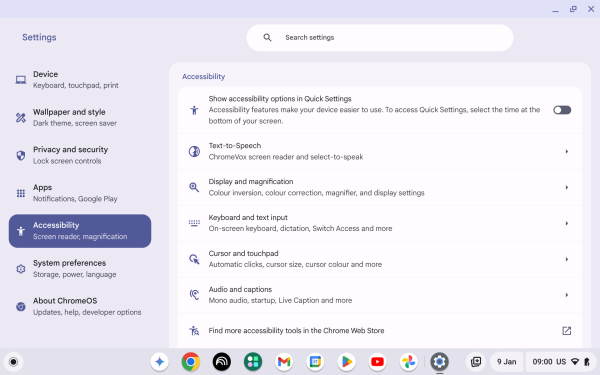
Vision-Related
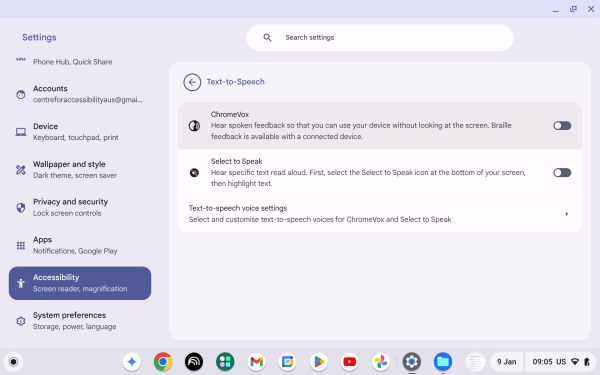
1. Text-to-Speech
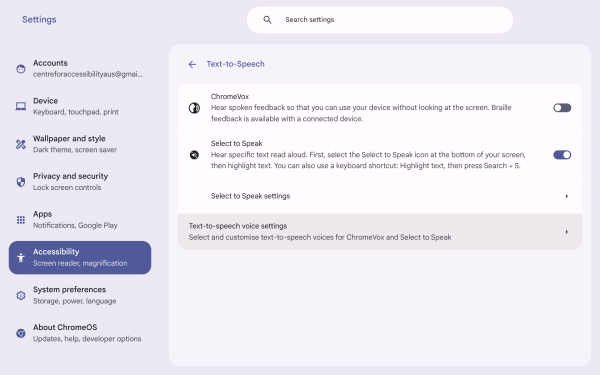
1.1. ChromeVox
Chromebooks have a built-in screen reader called ChromeVox that makes Chrome Operating System accessible to the visually impaired. To enable ChromeVox users will need to:
- Go Settings.
- Go to Accessibility.
- Go to the Text-to-Speech section.
- Toggle the “ChromeVox” switch to On.
- Now the device will read through the content being selected. Also, the reading section will be circled by an orange rectangle and reading content will be displayed at the top of the screen.
- To change reading content users can use either pointer or press Tab on their keyboard.
1.2. Select to Speak
Users can use the Select to Speak feature to make the device read the entire page or just selected parts aloud. To do this user will need to:
- Go to Settings – Accessibility – Text-to-Speech.
- Find and turn on “Select to Speak”.
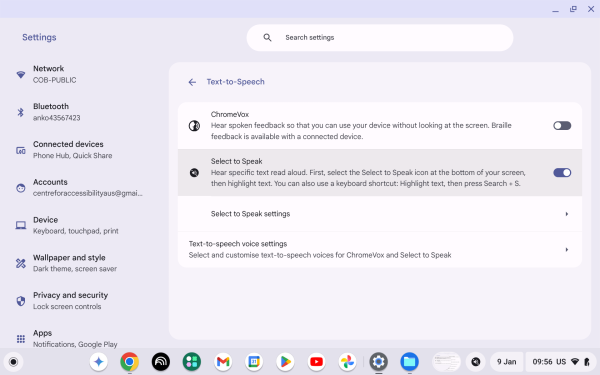
- Highlight the content and press Search + S.
- The reading content will be highlighted by the purple rectangle.
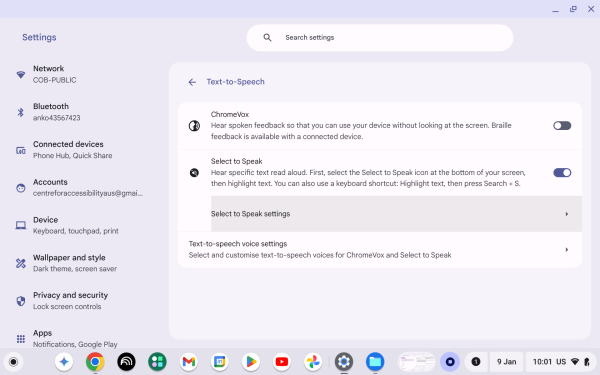
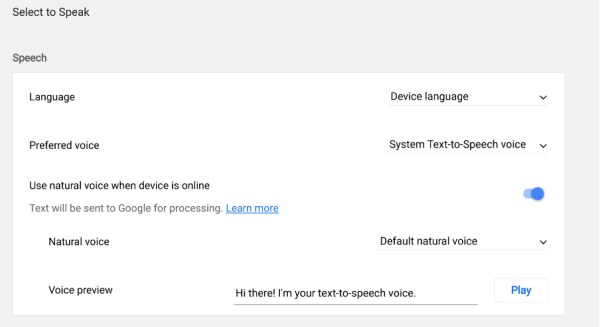
1.3. Select to Speak settings
Users can also access Select to Speak settings to change elements according to their preferences. To do this user will need to:
- Go to Settings – Accessibility – Text-to-Speech
- Click “Select to Speak setting”.
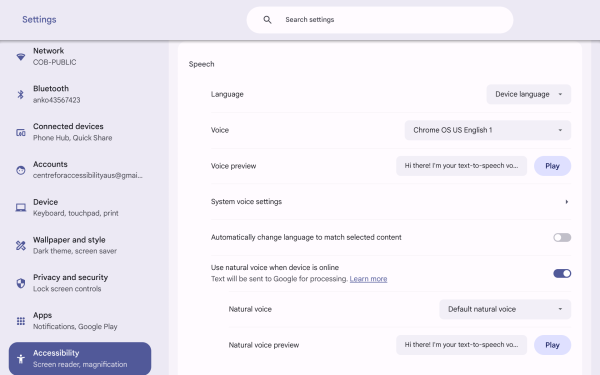
- Users can now change their speaking voice under the Speech section.
- Language: The user can select which language to use.
- Voice: The user can select what voice to use.
- Use natural voice when the device is online: To use a more realistic, lifelike voice, select Use natural voice when the device is online.
- Natural voice: The user can select what natural voice to use.
- Voice preview: The user can hear the voice in advance before applying the settings.
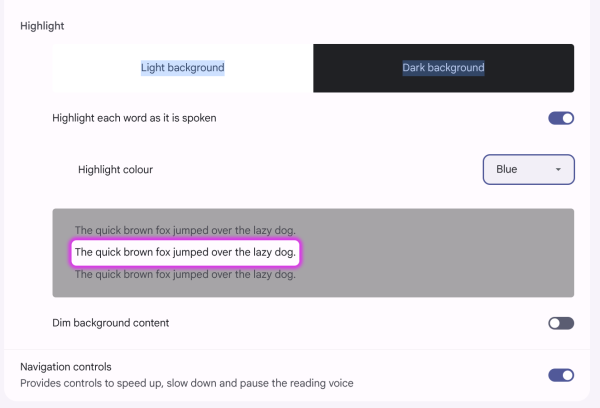
- There are more functions related to highlighting under the highlighting section:
- Highlight each word as it is spoken: This will highlight the reading content while the system reads it.
- Highlight colour: The user can select the colour of the highlighted word.
- Dim background content: System will shade the background while it’s reading.
- Navigation controls: Provides options for users to speed up, slow down, and pause the reading voice.
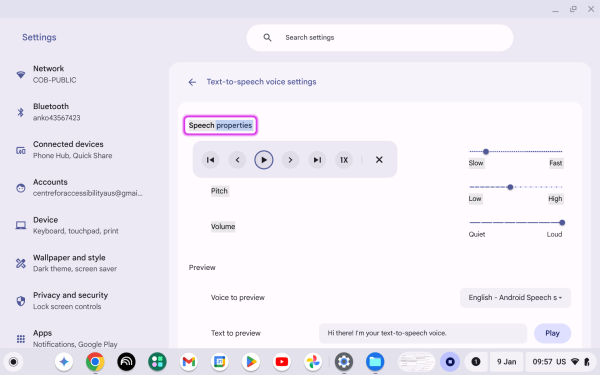
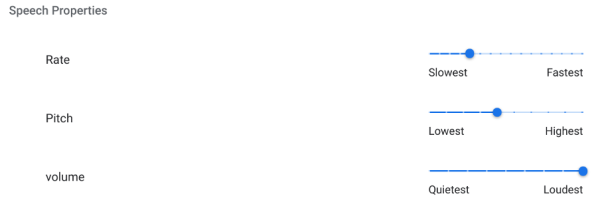
1.4. Text-to-Speech voice setting
Users can customise text-to-speech voice by:
- Go to Settings – Accessibility – Text-to-Speech.
- Find and click on “Text-to-Speech voice settings”.
- Users can change “Rate”, “Pitch”, “Volume” and “Language”.
2. Display and magnification
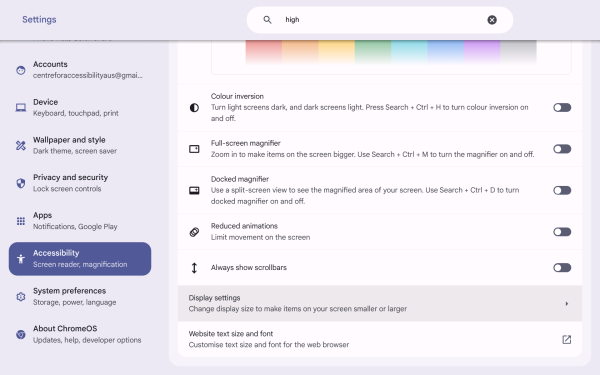
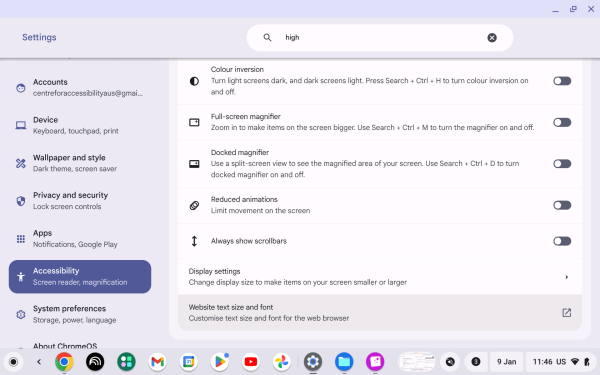
2.1. Colour inversion
Colour inversion is an accessibility feature that helps people with low vision improve readability by changing page colours. To use this feature:
- Go to Settings – Accessibility – Display and magnification.
- Turn on “Colour inversion”.
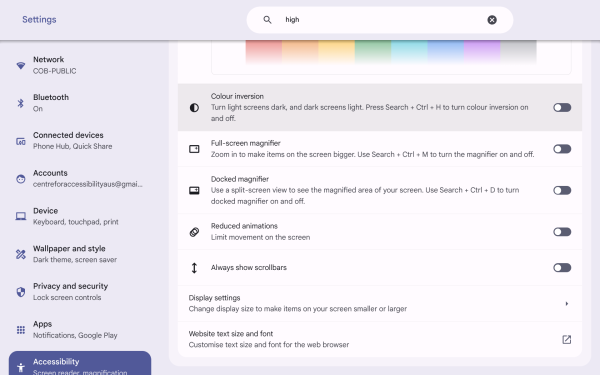
2.2. Full-Screen magnifier
Full-screen magnifying allows users to browse the enlarged screen, and the magnification can be adjusted according to the user’s needs. To use this function:
- Go to Settings – Accessibility – Display and magnification.
- Turn on the “Full-screen magnifier”.
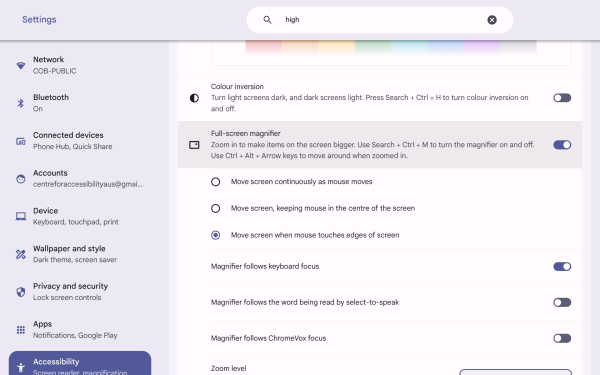
- Click on the “Zoom level” to adjust the magnification.

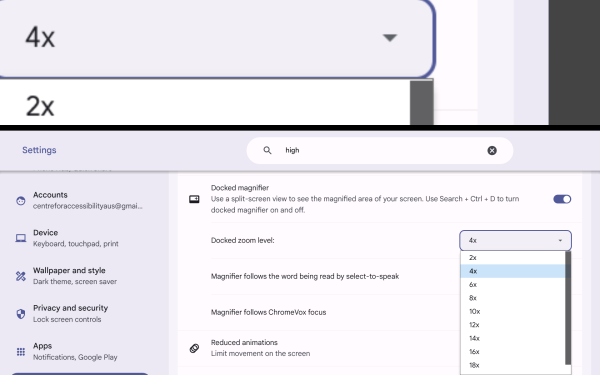
2.3. Docked magnifier
Docked magnifier will zoom in on the section where the pointer is and display it at the top of the screen instead of zooming in on the entire screen.
- Go to Settings – Accessibility – Display and magnification.
- Turn on “Docked magnifier”.
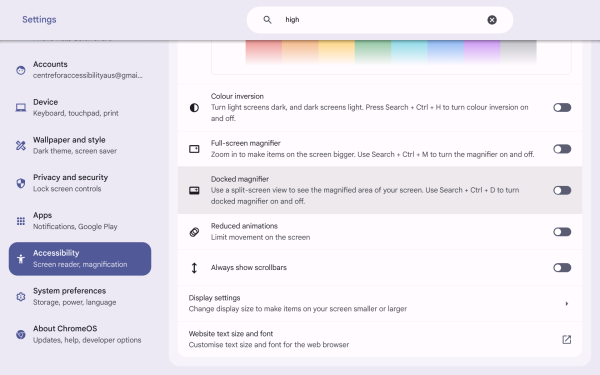
- Users can also adjust the magnification by clicking Docked zoom level.
2.4. Display settings
Display settings allow users to adjust their screen resolution according to their preferences.
- Go to Settings – Accessibility – Display and magnification.
- Click on Display settings.
- Users can then change the Display brightness, Display and text size, or Orientation.

- Users can also turn on the Automatically adjust display brightness to adjust brightness based on your environment and the Night light to make it easier to read in dim light.
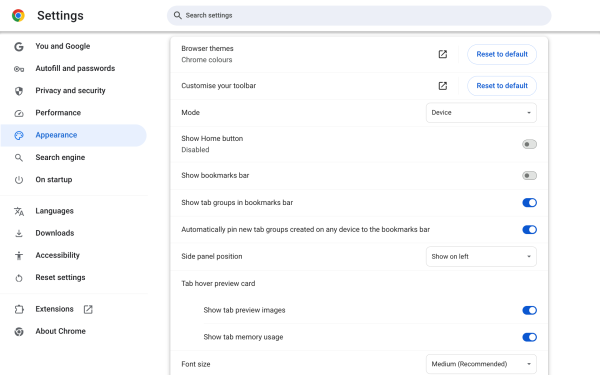
2.5. Website text size and font
This function allows users to customise text settings for the web browser.
- Go to Settings – Accessibility – Display and magnification.
- Click on Website text and font.
- Users can now access settings including:
- Mode: Choose between Light, Dark, and Device.
- Show Home button: Display the home button in the browser tab.
- Show bookmarks bar: Display the bookmark bar in the browser tab.
- Show tab groups in bookmarks bar: Organize your tabs efficiently and view related pages or tabs in one workspace.
- Automatically pin new tab groups created on any device to the bookmarks bar
- Side panel position: Choose between “Show on right” and “Show on left”.
- Font Size: Change the font size.
- Customise fonts: Choose between different font types.
- Page zoom: Adjust the zoom level for the browser.
- Allow split view drag and drop on left or right edge of window: Display 2 websites simultaneously within a single Chrome window.
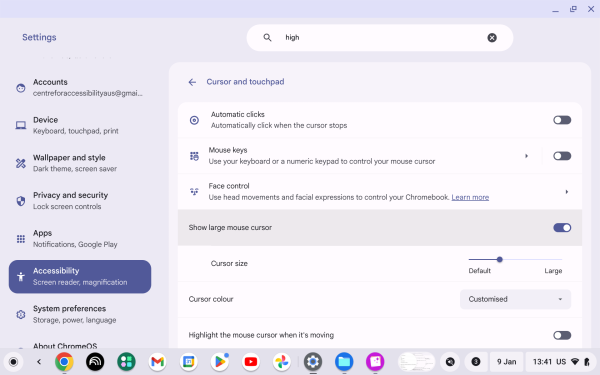
3. Mouse visibility options
3.1. Show large mouse cursor
This feature will magnify the cursor to help people with low vision locate the cursor easier. To activate this user will need to:
- Go to Settings – Accessibility – Cursor and touchpad.
- Turn on the toggle of Show large mouse cursor.
- Now the cursor is magnified already, and users can adjust the size of the cursor magnification by sliding left and right.
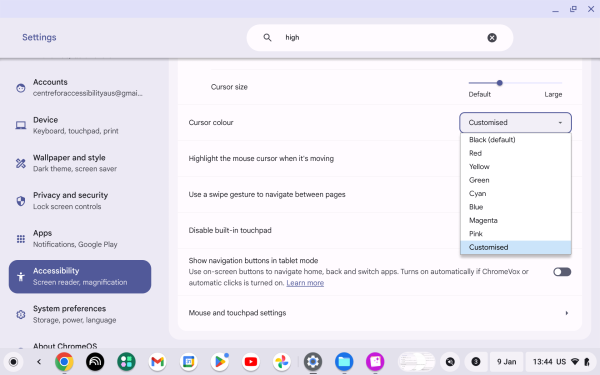
3.2. Cursor Colour
This feature allows users to adjust the colour of the cursor to help them use the device better, especially for people with visual impairments. To activate this user will need to:
- Go to Settings – Accessibility – Cursor and touchpad.
- Click on the drop-down selection and select cursor colour.
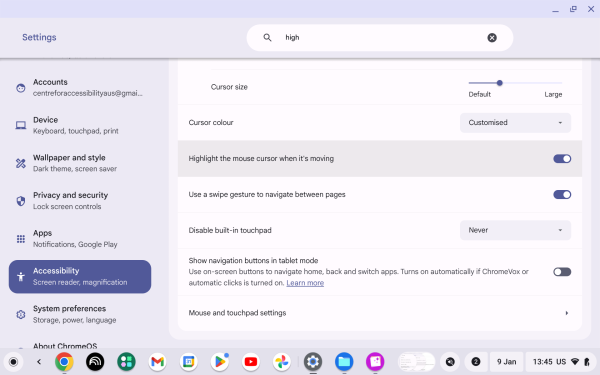
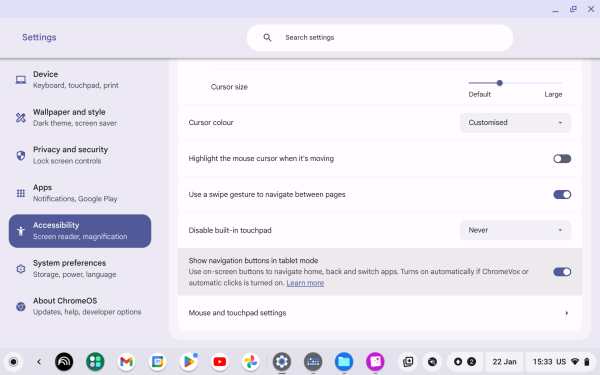
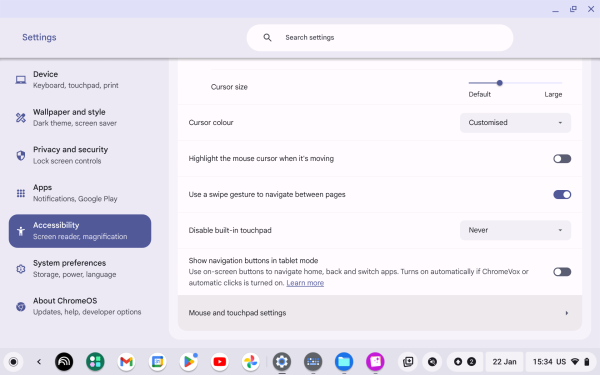
3.3. Highlight the mouse cursor when it’s moving
This feature will highlight the cursor when it’s moving to help users locate the cursor easier, especially for people with visual impairments. To activate this user will need to:
- Go to Settings – Accessibility – Cursor and touchpad.
- Turn on the toggle of Highlight the mouse cursor when it’s moving.
- The cursor is now highlighted by an orange circle when moving.
Hearing-Related
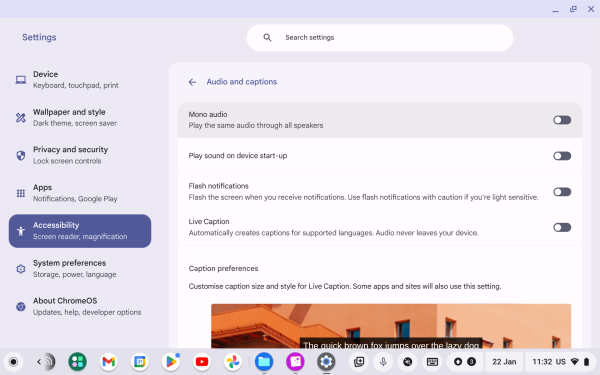
1. Audio and captions
- Go to Setting.
- Go to Accessibility.
- Scroll down to “Audio and captions”.
1.1. Mono audio
This function will make the device play the same audio through all speakers (mono audio). To do this, user will need to:
- Go to Settings – Accessibility – Audio and captions.
- Click on “Mono audio” to toggle the switch.
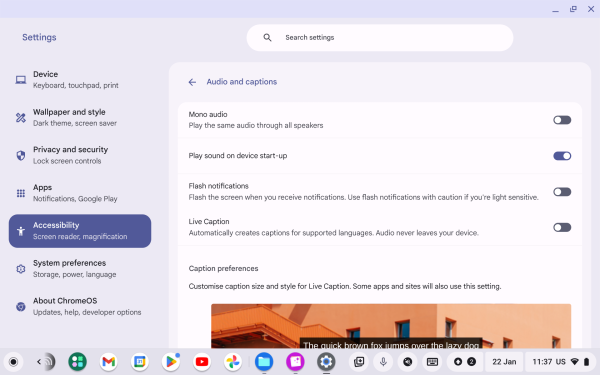
1.2 Play sound on device start-up
This function will play a start-up sound when the device is turned on. To do this, user will need to:
- Go to Settings – Accessibility – Audio and captions.
- Click on Play sound on device start-up to turn the feature on.
1.3. Captions
This function will automatically generate captions when audio/video plays. To do this user will need to:
- Go to Settings – Accessibility – Audio and captions.
- Live Captions: turn on the toggle so the device will automatically create captions for media in Chrome Browser.
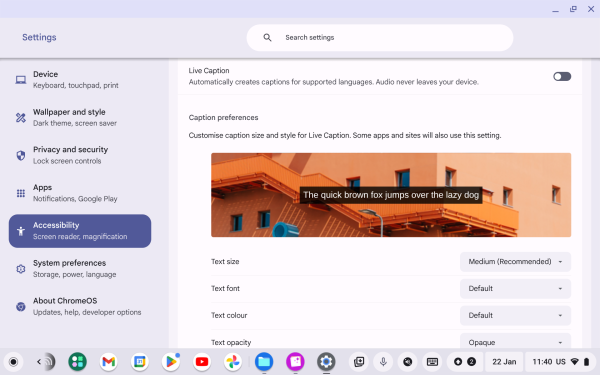
- Caption preferences:
- Text size: Choose the caption text size.
- Text font: Choose the caption text font.
- Text colour: Choose the caption text colour.
- Text opacity: Choose the caption text opacity.
- Text shadow: Choose the caption text-shadow.
- Background colour: Choose the background colour.
- Background opacity: Choose the background opacity.
General and Mobility-Related
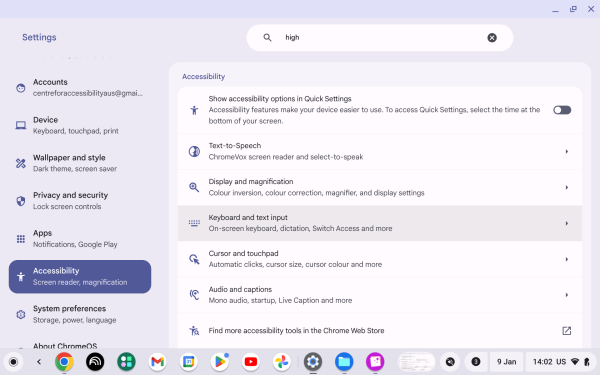
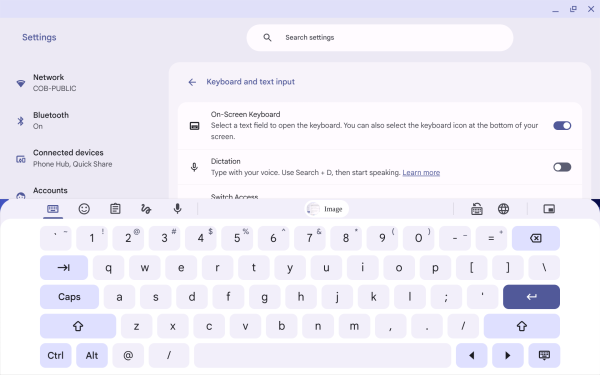
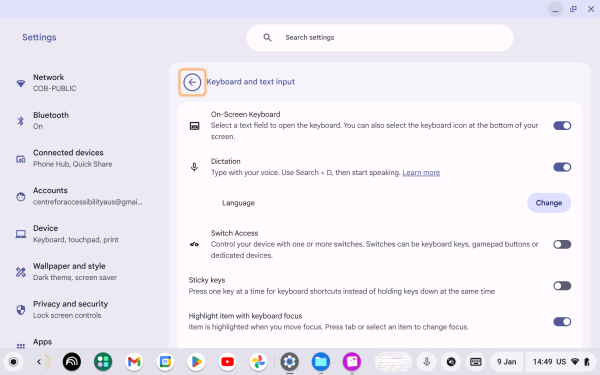
1. Keyboard and text input
- Go to Setting.
- Go to Accessibility.
- Scroll down to “Keyboard and text input”.
1.1. On-screen keyboard
This function will have a virtual keyboard on the screen to enable users to click on keys by using a pointer. To do this users need to:
- Go to Settings – Accessibility – Keyboard and text input.
- Find On-screen keyboard.
- Switch the toggle on.
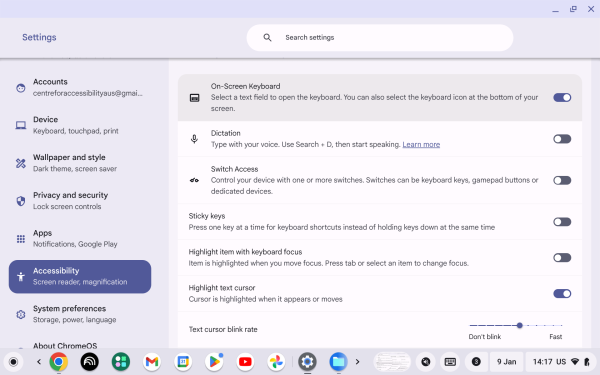
- This virtual keyboard will display on the user’s screen.
1.2. Dictation
This function will let users type with their voice. To enable this users need to:
- Go to Settings – Accessibility – Keyboard and text input.
- Find Dictation.
- Switch the toggle on.
- Tap or select where you want to type.
- Now user can click on the microphone icon at the bottom right corner and start speaking.

1.3. Sticky keys
Sticky keys enable users to press the combination keys respectively instead of pressing multiple keys at the same time. To active this function user needs to:
- Go to Settings – Accessibility – Keyboard and text input.
- Find Sticky keys.
- Switch the toggle on.
- Now users can press keys respectively. For example, press Control and then press C to copy instead of press Control + C at the same time. (This part cannot be screenshotted, but it will show in the upper left corner of your device.)
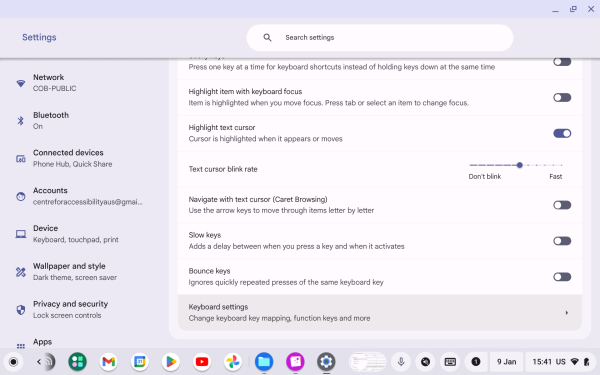
1.4. Highlight item with keyboard focus
This function will highlight the section on which the user’s pointer or keyboard is currently focusing. To enable this users need to:
- Go to Settings – Accessibility – Keyboard and text input.
- Select the toggle for ‘Highlight item with keyboard focus’.
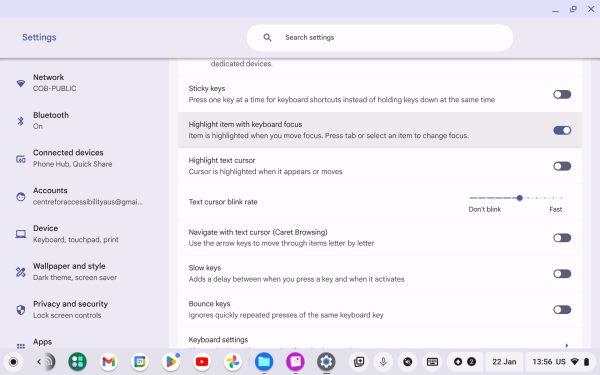
- An orange rectangle will now highlight where the keyboard is focusing on.
1.5. Highlight text cursor
This function will highlight where the text caret is when it is moving to help users to know where the text caret is. To enable this users need to:
- Go to Settings – Accessibility – Keyboard and text input.
- Find “Highlight text cursor”.
- Switch the toggle on.
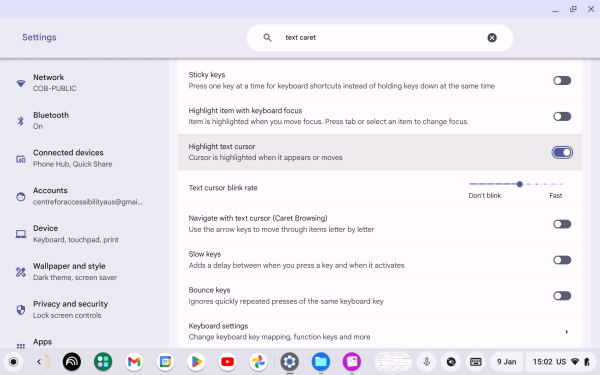
- Now the device will highlight the text caret by a purple circle.
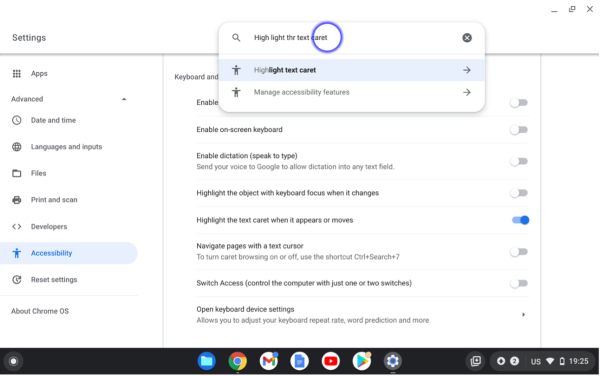
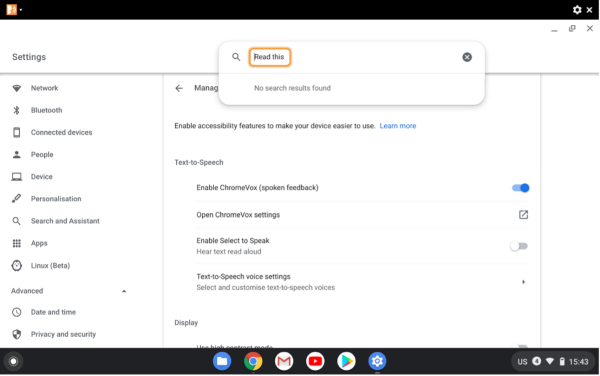
1.6. Navigate with text cursor (Caret Browsing)
To enable this users need to:
- Go to Settings – Accessibility – Keyboard and text input.
- Find Navigate with text cursor.
- Switch the toggle on.
![]()
1.7. Switch Access
Control your device with one or more switches. Switches can be keyboard keys, gamepad buttons, or dedicated devices.
- Go to Settings – Accessibility – Keyboard and text input.
- Find Switch Access.
- Switch the toggle on.
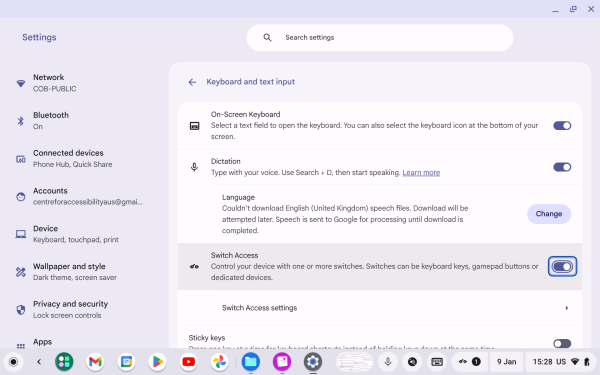
- Users can also click on “Switch Access settings” to make changes to their preferences.
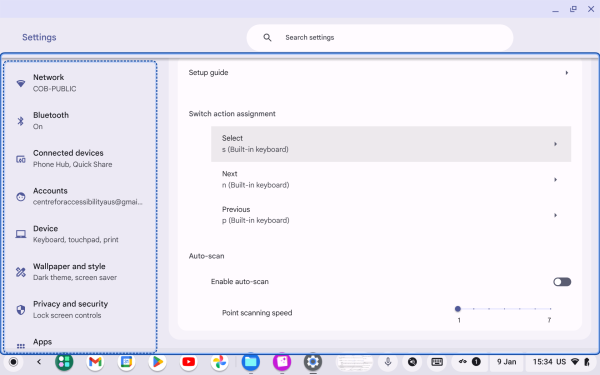
- Switch action assignment:
- Select: Assign a switch to perform action select.
- Next: Assign a switch to perform the next action.
- Previous: Assign a switch to perform the previous action.
- Auto-scan:
- Enable auto-scan: Turn this on to enable the device to do auto scan through the screen.
- Point scanning speed: Adjust the point scanning speed.
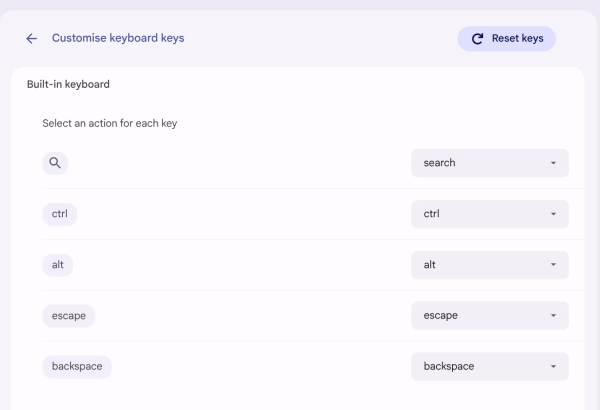
1.8. Keyboard settings
This allows users to adjust their keyboard settings. To do this user will need to:
- Go to Settings – Accessibility – Keyboard and text input.
- Find and click on Keyboard settings.
- Users can now access settings including:
- Treat top-row keys as function keys: Hold the Search key to switch the behaviour of the top-row keys.
- Customise keyboard keys: Users can set the key to do Search, Ctrl, Alt, Escape, and Backspace.
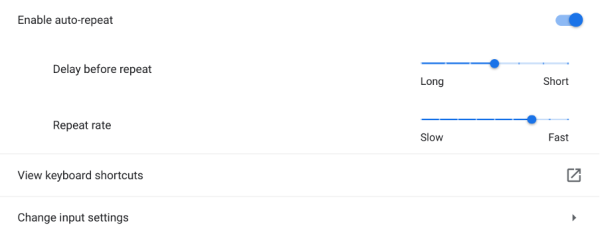
- Show accent marks and special characters: Press and hold keyboard keys to see accent marks and special characters. This turns off the repeat key press for alphabet keys. Only available for English (US).
- Press and hold to automatically repeat the key: If you hold down a key, the key’s character will be repeated.
- Users can also change the “Delay before repeat” and “Repeat rate”.
- Users can also change the “Delay before repeat” and “Repeat rate”.
- View keyboard shortcuts: Display all keyboard shortcuts, and shortcut types including:
- General
- Device
- Browser
- Text
- Windows and desks
- Accessibility
- Input settings: Lets users to choose which languages to install on the device.
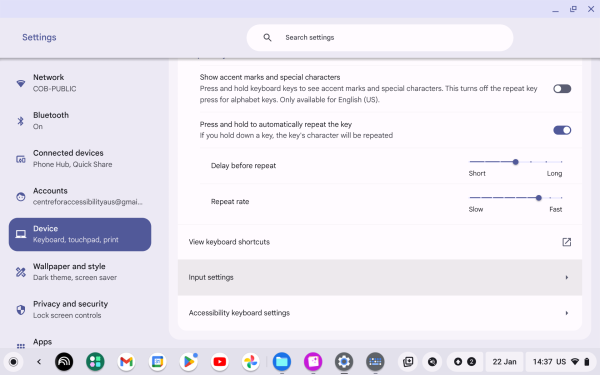

- Accessibility keyboard settings
2. Cursor and touchpad
- Go to Setting.
- Go to Accessibility.
- Scroll down to “Cursor and touchpad”.
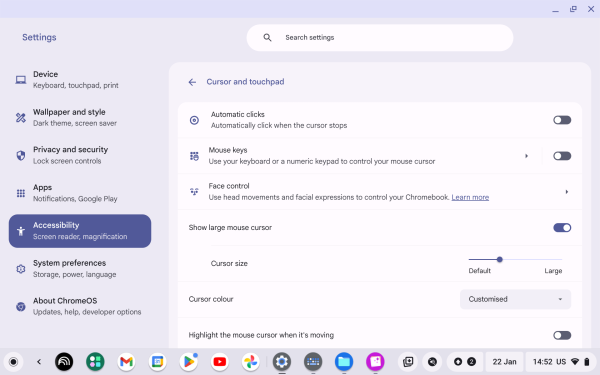
2.1. Automatic clicks
This function enables the cursor automatically to click after stopped moving. To activate this user will need to:
- Go to Settings – Accessibility – Cursor and touchpad.
- Turn on the toggle of Automatic clicks.
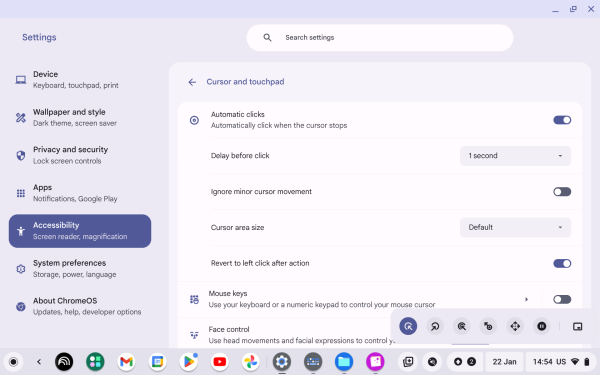
- Now the system will automatically click every time the user stops moving their cursor. Also, users can change settings according to their preferences.
- Delay before click: The click wait time of the device after the cursor stops moving.
- Ignore minor cursor movements: Prevents small, unintentional pointer movements from cancelling an automatic click on a Chromebook.
- Cursor area size: Sets how much the cursor can move before an automatic click is cancelled.
- Revert to left-click after action: Automatically return to the left button click after other operations, such as right-click or double-click.
2.2. Show navigation buttons in tablet mode
Navigate home or back and switch apps with buttons in table mode. Turned on when ChromeVox or automatic clicks is enabled. To enable this function:
- Go to Settings – Accessibility – Cursor and touchpad.
- Turn on the toggle of the “Show navigation buttons in tablet mode”.
- The navigation button will now appear at the bottom of the screen, and the user can interact with it.
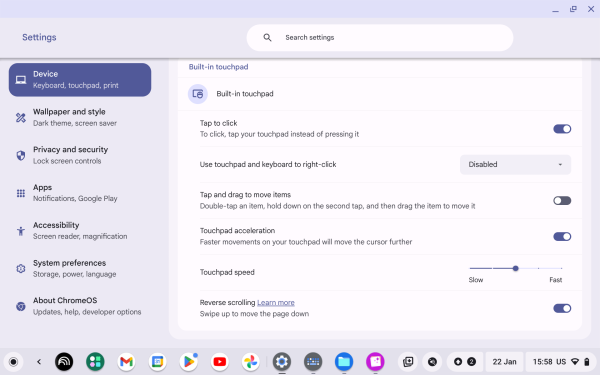
2.3. Mouse and touchpad settings
This feature allows users to make changes to the setting according to their preferences. To activate this user will need to:
- Go to Settings – Accessibility – Cursor and touchpad.
- Click on Mouse and touchpad settings.
- Functions include:
- Tap-to-click: Perform a click by lightly tapping your touchpad instead of clicking.
- Use touchpad and keyboard to right-click: Choose “Disabled,” “search + click,” or “alt + click.”
- Tap and drag to move items: Enable double-tapping and then start dragging.
- Touchpad acceleration: When enabled, the distance your pointer moves across the screen will depend on how quickly you move your mouse.
- Touchpad speed: Adjust touchpad speed by using the slider.
- Reverse scrolling: When enabled, swiping up moves the page down.
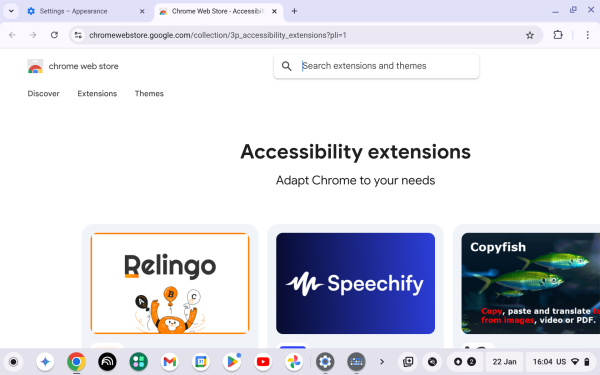
3. Find more accessibility tools in the Chrome Web Store
This function allows the user to purchase/download additional features from Chromebook online shop and install them on their device. To do this user will need to:
- Go to Settings – Accessibility – Find more accessibility tools in the Chrome Web Store.
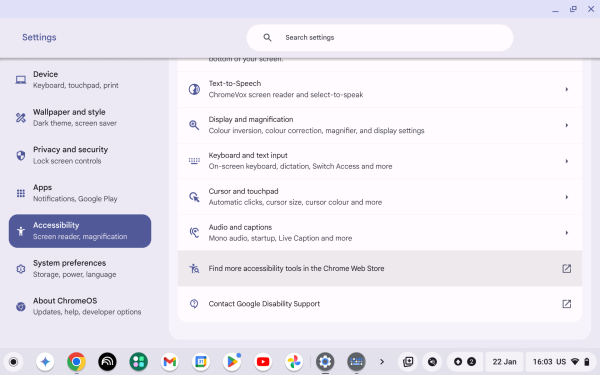
- Search and download the features you want to add to your device.
Keyboard Shortcuts
The search key is located at the very left side of the keyboard with a search symbol. Ctrl key is located at the bottom left corner of the keyboard.
A lot of keyboard shortcuts can be customised from Settings > Accessibility > Keyboard and text input > Keyboard settings > View keyboard shortcuts.
Text-to-Speech
- Enable and disable ChromeVox: Ctrl + Alt + Z
- Navigate with ChromeVox: Search + Left arrow or Right arrow
- Select (activate) with ChromeVox: Search + Space
- Read highlighted text with Select to Speak: Search + S
Additional Resources
To learn more about the accessibility features found on Chromebook, visit the official website through the following link: https://support.google.com/chromebook/answer/177893?hl=en